Configure Runbook Settings
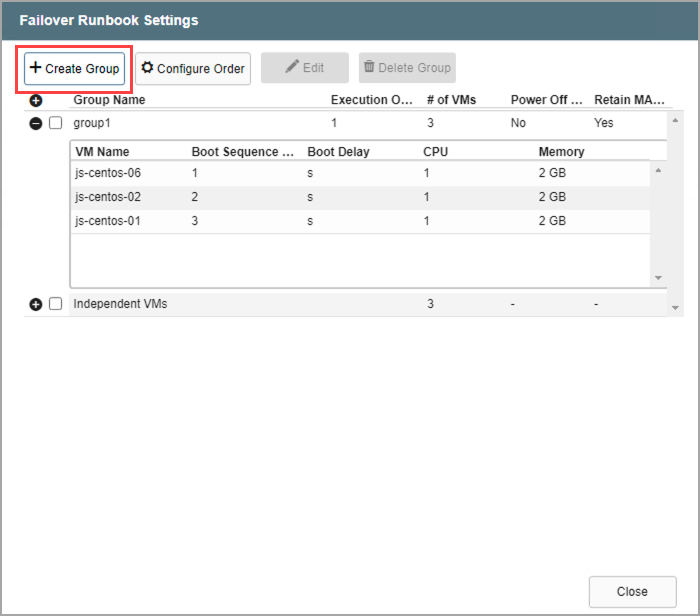
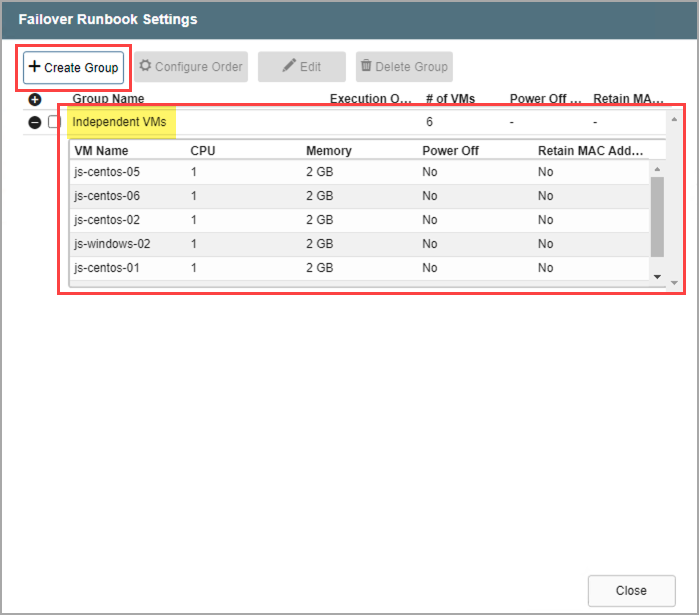
A list of all protected VMs will initially be displayed under the section labeled Independent VMs. After runbook rules have been applied, VMs will be moved from the Independent VMs section and appear under the group to which they are associated.
- Click the Create Group button to begin creating a new runbook group.
- Follow the guided steps of the pop-up dialog window.
1. General
- Enter a name for the runbook group.
- If needed, in the lower portion of the screen apply custom pre- and post- scripts to automatically run prior to and following operation of the runbook group.
- Click the Next button.
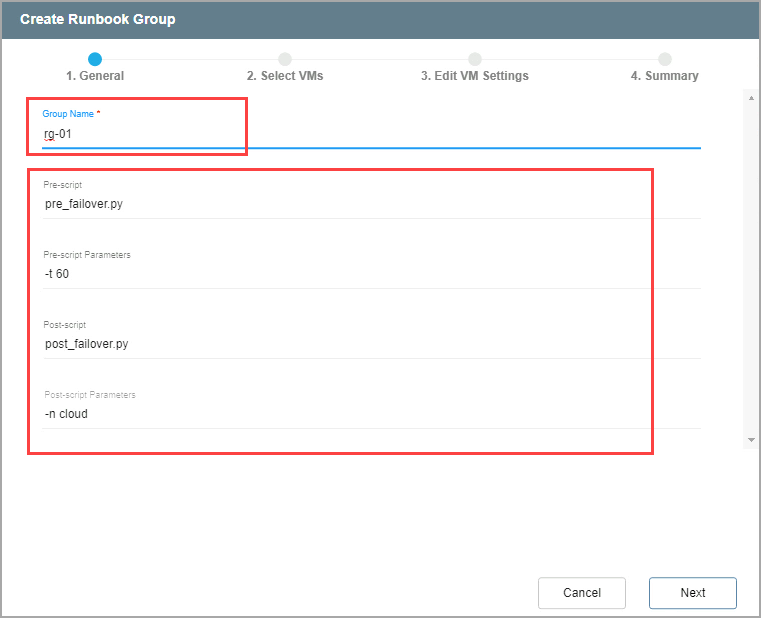
Note: Runbook scripts must reside on the management server.
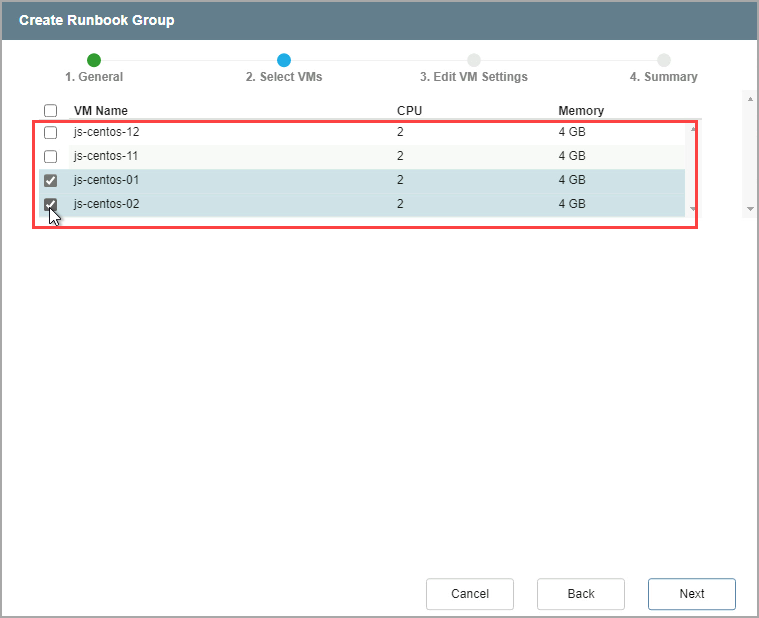
2. Select VMs
- Select individual VMs from the list to add to the runbook group.
- Click the Next button.
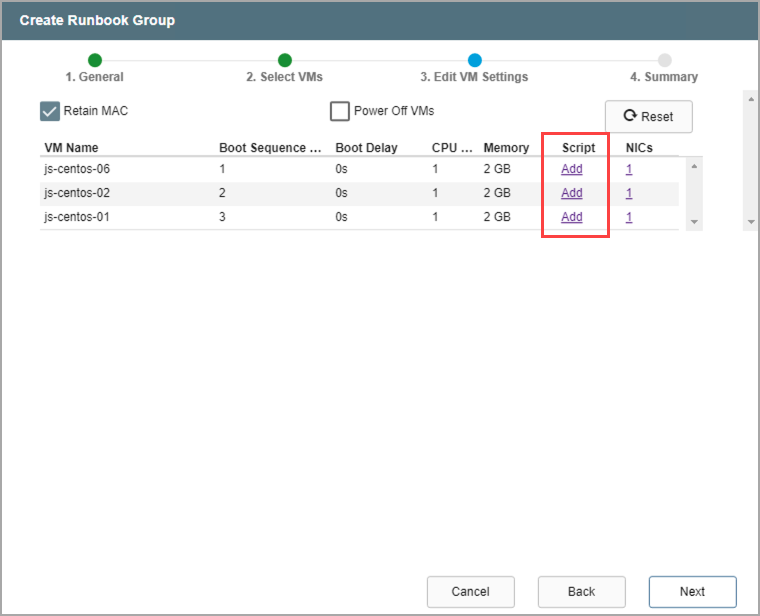
3. Edit VM Settings
- Specify parameters for recovering the VMs, including: boot sequence, boot delay (specified in seconds), # of CPUs, and amount of memory to allocate.
- Change the boot sequence of a VM by dragging it to a new position on the list.
- Options are also provided to “Retain MAC” and “Power Off VMs.”
- Retain MAC preserves the existing MAC address values for each of the protected VM's virtual NICs so they will retain their "original" MAC address when they are restored.
- These settings will automatically be applied to each VM of the group when its runbook operation is performed.

- A post- script can be applied to individual VMs of the group that will run immediately after each VM is processed.
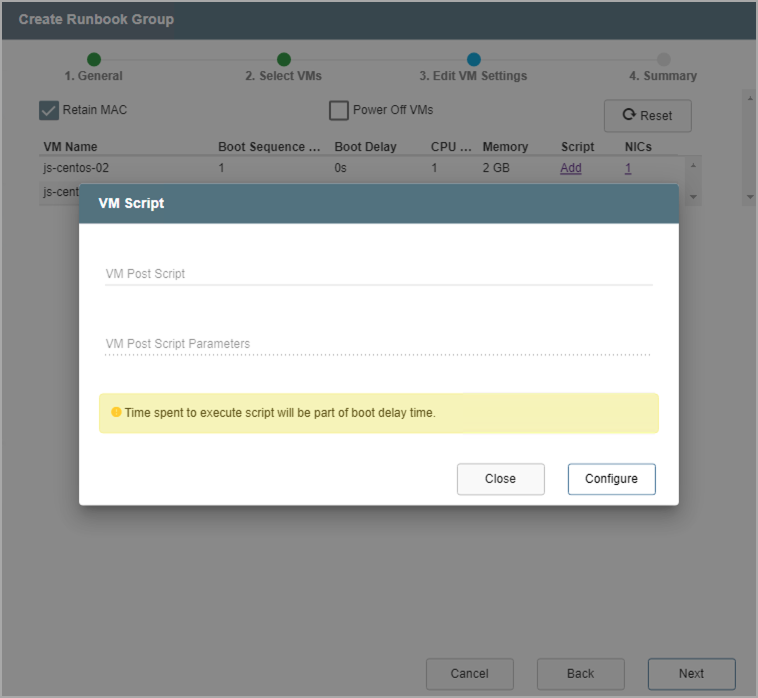
- Click the Add link under the Script column for a VM to apply a script.
- Runbook scripts must reside on the Management Server.
- Runbook scripts are typically written in Python.
- Specify the location of the script and any necessary parameters.
- Click the Configure button to save the script settings for the VM.
- Static IP addresses can be manually configured for individual VMs of the group.
- Click a numbered link under the NICs column for a VM to manually configure its IP address settings.
- The number indicates the number of NICs currently used by the VM.
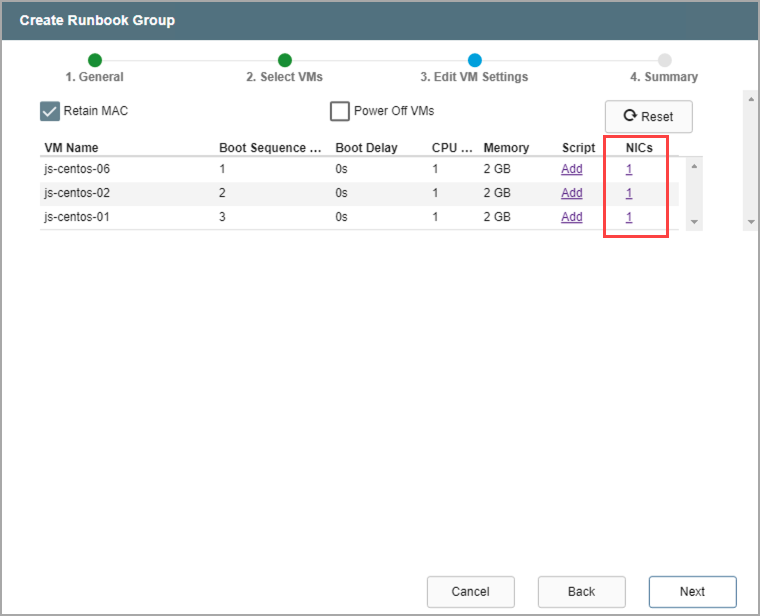
- Specify IP address details for the NIC.
- Click the Configure button to save the NIC settings for the VM.

4. Summary
- Review all entered settings on the Summary step.
- Use the Back button to modify any settings that need to be changed.
- If the settings are correct, click the Create button.
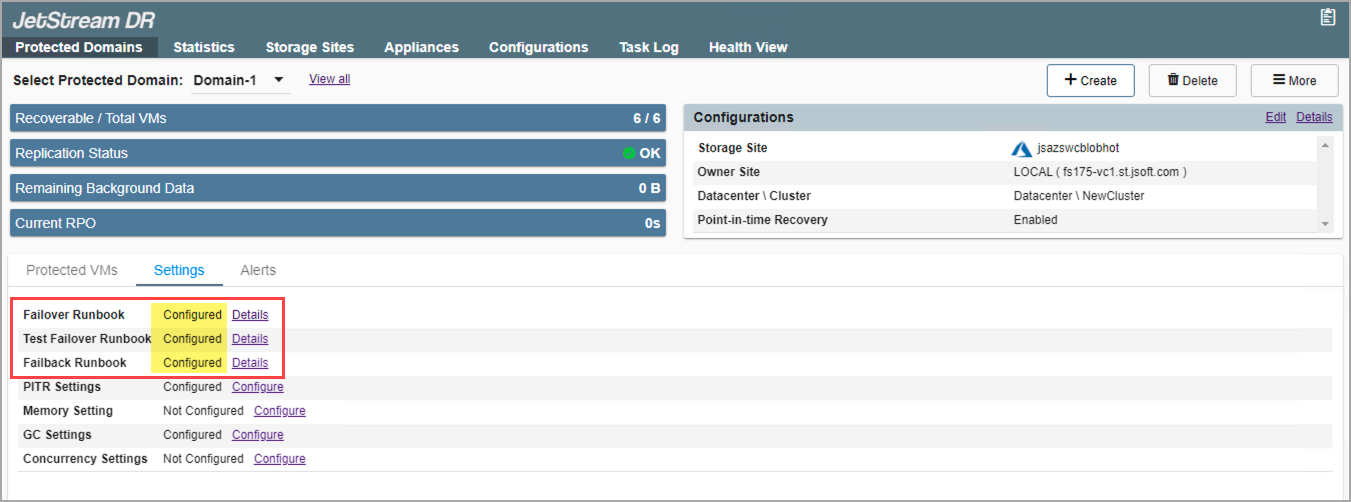
- The runbook group will be created.

- The status of both failover and failback runbooks will now be “Configured.”
- Failover and failback runbooks are created in pairs using the same initial group of VMs and settings.
- If necessary, the settings of either runbook can be individually customized by clicking its respective Details link and making changes.
Notes:
1) Failover and failback runbooks are always created in matched pairs, but their settings can be individually customized.
2) Failback runbook settings can be customized while failover is running.
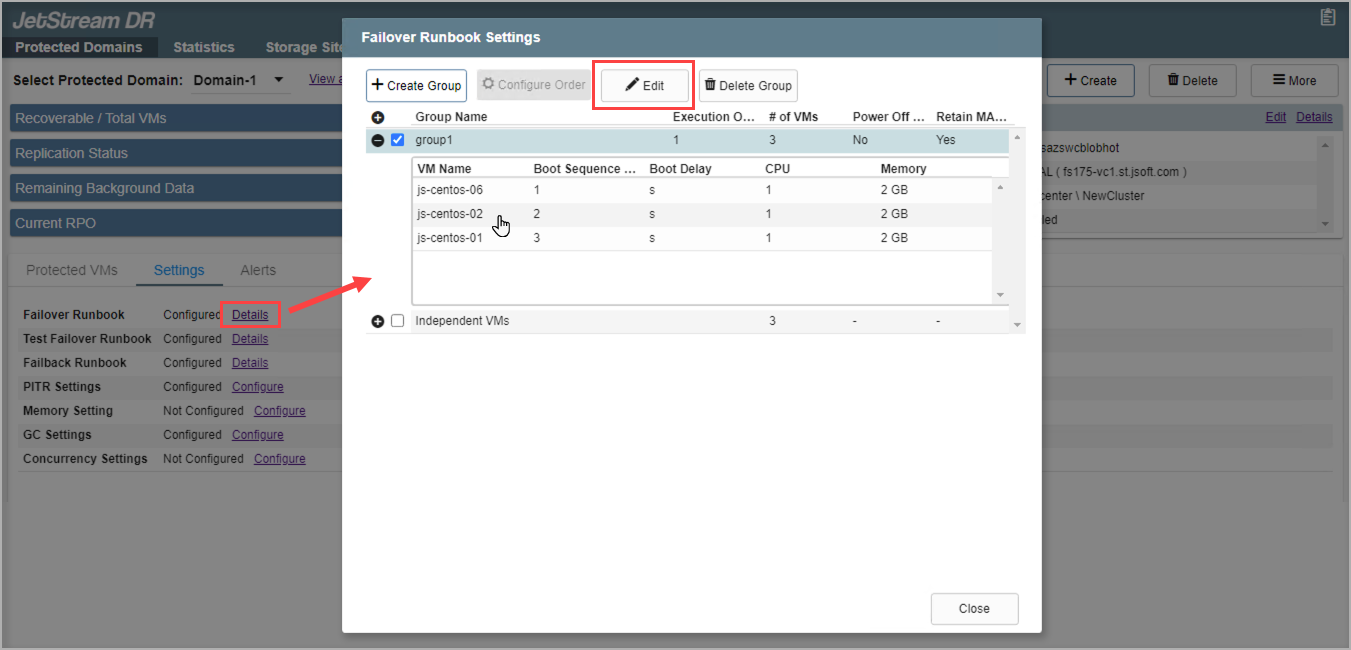
- Clicking the Details link of a runbook from the Protected Domains tab shows details of the runbooks and independent VMs in the protected domain.
- Select a runbook group from the list and click the Edit button to modify its settings.
Note: The boot sequence of VMs will always be the same for both runbooks of the pair (failover and failback). Changing one automatically changes the other; they cannot be made different from one another.
- Additional runbook groups can be created by clicking the Create Group button.