Create a Protected Domain
The following steps describe how to set up a protected domain.
- Go to the Protected Domains tab and click the Create Protected Domain button.
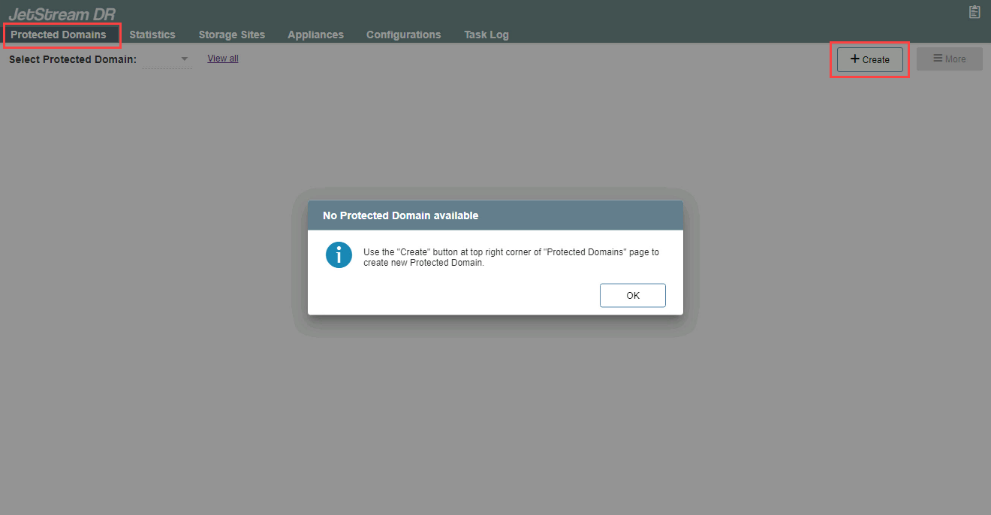
Note: If no protected domains yet exist, a pop-up message will be displayed.
- A pop-up dialog window will appear to guide you through a multi-step deployment process.
1. General
- Enter a name for the protected domain.
- Select a Storage Site from the drop-down menu.
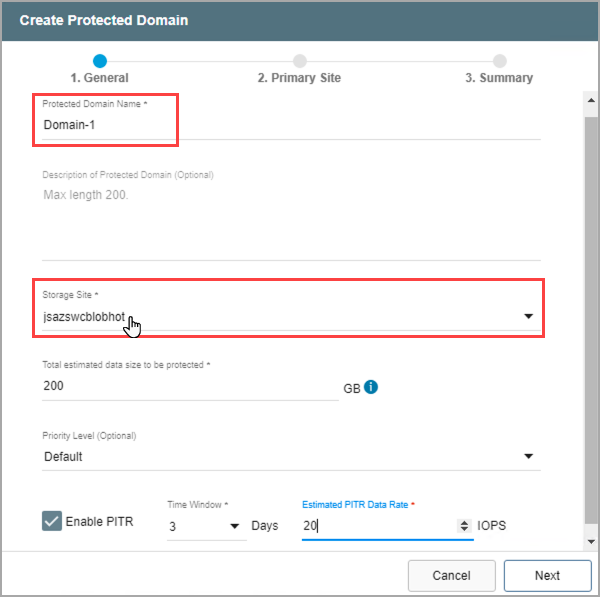
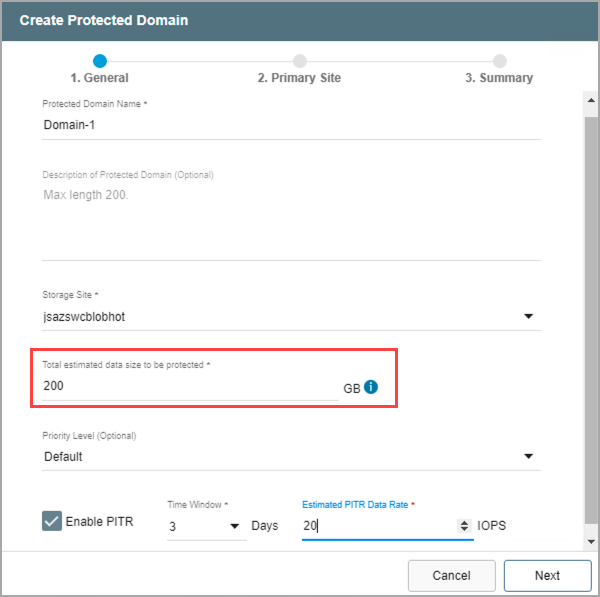
- Specify a value for “Total estimated data size to be protected.” This value reserves an initial amount of space for storing metadata and data of the protected VMs. It can be adjusted to optimize system performance.
- The minimum value is 200GB.
- A good starting value is the total amount of disk space consumed by all protected VMs in the cluster.
- (Optional) Set a priority level for the protected domain by selecting a value from the drop-down menu.
- Priority is a numeric value used to identify and sequence operations of protected domains. Priority values from 1 to 5 can be assigned, with lower numbers having higher priority.
- For failover/failback operations, the priority level number is used to identify which protected domains get failed over (or failed back) and in what sequence.
For example, the Continuous Failover function fails over protected domains in batches. By assigning priority levels to protected domains, the administrator could specify domains assigned priority 1 get failed over together first, followed by domains assigned priority 2, then 3 and so on.
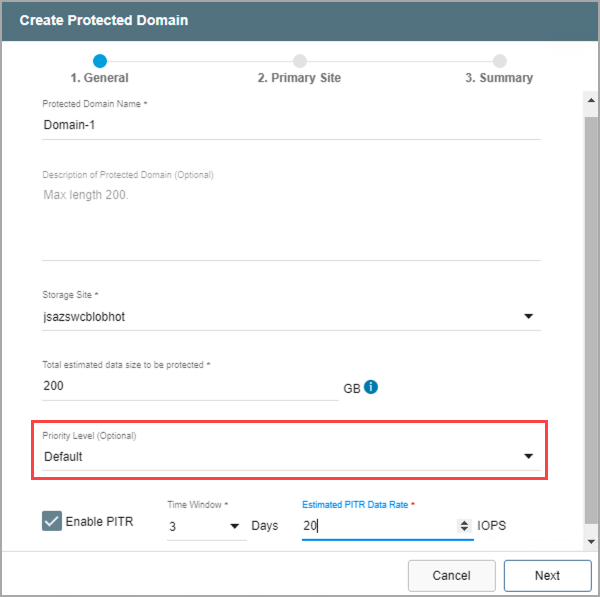
Note: Although the priority level can be specified in the UI during creation of the protected domain, it is specifically used together with the Capacity Planning Tool (CPT) script for the purpose of automating failover and failback operations. It is recommended to leave the priority level option in its default state unless necessary to explicitly change it.
- Point-in-Time Recovery (PITR) allows VMs and data to be recovered to a particular time in the past (last "known good" point) specified by the user. Select the Enable PITR option if point-in-time recovery is desired. Learn more about configuring and using Point-in-Time Recovery.
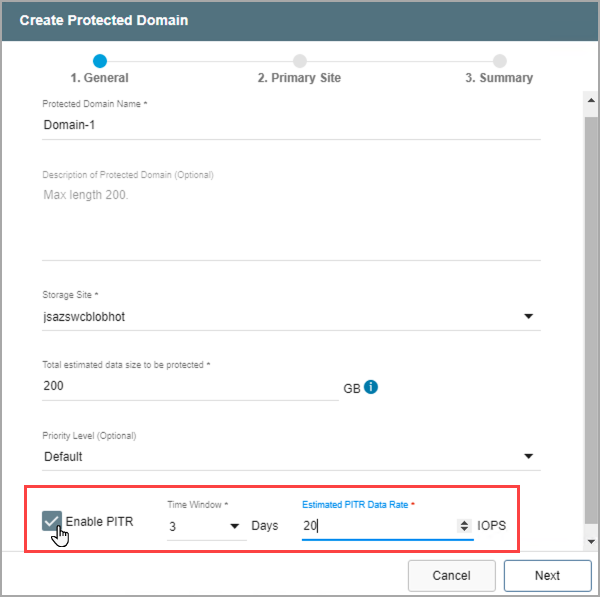
- Click the Next button when done.
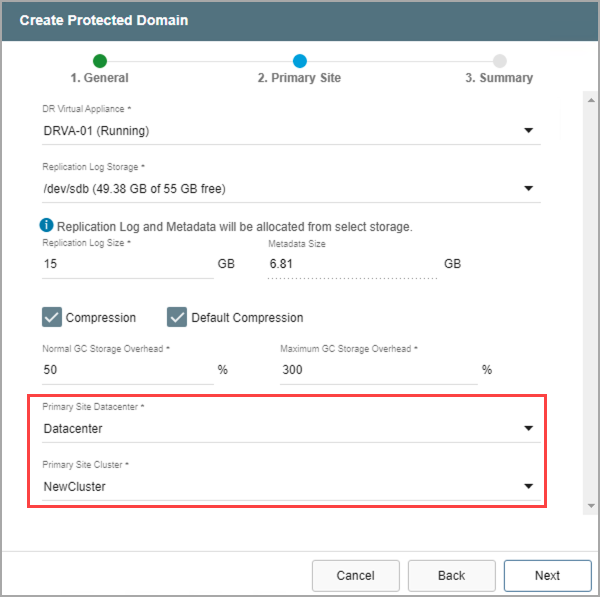
2. Primary Site
- Select a DRVA from the drop-down menu to use for the protected domain.
- Any DRVA that was previously configured under the Appliances tab can be selected.

- Select a resource for Replication Log Storage from the drop-down menu.
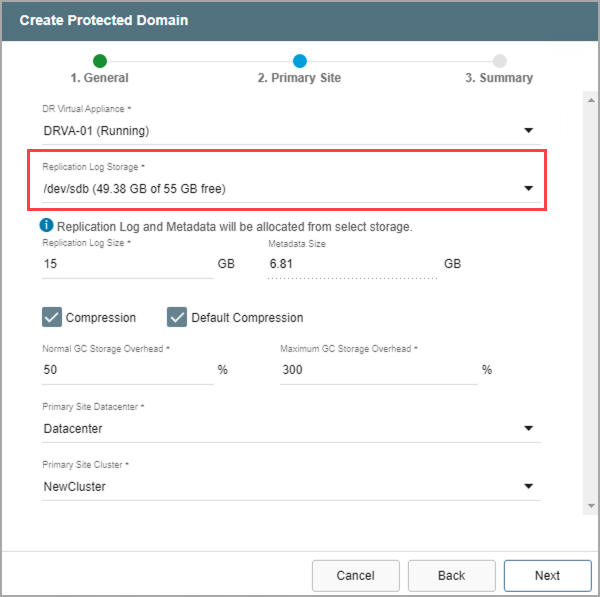
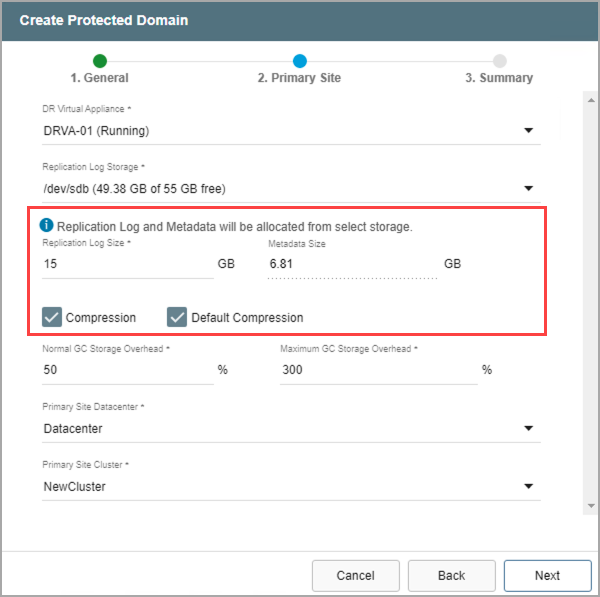
- Review the Replication Log and Metadata sizes.
- Default values will be applied by the system but can be changed if necessary.
- The size of the replication log cannot exceed the total replication log volume size minus the metadata size.
- The minimum allowable size of a replication log is 15GB.
- If necessary, adjust the compression option.
- When the Default Compression option is de-selected, a menu will appear allowing a specific compression level to be manually specified.
- Unless specifically advised, it is not advisable to change from the default compression settings.
- Enter values to specify the amount of GC Storage Overhead to be reserved for normal garbage collection and a maximum amount that should never be exceeded.
- The values are represented as percentages of the amount of storage reserved for protected data (described above).
- The values can be changed as necessary to optimize system performance.
- The default maximum amount is 300% (i.e., three times the amount of storage reserved for protected data.)
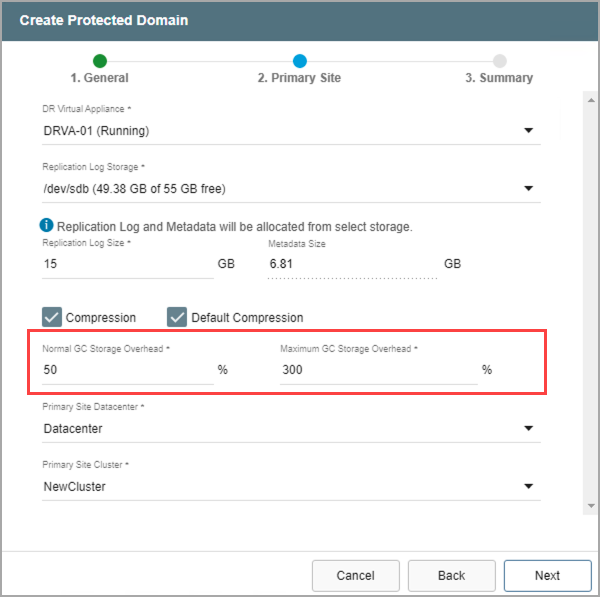
- Identify the primary site datacenter and the cluster containing the VMs to be protected.
- Only clusters that have been configured in the previous steps will appear in the selection drop-down menu.
- Click the Next button when done.
3. Summary
- Review all entered settings on the Summary step.
- Use the Back button to modify any settings that need to be changed.
- If the settings are correct, click the Create button.

- The protected domain will be created. It is now possible to add VMs to the protected domain and start protection.
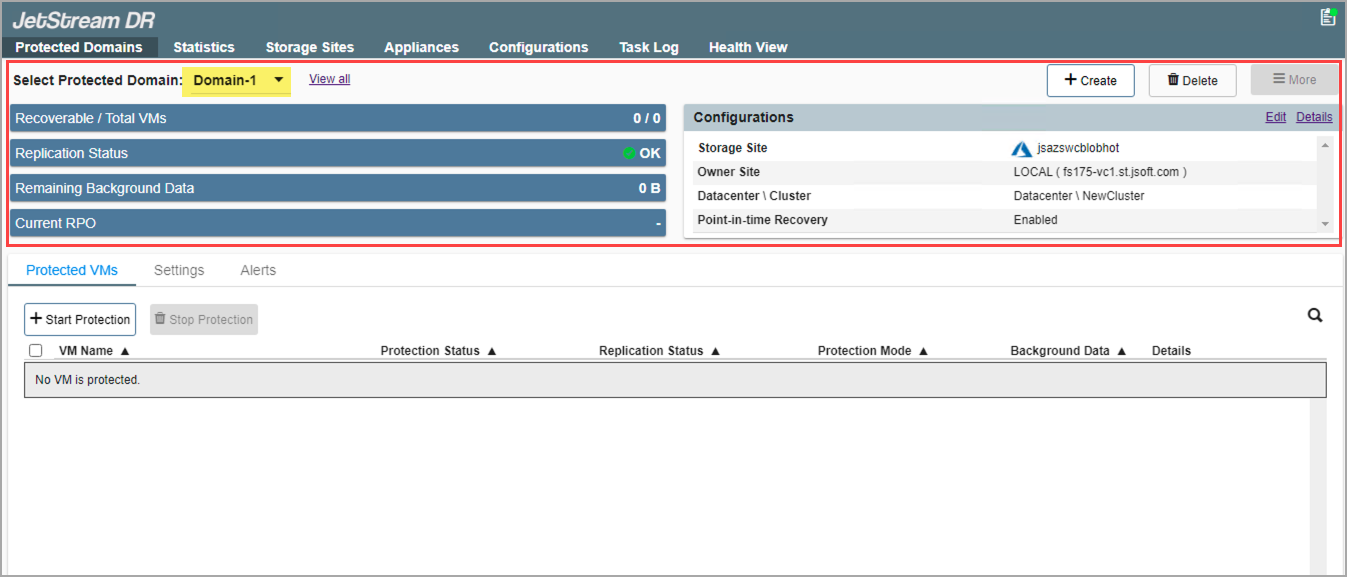
- Repeat the above steps to create as many protected domains as needed.
- Multiple domains can share the same DRVA, but each domain must have its own replication log.
- As previously noted, replication log volumes from multiple DRVAs can share a common datastore or ISCSI LUN with space management handled automatically by JetStream DR software.