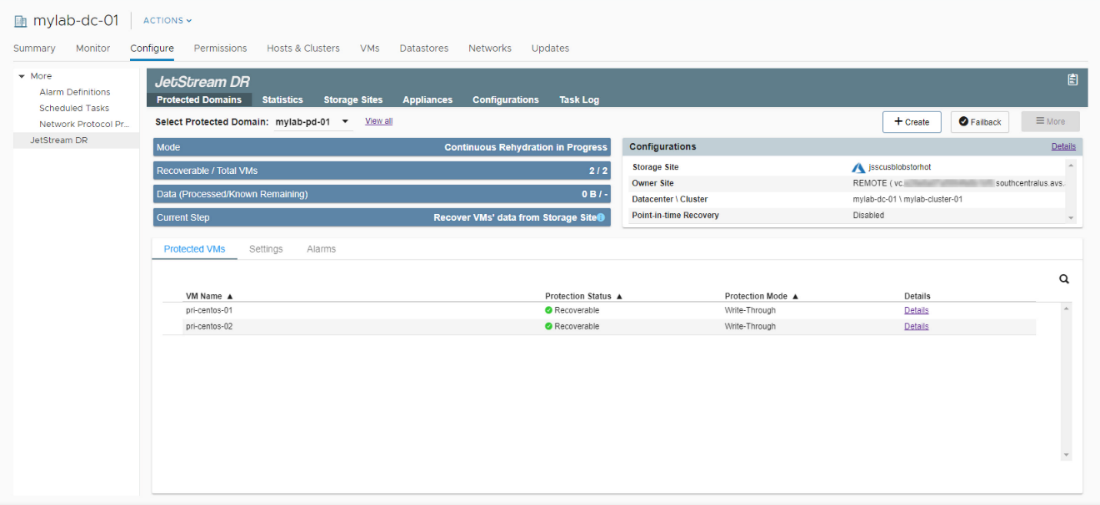
Resume Continuous Rehydration
If the Resume Continuous Rehydration on Remote Site option was not configured for the initial failover operation, it can be manually started at the recovery site after VMs have been failed over.
Note: Continuous rehydration of the recovery site is typically configured to protect data and VMs operated at the recovery site back to the original protected site. It is in essence operating as “continuous failback” to the protected site.
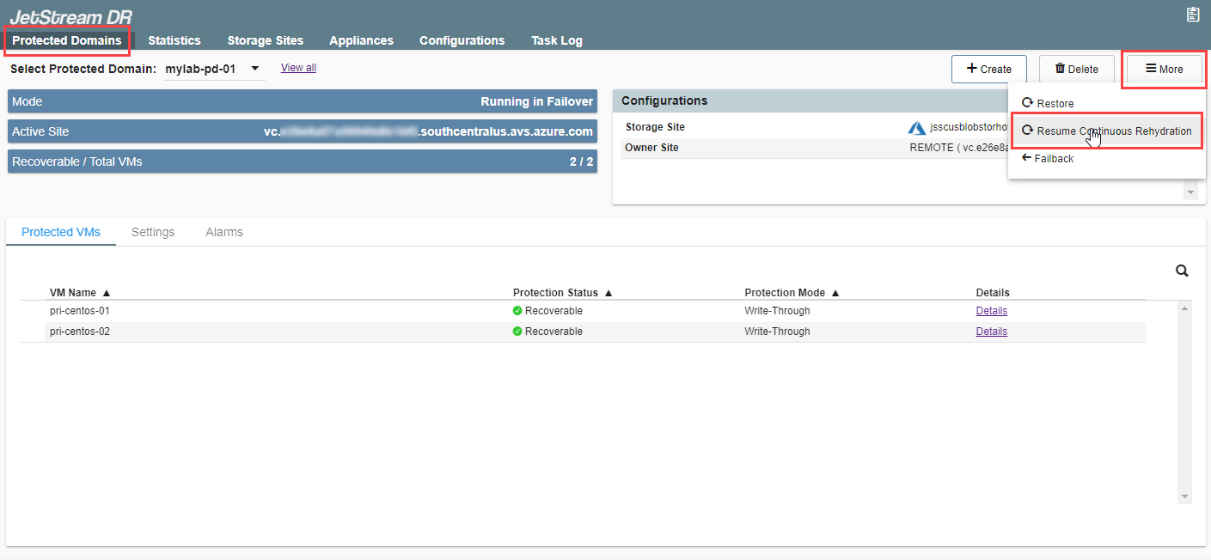
- After VMs have been failed over, go to the Protected Domains tab then click More > Resume Continuous Rehydration.
- Follow the guided steps of the dialog window to resume continuous rehydration (failback) of the recovery site.
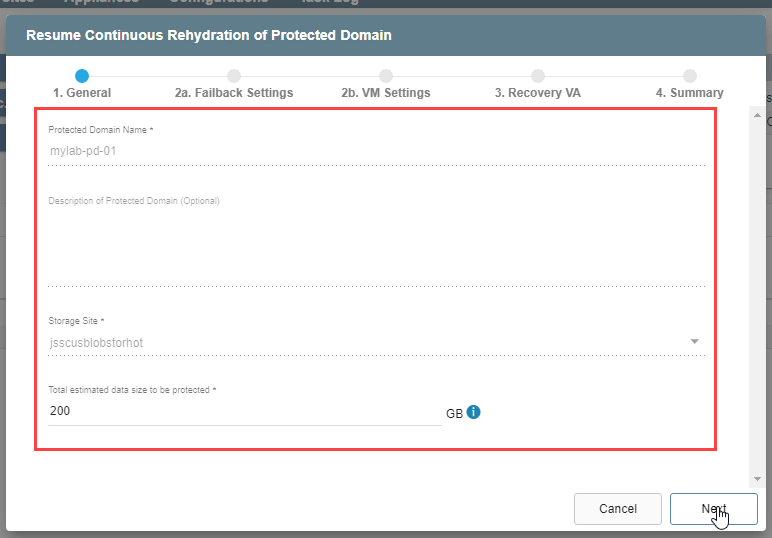
1. General
- Review the information about the protected domain.
- If the information is correct, click the Next button.
2(a). Failback Settings
- Make selections from the drop-down menus to specify the recovery site datacenter, cluster, resource pool (if any), and datastore.
- Click the Next button.

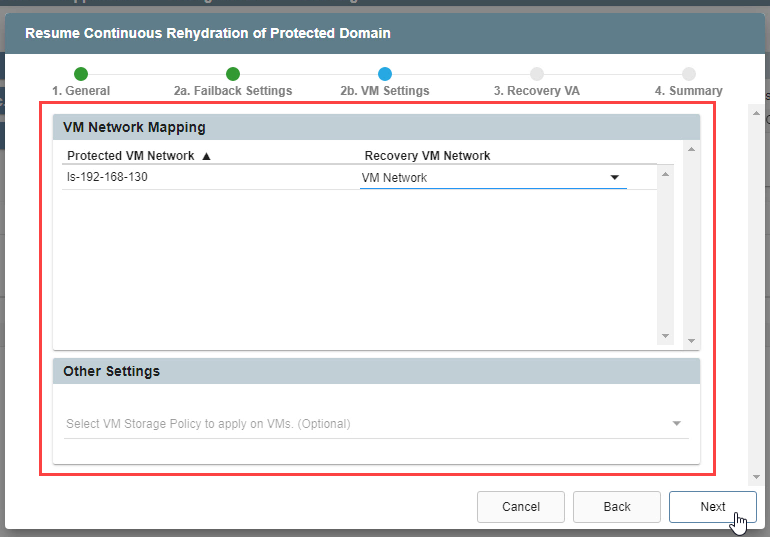
2(b). VM Settings
- Map a Recovery VM Network to the Protected VM Network.
- Specify a storage policy for VMs (optional).
- Click the Next button.
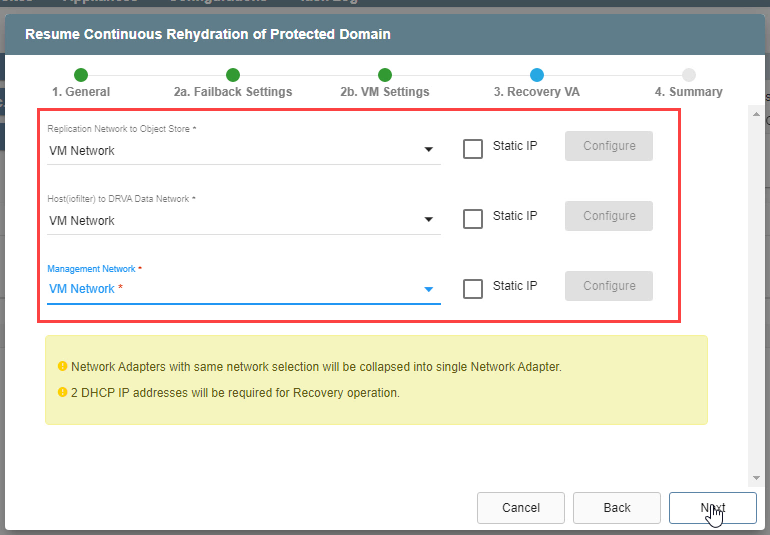
3. Recovery VA
- Specify network settings for the Replication Network to Object Store, Host (iofilter)/RocVA to DRVA Network, and Management Network.
- DHCP will be used by default.
- Static IP addresses can be manually assigned by selecting a network's Static IP checkbox then clicking its Configure button.
- A mix of static and dynamic IP addresses can be used.
- Click the Next button.
Note: Learn more about RocVA.
4. Summary
- Review all entered settings on the Summary step.
- Use the Back button to modify any settings that need to be changed.
- Click the Resume Continuous Rehydration button.
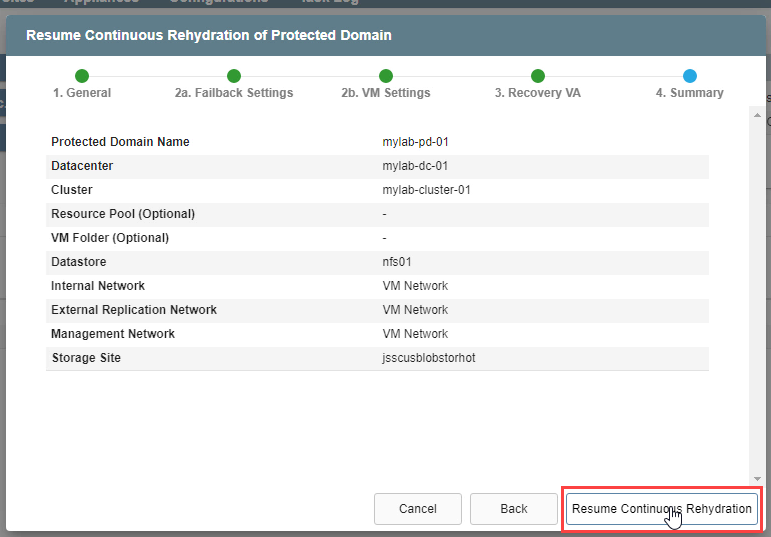
- Continuous rehydration at the protected site now begins to protect VMs of the recovery site.