Deploy a DRVA
A DRVA can be deployed following these steps:
Note: If routing using multiple networks is desired, the networks must be configured before deploying the DRVA.
Appliances created before IP routing has been established will not have the option to use IP routing.
- On the Appliances screen click the Deploy New DRVA button.
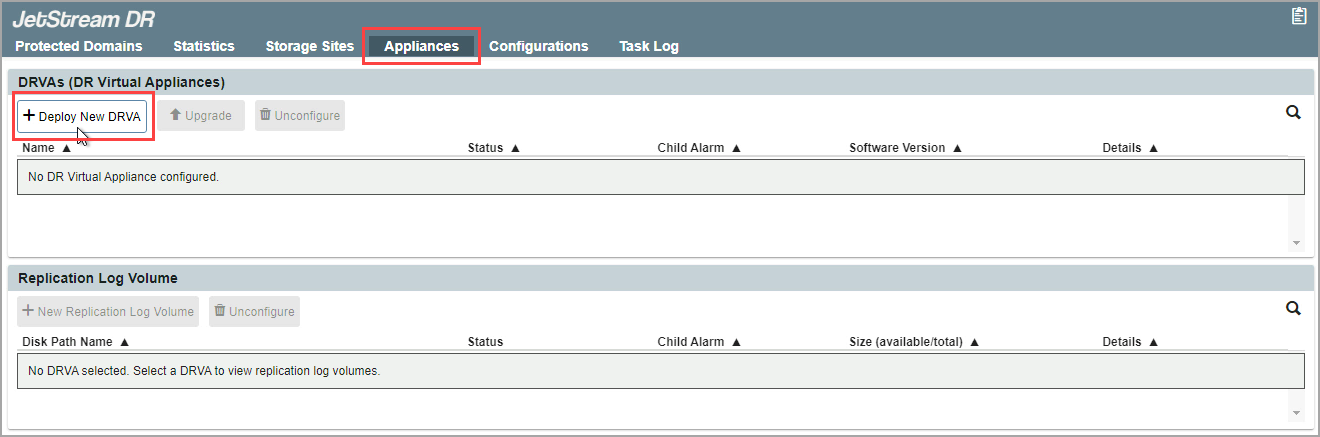
- A pop-up dialog window will appear to guide you through a multi-step deployment process.
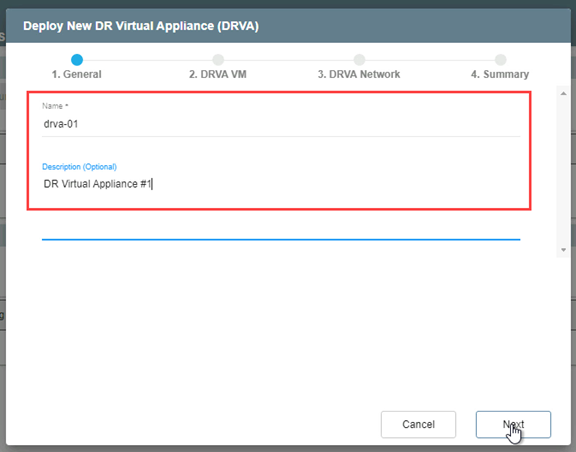
Step: General
- Provide a name and description for the DRVA.
- Click the Next button.
Step: DRVA VM
- On the upper portion of the screen, make selections from the drop-down menus to specify details about the location for the DRVA including the specific datastore on which it will reside.
- Upon deployment, the MSA will automatically upload the file drva.iso to a folder in the specified datastore.
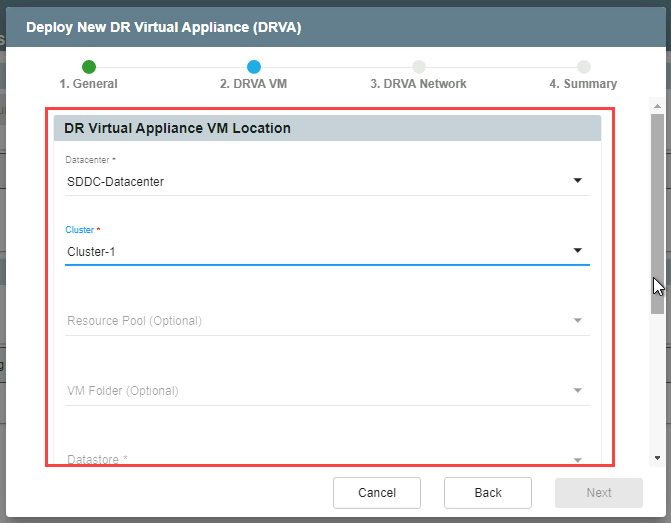
Figure 50: Specify a VM for the DRVA.
- On the lower portion of the screen, specify parameters for the DRVA.
- Recommended default parameters are: 4 CPU cores and 8GB memory.
- If necessary, these parameters can be changed later.
- Click the Next button.

Figure 51: Configure DRVA VM settings.
Step: DRVA Network
- Specify a network to use for the DRVA from the Management Network menu.
- If a single network will be used for the DRVA, leave the option "Apply same network settings to all" selected.
- If different networks will be used, de-select the option and specify the various desired networks from the menus below.
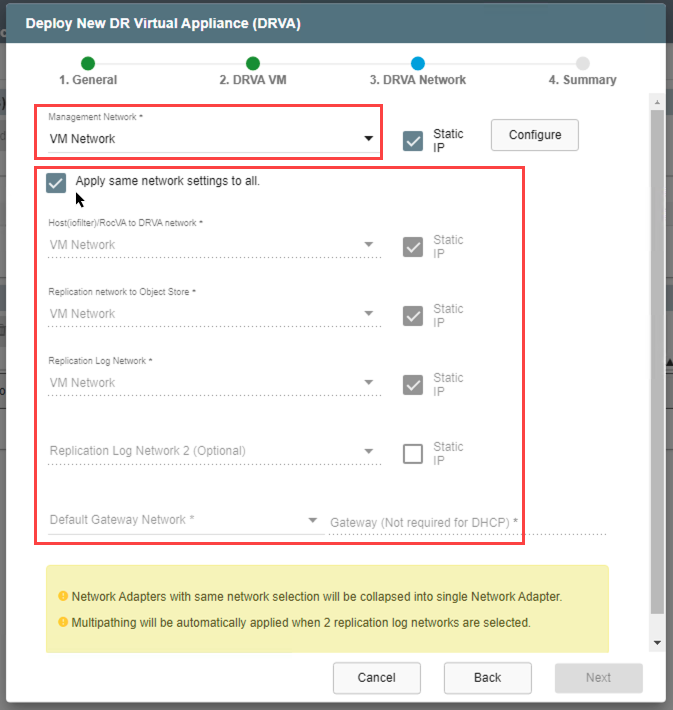
Figure 52: Configure the DRVA network.
- To manually configure a static IP address, select the Static IP checkbox then click the Configure button.
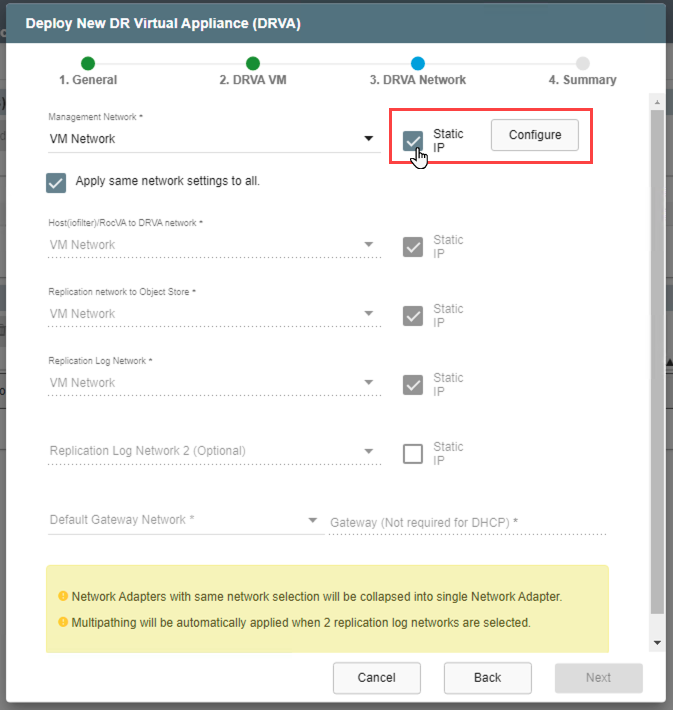
Figure 53: Configure a static IP (optional).
- On the Configure Static IP Address pop-up window, enter information to define the static IP address.
- Refer to Pre-Installation to review required network specifications.
- Click the Configure button to save the settings, then click the Next button to move to the next step.

Figure 54: Save static IP settings.
Step: Summary
- Review all entered settings on the Summary step.
- Use the Back button to modify any settings that need to be changed.
- If the settings are correct, click the Deploy button.
- The DRVA will be deployed and will appear in the list of DRVAs on the Appliances screen.
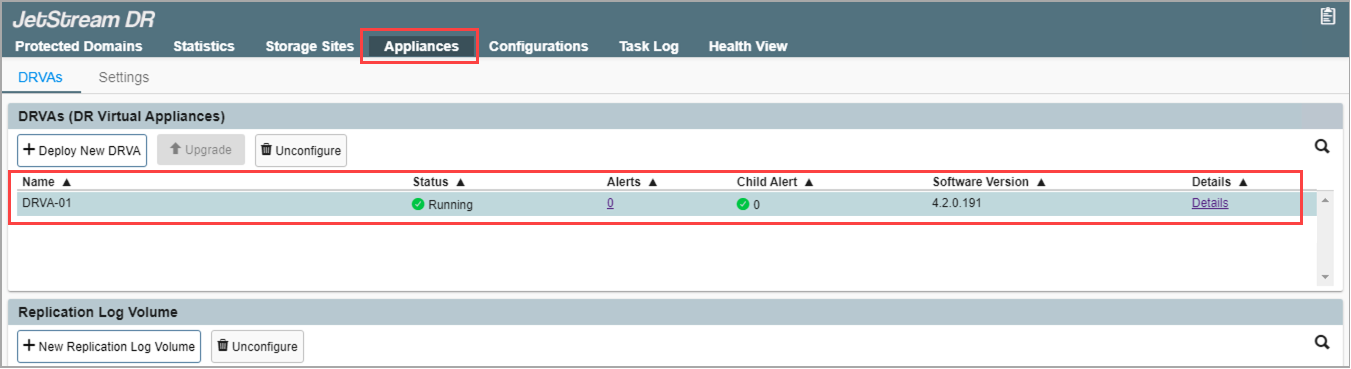
Figure 55: The DRVA has been deployed and is operational.
Also see:
After the DRVA has been deployed, create a replication log volume on it.