Install the MSA
The MSA is installed with the following actions:
- Copy the .OVA file to a workstation from which it can be deployed.
- Verify compatibility of the vCenter Server with the JetStream DR software version being installed.
- Connect to the vCenter Server with vSphere Client and deploy the template containing the MSA.
Installation Procedure
- From the vShpere client, deploy an OVF Template.
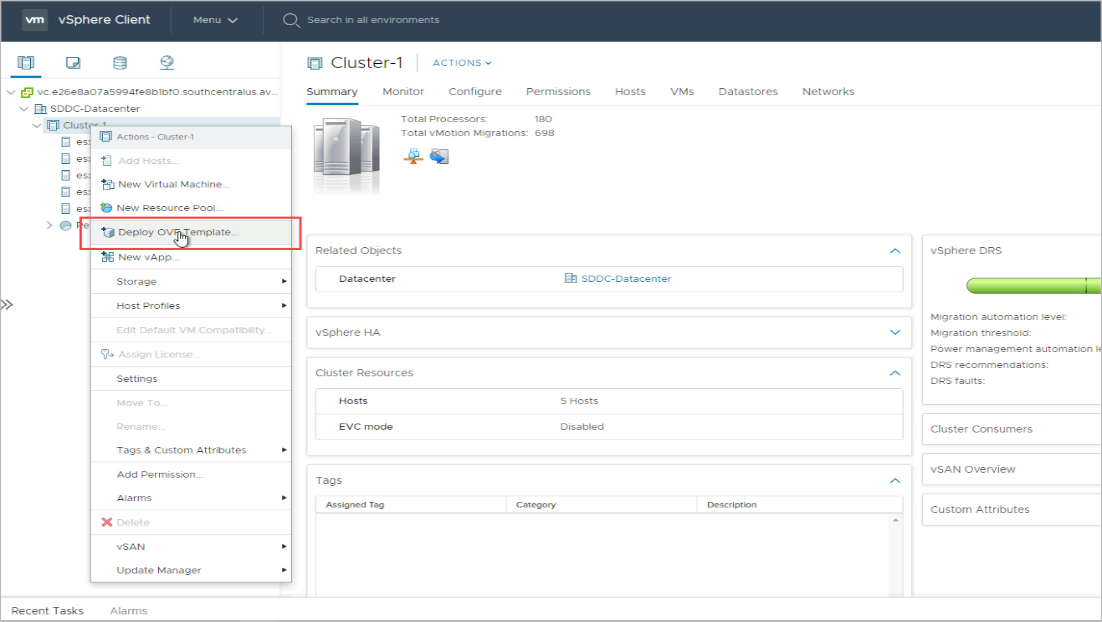
Figure 13: Begin by deploying an OVF template.
- Select the option Local file then click the Choose Files button.
- Locate the template file to install.
- Click the Next button.
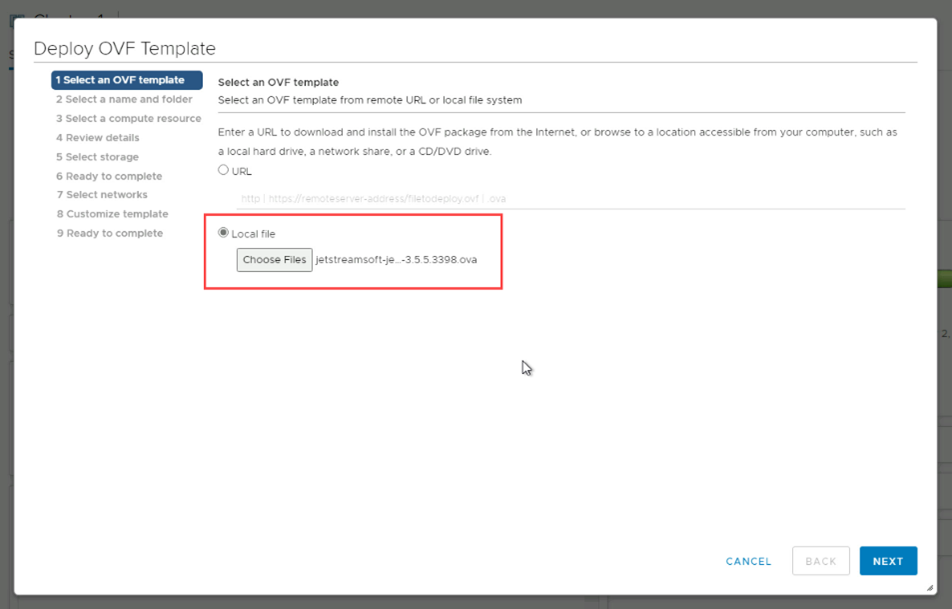
Figure 14: Select the OVA file to install.
- Select a name and folder for the management server virtual machine (i.e., the VM on which the MSA will be installed).
- Select a deployment location for it.
- Click the Next button.
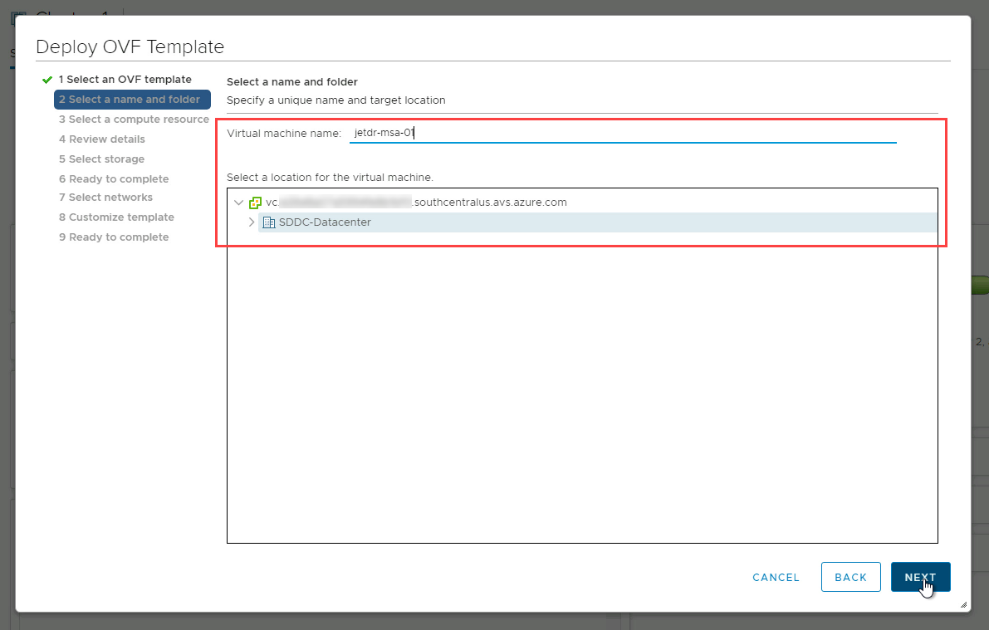
Figure 15: Define a virtual machine for the MSA.
- Select a compute resource to run the management server VM.
- Click the Next button.
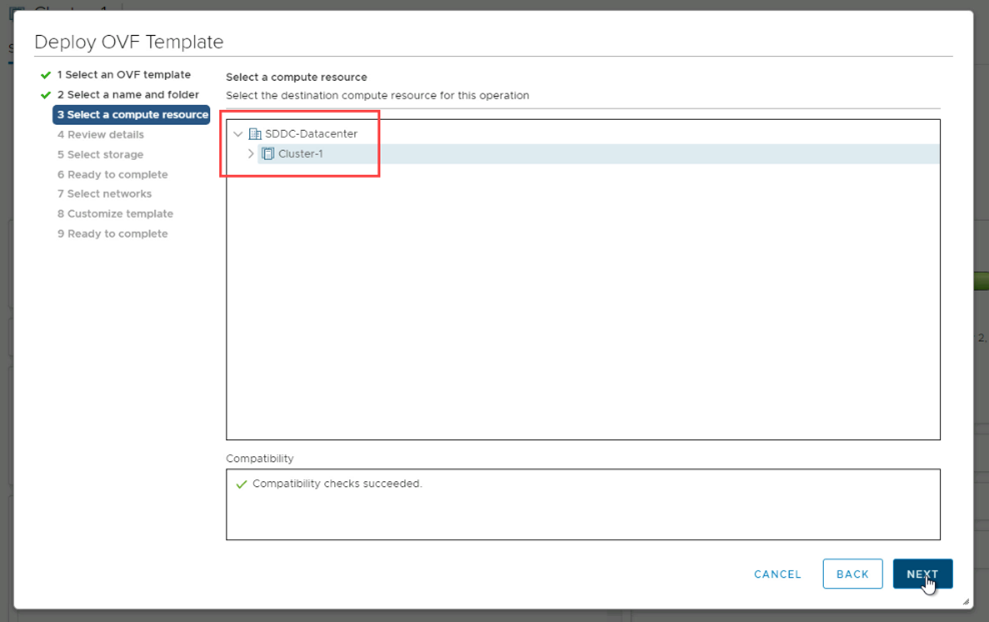
Figure 16: Specify a compute resource.
- Review the details of the template to use for creating the management server VM.
- Click the Next button.
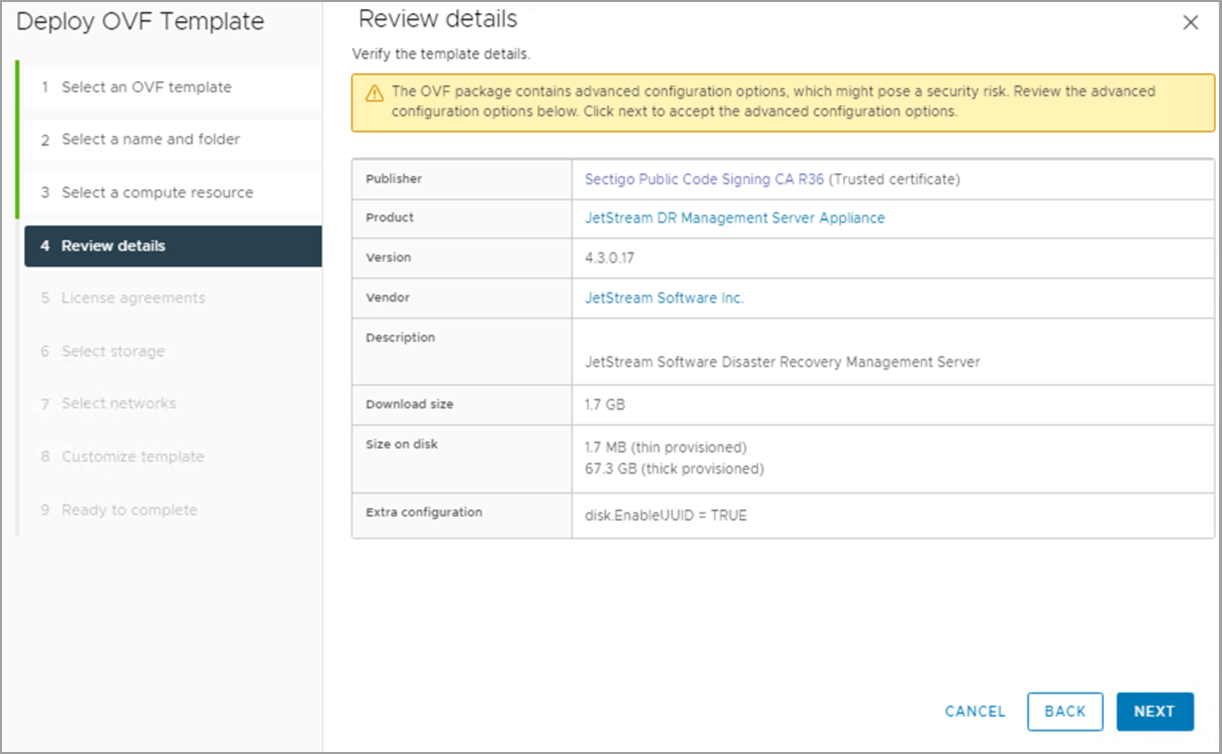
Figure 17: Review the VM details.
- Read and accept the license agreement by selecting the I accept all license agreements checkbox.
- Click the Next button to begin installing the management server VM on the specified host.
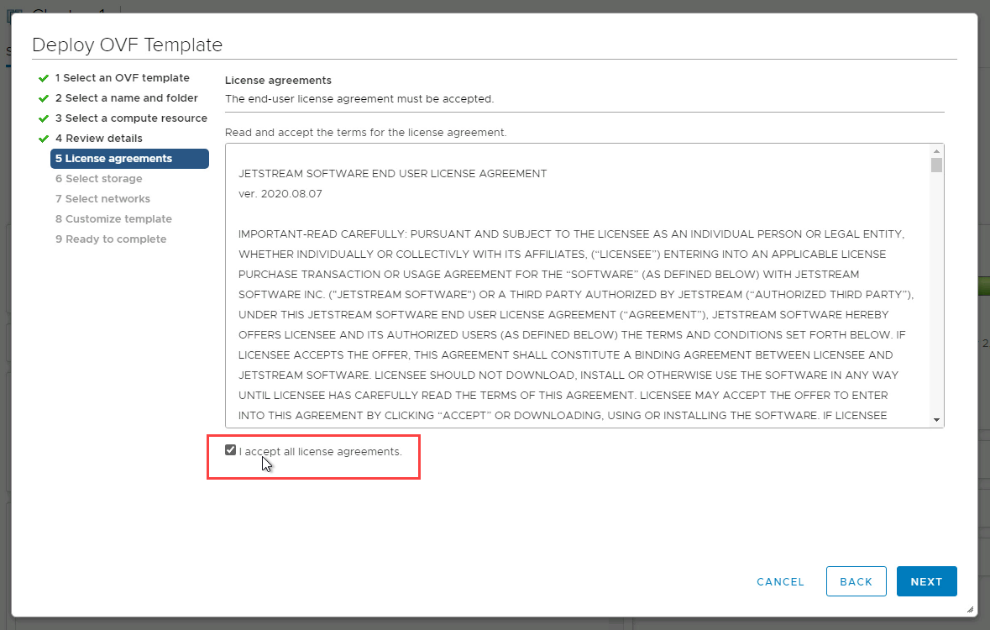
Figure 18: Accept the license agreement.
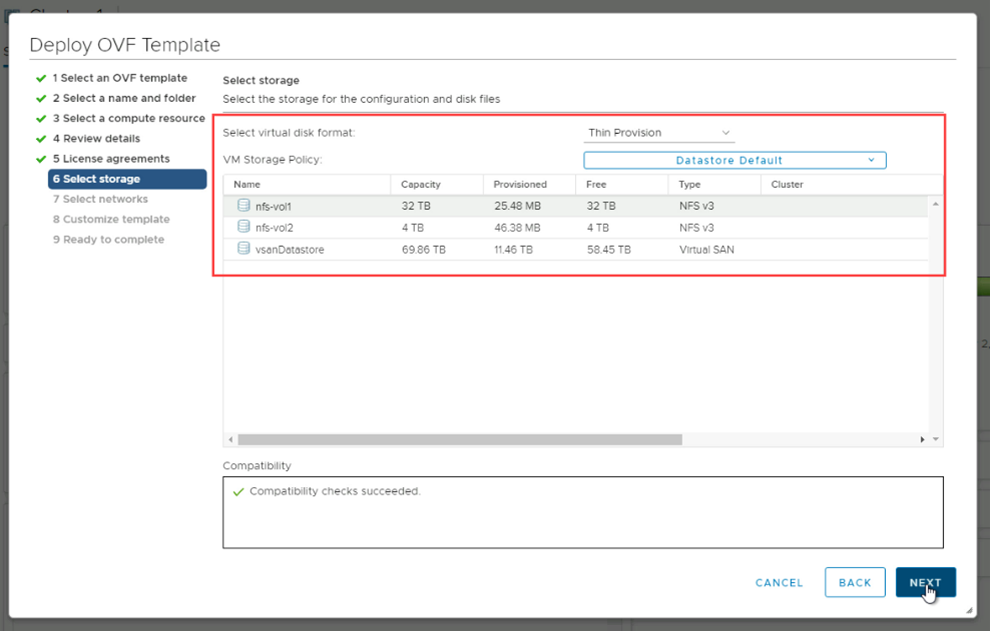
- Specify storage details for the virtual disk format, VM storage policy, and the MSA datastore.
- Click the Next button.
- Specify networks details for the MSA.
- Click the Next button.
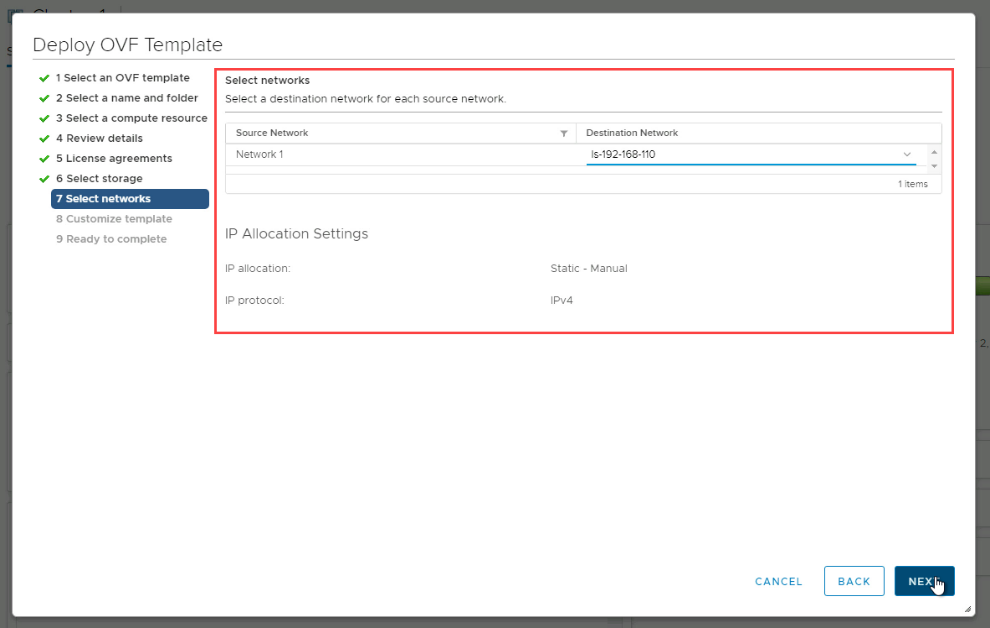
Figure 20: Configure the network.
- Customize the deployment template.
- Enter a hostname for the MSA.
- This must be a unique and fully qualified domain name (FQDN) that can be accessed by the vCenter.
- Enter password information for the MSA.
- If a root user password is not specified, the default value "jetstream" will be used.
- Configure Networking Properties details for the MSA.
- VLAN Tagging is an available option that can be used with JetStream DR.
- Click the Next button when done.
Important: The MSA’s FQDN must be properly registered to the DNS server and the vCenter Server should be able to reach the MSA by its FQDN. Without proper hostname configuration, the JetStream DR client plug-in will not appear in the vCenter Server.
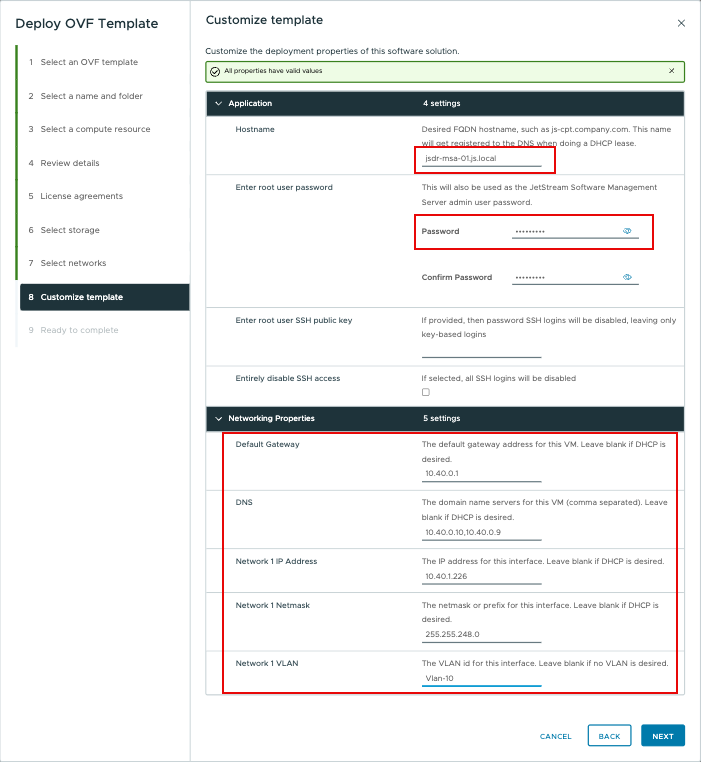
Figure 21: Customize the template.
- Review all entered settings on the final summary page.
- Click the Finish button to create the management server VM and install the JetStream DR MSA.
- Wait until the MSA VM has finished deploying.
- Make sure the VM is powered on then register the vCenter Server with the MSA.
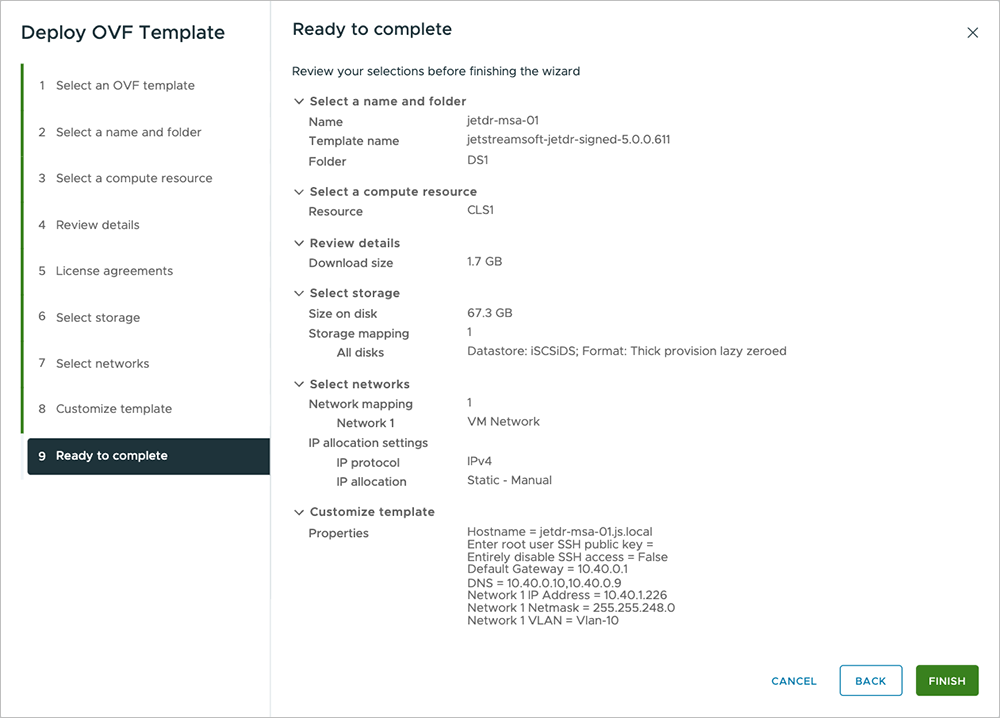
Figure 22: Finish deploying the template.
Note: Reverting an MSA snapshot to a previous state is not supported. Information can be lost causing the GUI to display inconsistent results.