This article explains how to update/change the DNS server IP address of a DRVA appliance.
Method 1: Using DRVA CLI
- Launch the DRVA web console and log in with admin credentials.
- Check the current DNS server IP using the command: cat /etc/resolv.conf

- Change the DNS server IP address using the command: sudo vi /etc/resolv.conf
- It will prompt for the password. After entering the password, press the Enter key.

- Press the i key to switch to insert mode, then edit the DNS IP address.
- To save the changed file, press the ESC key and then type the command :wq!
- The new DNS IP address will be changed and displayed.

Method 2: Using vCenter GUI
- Power off the DRVA.
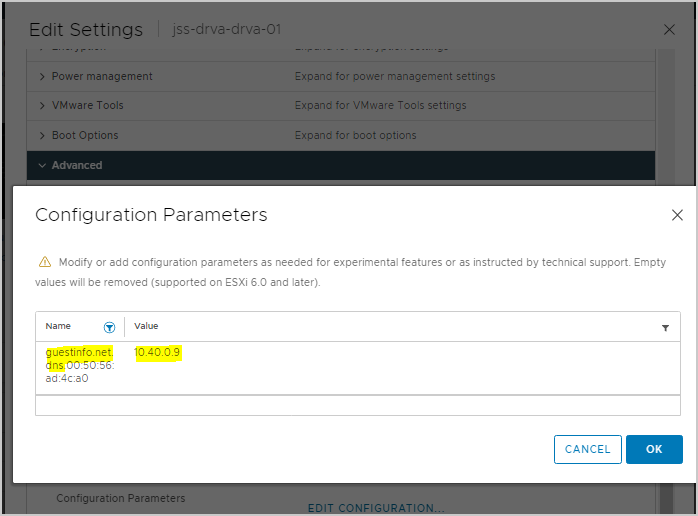
- Edit the VM Advanced options.
- Edit all configuration parameter entries matching: guestinfo.net.dns.*
- Update all such keys with the new DNS IP value.
- Power the DRVA back on.

Method 3: Using a PowerShell Script
- Use the PowerShell script (change_drva_addr_new.ps1) provided from JetStream Software to change the DRVA DHCP IP to static IP.
- Add the DNS entry to the script (as shown in the example below) to update the DNS automatically:
[netConfig]@{ netName="VM Network"; gw="*"; setup=""; routes=""; dns="10.40.0.9"} - Click here for example script.
