By default, DRVA replication log disks are created with a thick provision lazy zeroed storage policy (irrespective of datastore defaulty policy). However, if it is necessary to switch to thin provisioning to optimize storage space usage, refer to the following article for guidance.
Manually Change Storage Policy
- Azure Cloud admin users can manually change the VM storage policy as follows:
- Navigate to vCenter > select DRVA VM > editing settings > expand Hard disk > VM Storage policy
- From the drop-down menu, select the desired storage policy then click OK to apply changes.
Change Storage Policy Using the Run Command
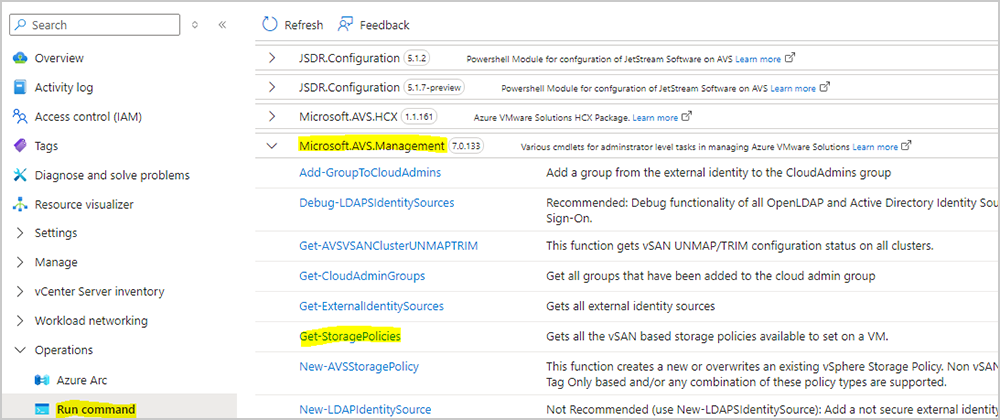
- Log in to Azure portal and select Operations > Run command under the left side navigation panel.
- Expand the Microsoft.AVS.Management command.
- Select Get-StoragePolicies to view all the vSAN-based storage policies available to set on a VM.

- Note the name of the desired storage policy to use. For example: RAID-5 FTT-1.
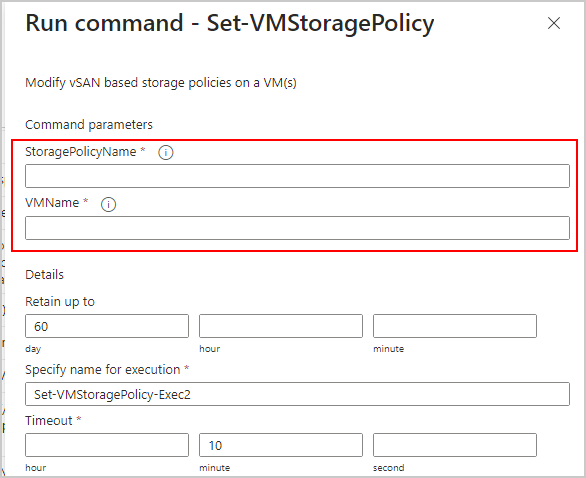
- Go back to the Microsoft.AVS.Management command package and select Set-VMStoragePolicy.

- Specify the storage policy name (noted in the above step) and enter the VM name to change.
- Then execute the command to change the storage policy.

