In certain types of disaster incidents, the primary site (including both service and compute clusters) may become temporarily or even permanently unusable. In this case, JetStream DR can be used to recover the affected domains to a separate recovery site. Failover can be performed “as-needed,” in which case resources at the recovery site will only be created and utilized at the time failover recovery is performed. This is the most economical mode of operation. Alternatively, failover can be performed “continuously” where the recovery site is initially created and then synchronized with the protected site during its normal course of operation. Continuous failover (“CFO”) requires simultaneous operation of resources at both the protected site as well as the recovery site, but it can significantly reduce the amount of time required to recover from a disaster event.
Failover Setup: Prepare Recovery Site
Configuring the recovery site for failover involves provisioning a vSphere environment and installing JetStream DR. This step is required for both modes of failover operation. Follow these steps to configure the recovery site.
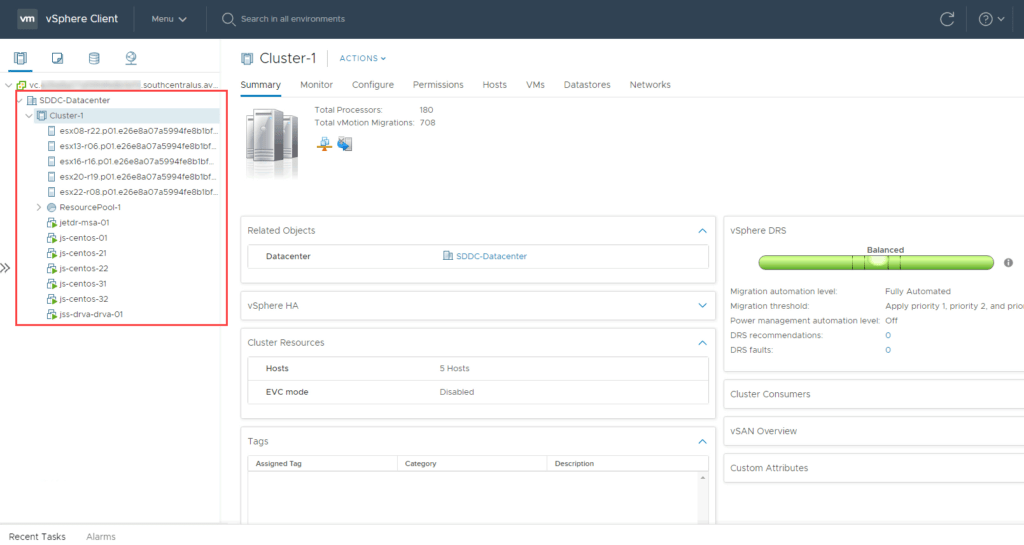
- Allocate compute resources and provision vSphere at the recovery site, as needed. The compute resources at the recovery site must be able to run an MSA, a DRVA, and the VMs to be failed over. Ensure the network is properly configured per the guidelines described in Pre-installation.
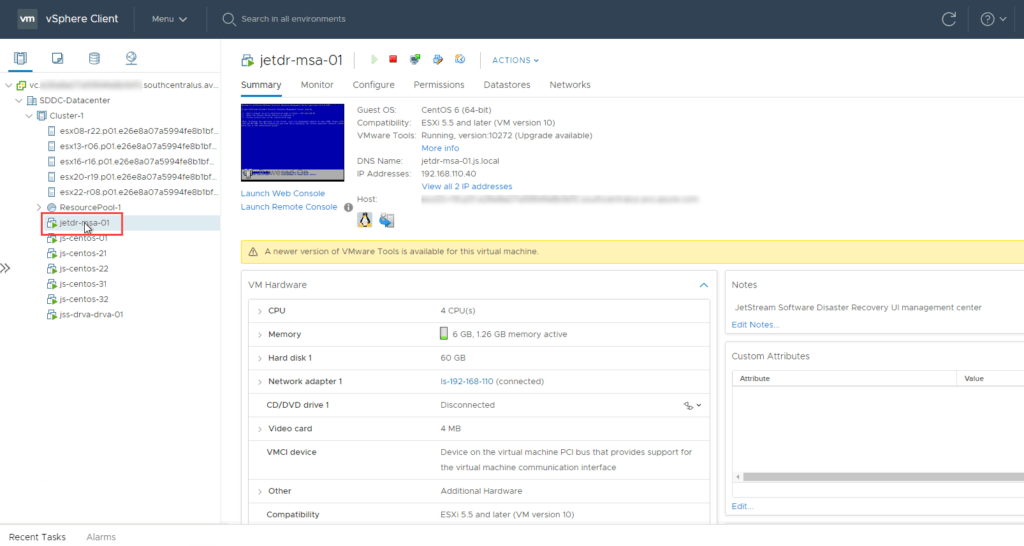
- Deploy an MSA at the recovery site. This should be done at the recovery site using the same steps performed at the protected site during initial setup.
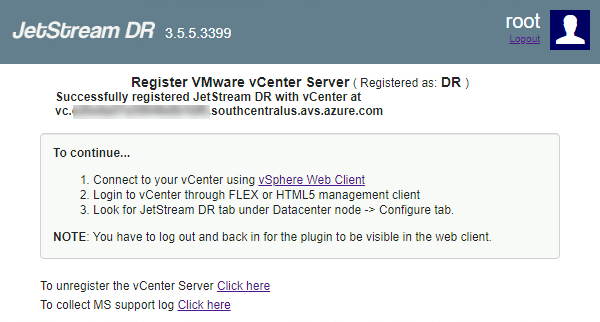
- Register the new MSA with vCenter at the recovery site. This should be done using the same steps performed at the protected site during initial setup.
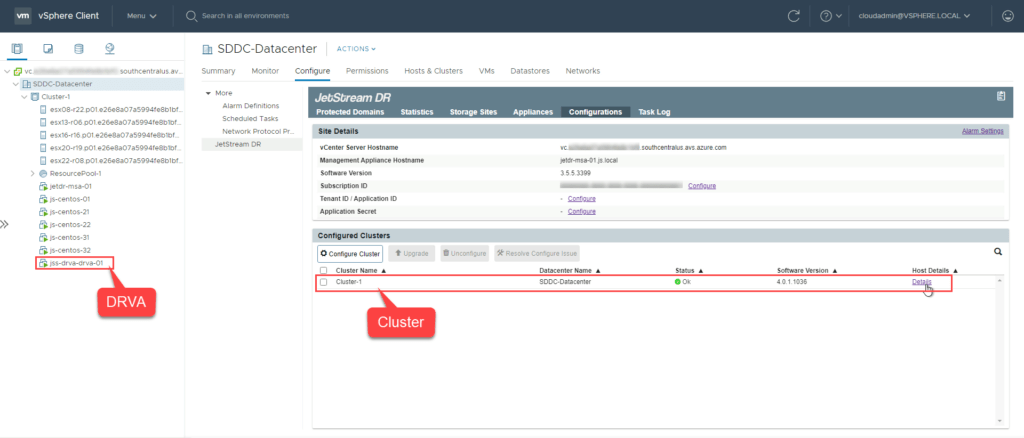
- Configure a DRVA and cluster at the recovery site. This should be done using the same steps performed at the protected site during initial setup.
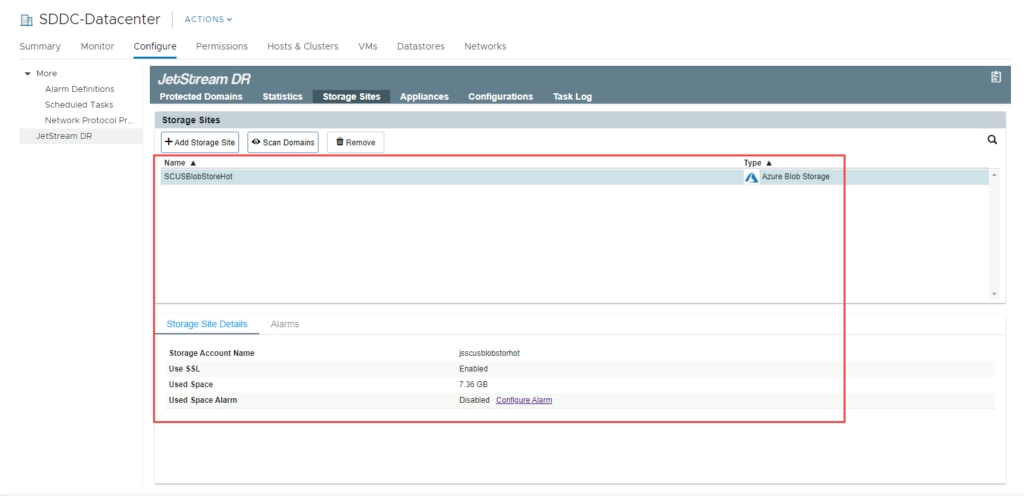
- At the recovery site, add the storage site using the same credentials that were used for the protected site. Make sure it points to the same object store originally used for the protected site.
Import VMs for Failover
Importing the VMs to the vSphere environment at the recovery site is performed at the level of a protected domain.
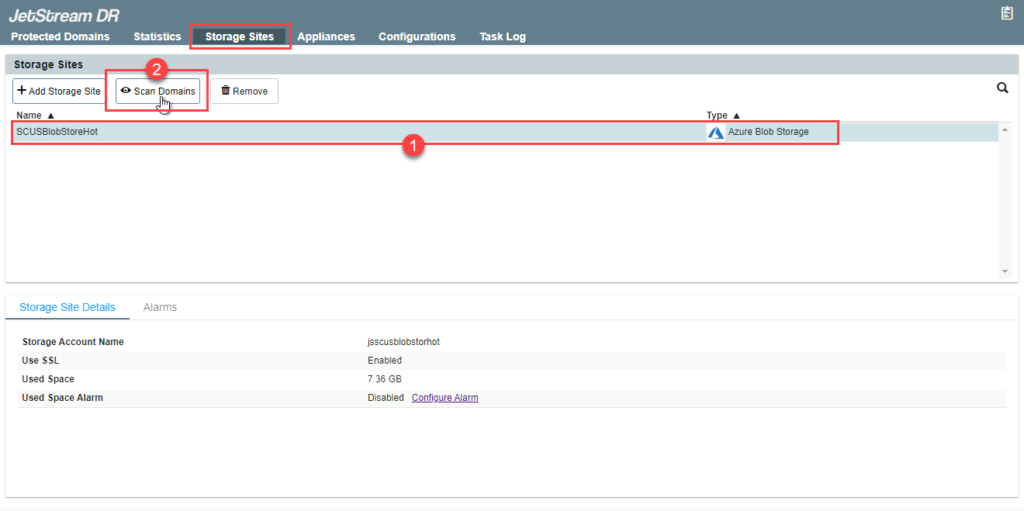
- Under the Storage Sites tab, select the object store (added in the above step). Click the Scan Domains button.
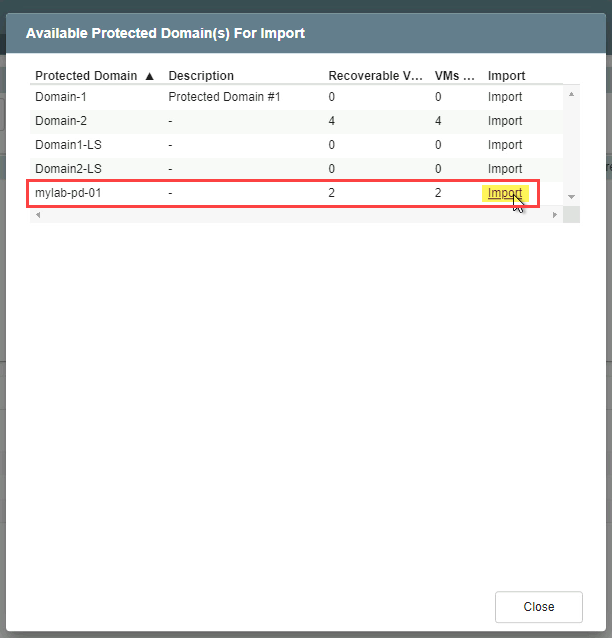
- In the pop-up dialog window that appears choose a domain to import then click its Import link.
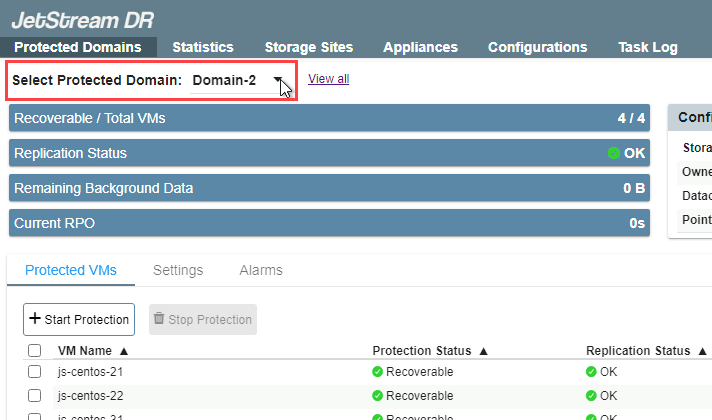
- The protected domain will be imported into the recovery site. Go to the Protected Domains tab to view the list of VMs in the protected domain that will be failed over.
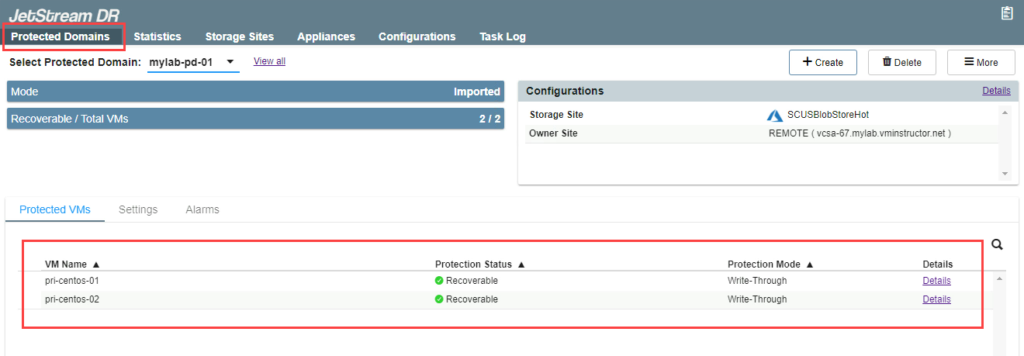
- If multiple domains have been imported, switch between them by selecting one from the Select Protected Domain menu.
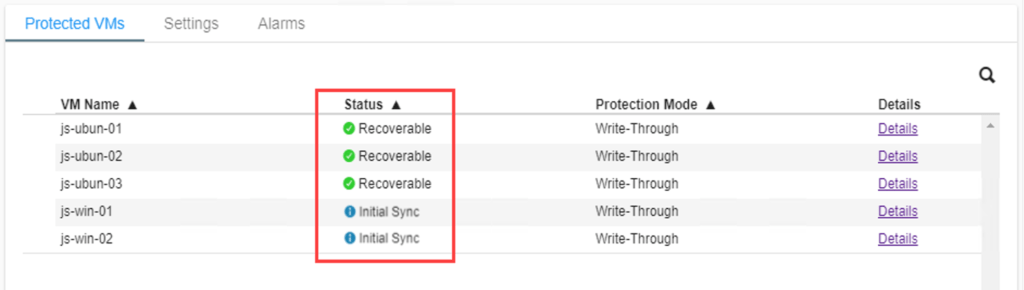
- If performing failover, only VMs with the status “Recoverable” will be failed over. If performing continuous failover, VMs will be failed over regardless of their status level.
Failover VMs to the Recovery Site
Select Failover Mode
Open the More menu and select one of the failover options (“Failover” or “Continuous Failover”)
to begin.
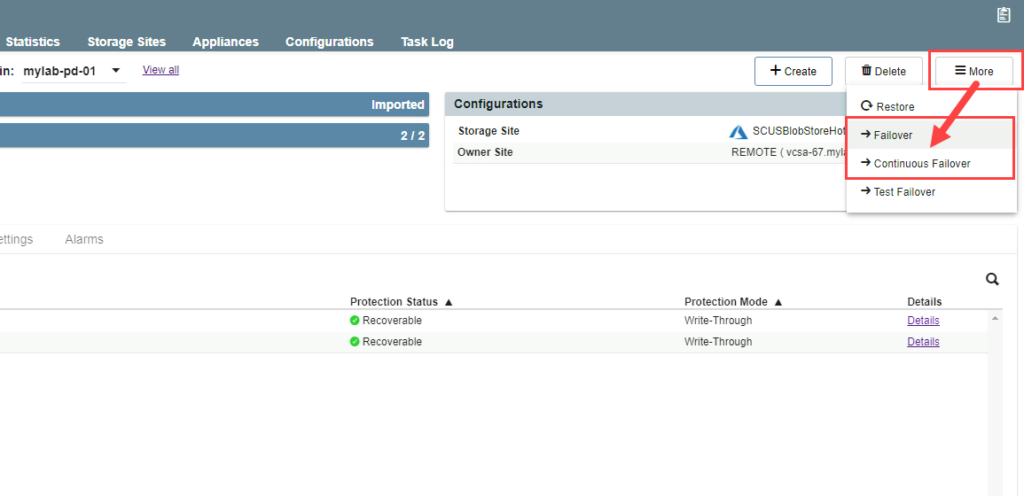
Failover
“Failover” is typically used in response to a disaster event where resources should be deployed to the recovery site and VMs recovered immediately.
Continuous Failover
“Continuous failover” can be initiated at any time to deploy resources to the recovery site prior to any disaster. The deployed resources will become synchronized with the protected site during normal operation, thereby minimizing failover recovery time when disaster does strike.
Failover Settings
Both failover modes are configured using the same steps; however, they differ at which point in time configuration is performed. Failover steps are configured and performed together in response to a disaster event. Continuous failover can be configured at any point in time and then allowed to run in the background during normal system operation. After a disaster event has occurred, continuous failover is “completed” to immediately transfer ownership of the protected VMs to the recovery site (near-zero RTO).
After selecting a failover mode, a pop-up dialog window will appear with guided steps. The following configuration steps are the same for either failover mode.
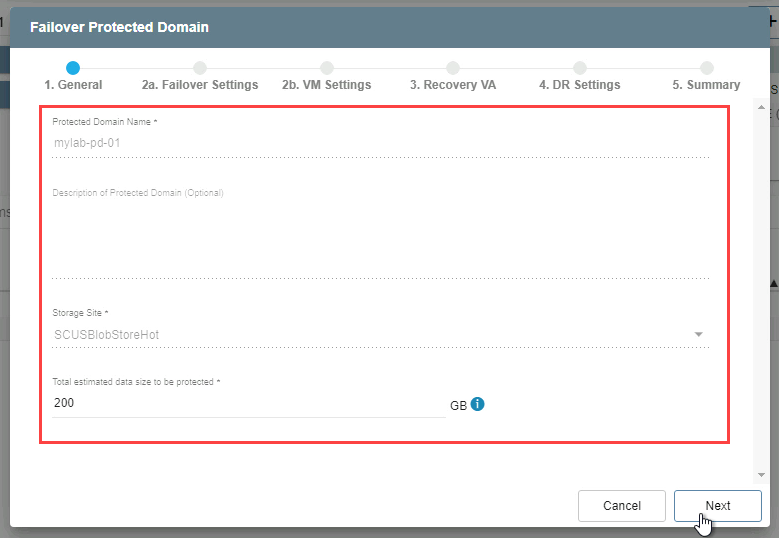
- 1. General
- Review the information about the imported protected domain.
- If the information is correct, click the Next button.
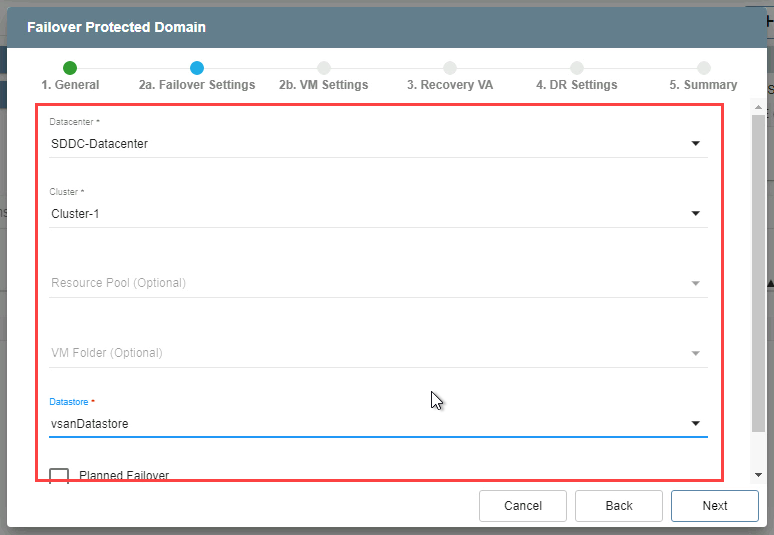
- 2a. Failover Settings
- Make selections from the drop-down menus to specify the recovery site datacenter, cluster, resource pool (if any), datastore, and if it is a planned or forced failover.
- Click the Next button.
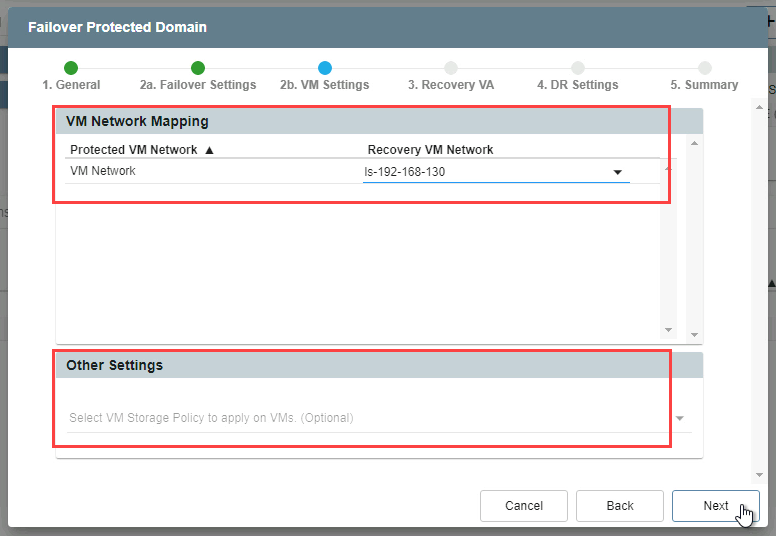
- 2b. VM Settings
- Select the VM network of the recovery site.
- Specify storage policies for VMs under the Other Settings section (optional).
- Click the Next button.
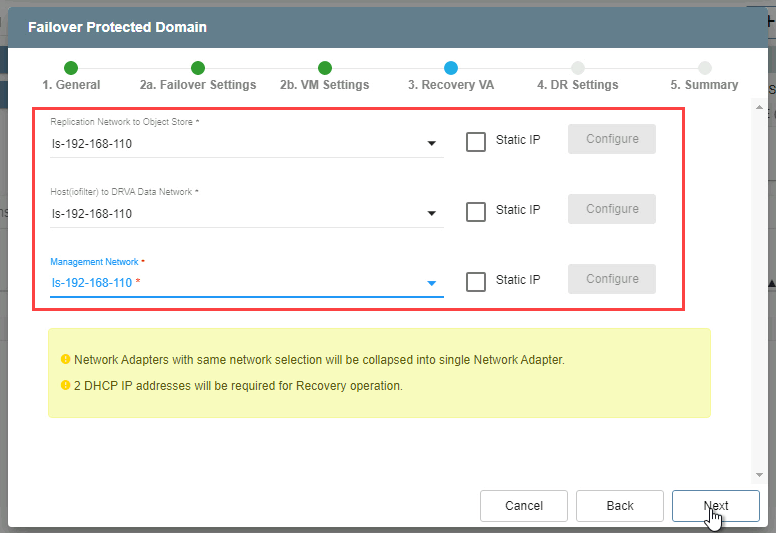
- 3. Recover VA
- Make selections from the drop-down menus to specify the External Replication Network, the Internal Network, and the Management Network.
- Click the Next button.
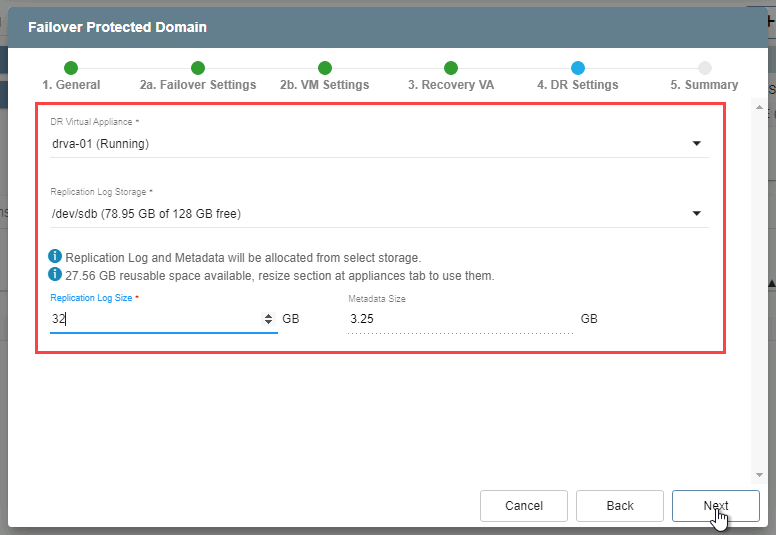
- 4. DR Settings
- Select the DRVA from the protected domain that was created during its initial configuration.
- Indicate the Replication Log Store on the failover site.
- Specify sizes for the replication log and metadata. (NOTE: The replication log and metadata will be allocated from the selected replication log storage.)
- Click the Next button.
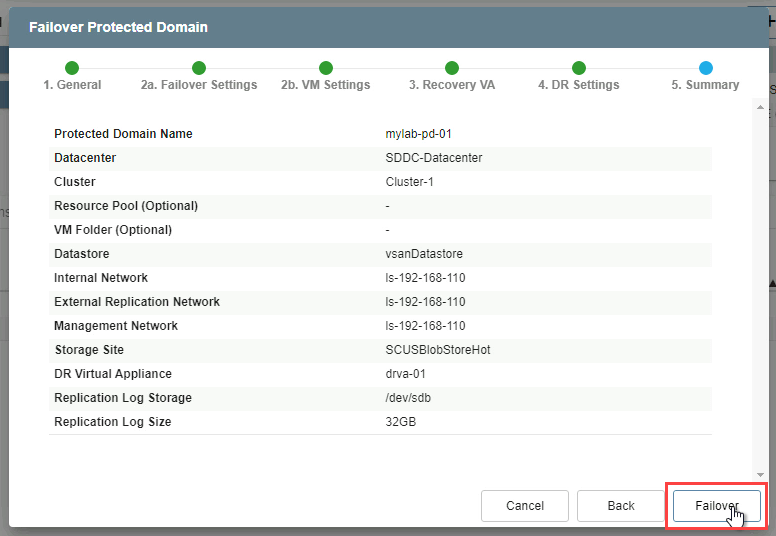
- 5. Summary
- Review all entered settings on the Summary step.
- Use the Back button to modify any settings that need to be changed.
- Click the Failover button to begin the failover process. (NOTE: The label of the failover button will indicate the failover mode selected; e.g., “Failover” or “Continuous Failover”)
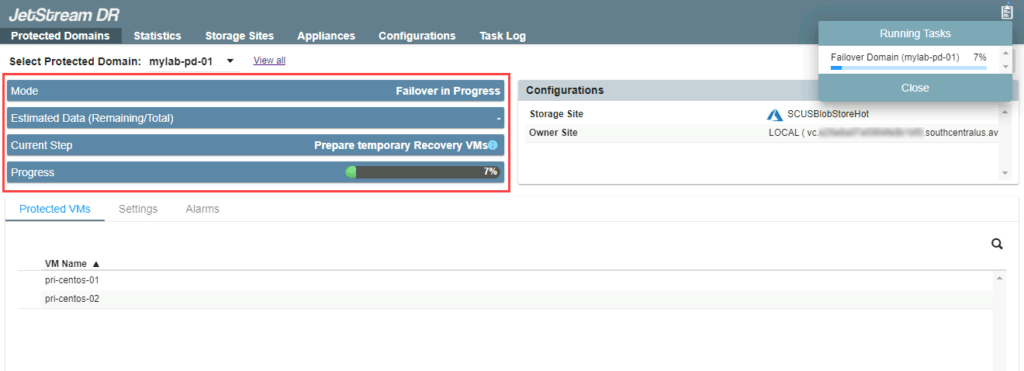
The failover process begins and its progress can be monitored from the UI.
Completing Failover
Mode: Failover
If failover mode was selected, the following conditions apply:
- After all data has been recovered from the storage site to the recovery site, the failover process will automatically conclude the final steps of failover, including: cleaning up temporary VMs used during the recovery process, resuming protection of the domain, applying DR storage policies, powering on VMs and shifting ownership to the recovery site.
- When failover has finished a message box will be displayed confirming completion of the failover recovery task.
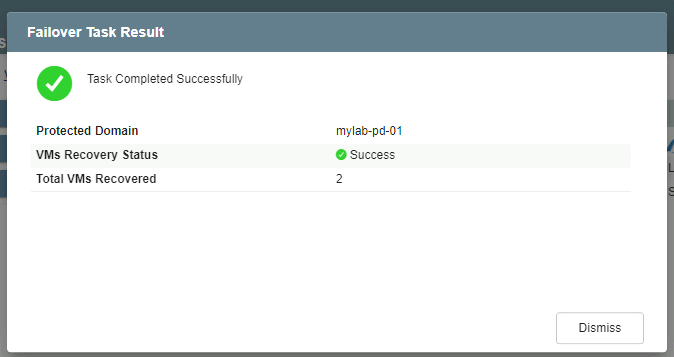
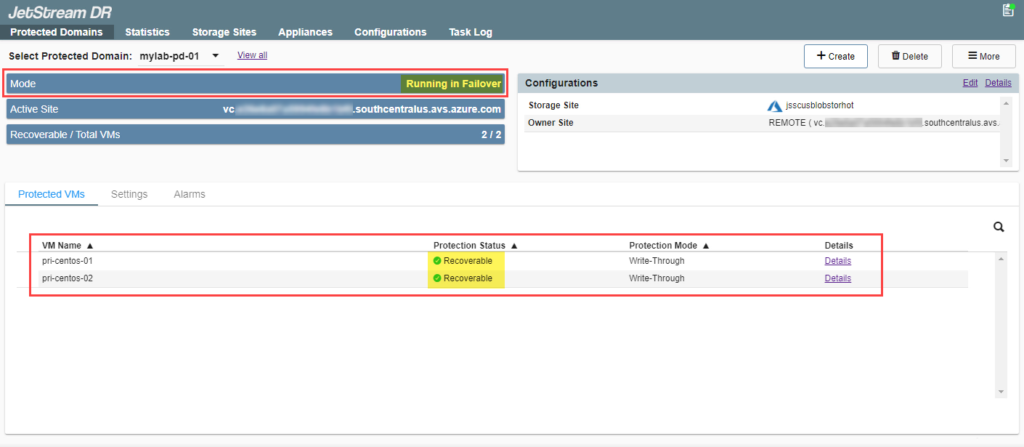
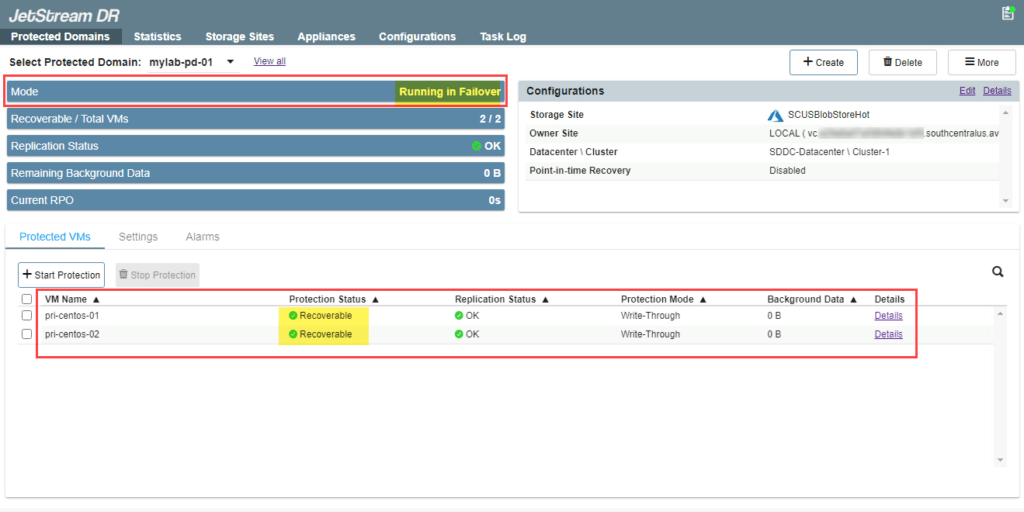
- The mode will now indicate “Running in Failover” and VM protection status will be “Recoverable.” All VMs of the protected domain will now be running at the recovery site in the state specified by the failover runbook settings (if applied).
Mode: Continuous Failover
If continuous failover mode was selected, the following conditions apply:
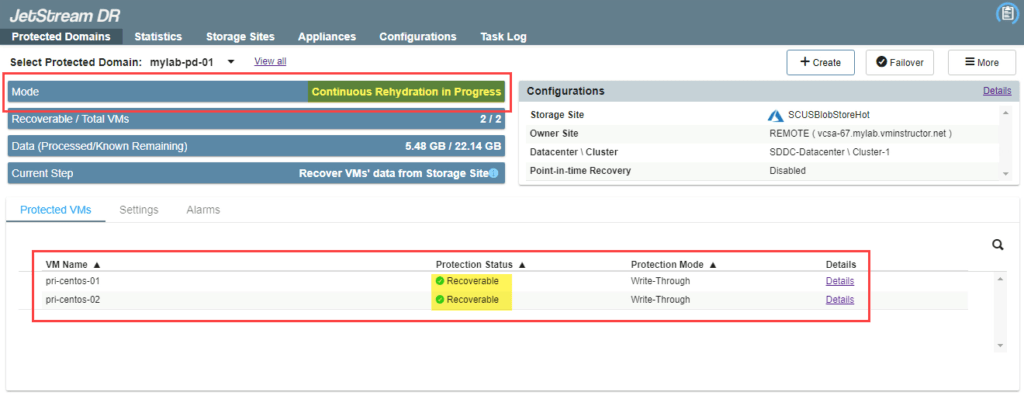
- After continuous failover has been started, data will be continuously synchronized between the protected and recovery sites. VMs can be operated normally at the protected site. The operating mode will eventually indicate “Continuous Rehydration in Progress” and the VMs’ protection status will become “Recoverable.”
NOTE: Additional VMs can be added to the protected domain while operating in continuous failover mode. Additionally, VDISKs can be added to or removed from VMs of the protected domain while operating in continuous failover mode.
- When necessary to recover from disaster, click the Failover button to complete the failover process to the recovery site.

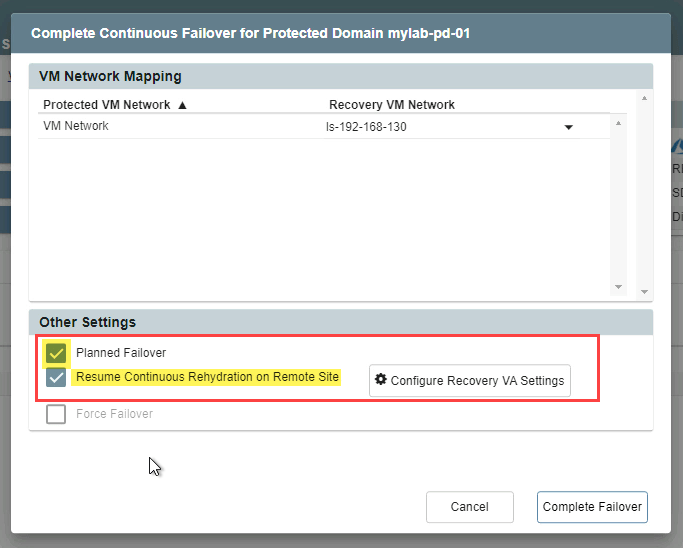
Failover Option: Planned / Forced Failover
An option is provided to specify the state of the protected site after failover has been completed:
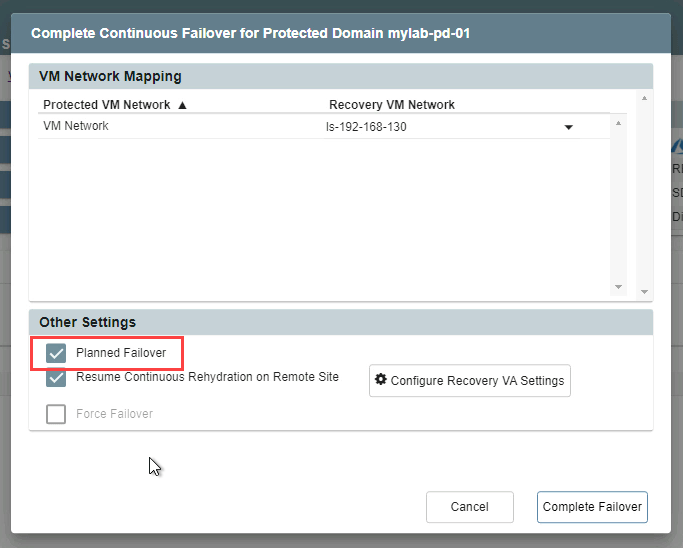
- In the dialog window that appears when completing failover, the failover task can be specified as “planned” or assumed to be “forced.”
- A planned failover shuts down the domain at the protected site (gracefully) before transferring ownership of VMs and data to the recovery site. Data at the protected site will not be deleted.
- A forced failover assumes the primary site is no longer accessible and ownership of the protected domain should be directly assumed by the recovery site.
NOTE: Planned failover is typically used for non-disaster related events such as seamlessly shifting the location of VMs and their workloads while they continue to operate.
For example, if it is known an event will occur that would produce a large workload or data burst that exceeds the resource capacity of the on-premises site, it could be beneficial to shift the VMs and their workloads to a cloud services provider capable of meeting the demand. Another common case is moving VMs and workloads away from the on-premises site before performing major site maintenance that could potentially be disruptive or risky. After maintenance is complete, the VMs and workloads can be non-disruptively “failed-back” to the updated on-premises site.
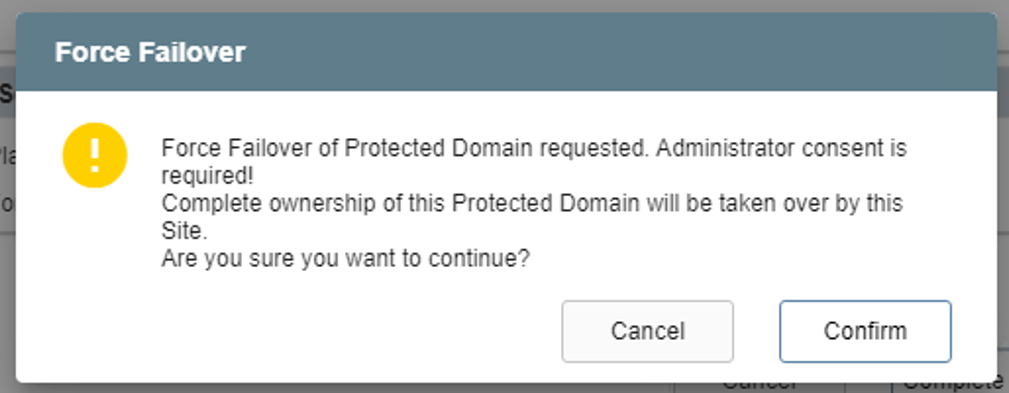
- If the Force Failover option is used (the Planned Failover option is left unselected), a dialog window appears asking the user to confirm that complete ownership of the protected domain can be taken over by the recovery site.
- If the Planned Failover option is used, a sub-option can be selected allowing for continuous rehydration from the remote site.
NOTE: This option is in essence “continuous failback.” Once VMs and data have been failed over to the remote recovery site, any new data generated there will automatically be “rehydrated” (synchronized in the background) back to the original protected site allowing for “near-zero RTO” failback.- Click the Configure Recovery VA settings button to configure the continuous rehydration function so it can run automatically upon failover.
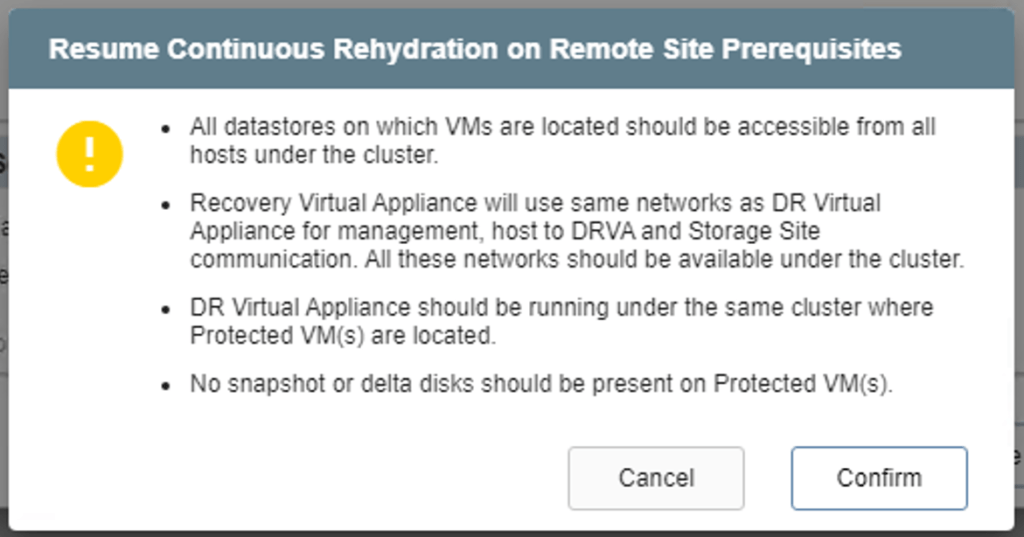
- If the Resume Continuous Rehydration on Remote Site option is selected, a dialog window appears announcing conditions for the function to operate.
- After continuous failover is complete a message appears confirming completion of the task.

- The mode will change to “Running in Failover” and VM status will be “Recoverable.” All the VMs of the protected domain will now be running at the recovery site in the state specified by the failover runbook settings.