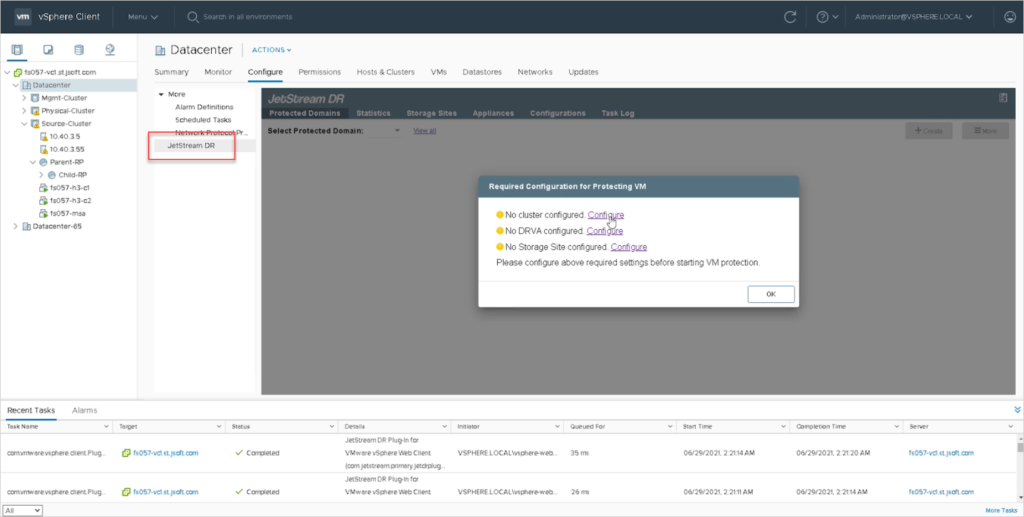
JetStream DR software consists of three main components: Management Server Virtual Appliance (MSA), DR Virtual Appliance (DRVA), and host components (IO Filter packages). The MSA is used to install and configure host components on the compute cluster and then to administer JetStream DR software. The DRVA runs the data path DR components. Multiple DRVAs can be used concurrently for better scalability. Each DRVA has one or more dedicated partitions attached as an iSCSI LUN or as a low-latency VDISK. The partitions are used to maintain replication logs and repositories for persistent metadata. The installation process is performed in three steps:
Download the Software
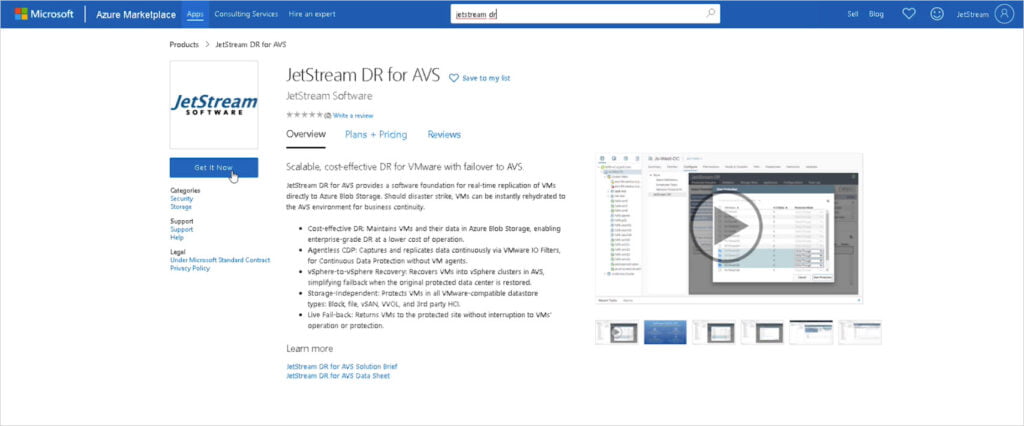
- Subscribe to JetStream DR software in the Azure Marketplace.
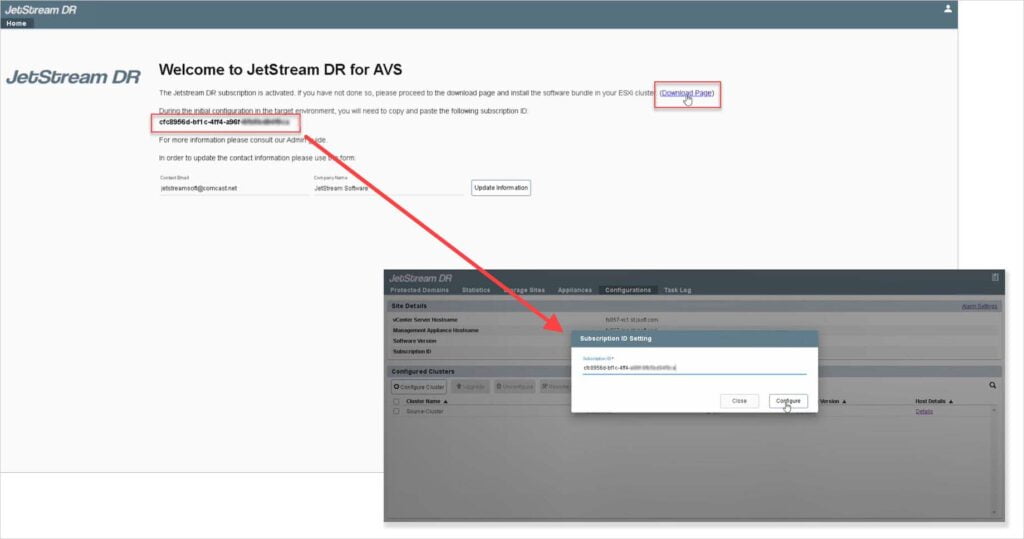
- Once subscribed, a subscription ID will be issued and a link to download the software will be displayed. Record the subscription ID – it will be used to unlock the software when you begin configuring it to protect VMs.
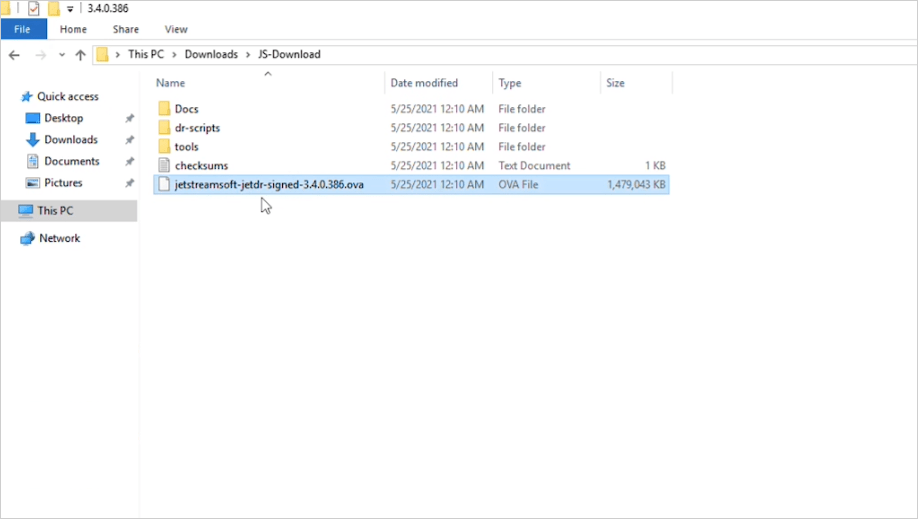
- Extract the OVA file from the download package.
Deploy the Management Server Appliance
Deploy the JetStream DR MSA to a vSphere host in the service cluster. Use a vSphere Web Client connected to the vCenter Server to manage the host. Although the JetStream DR MSA can be installed directly from the vSphere Client, it is recommended to use the vSphere Web Client whenever possible.
The distributed .ova file contains all the necessary components to work with the vSphere Web Client (the OVA archive file contains the JetStream DR OVF package files).
NOTE: To deploy the MSA and its components, you must have vCenter Server admin privileges to install third party vSphere Web Client extension plugins.
Follow these steps to install the JetStream DR MSA.
- Copy the .ova file to a workstation from which it can be deployed.
- Connect to the vCenter Server using the browser-based vSphere Web Client. Log in as an administrator with rights to provision and manage virtual machines. Select the option to deploy an OVF Template.
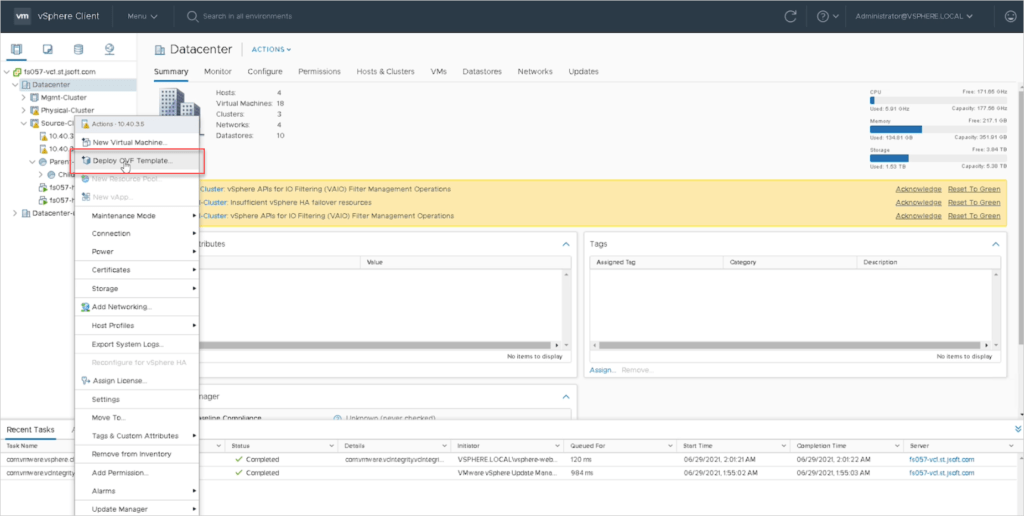
Deploy the OVF template:
- Install the template from a local file:
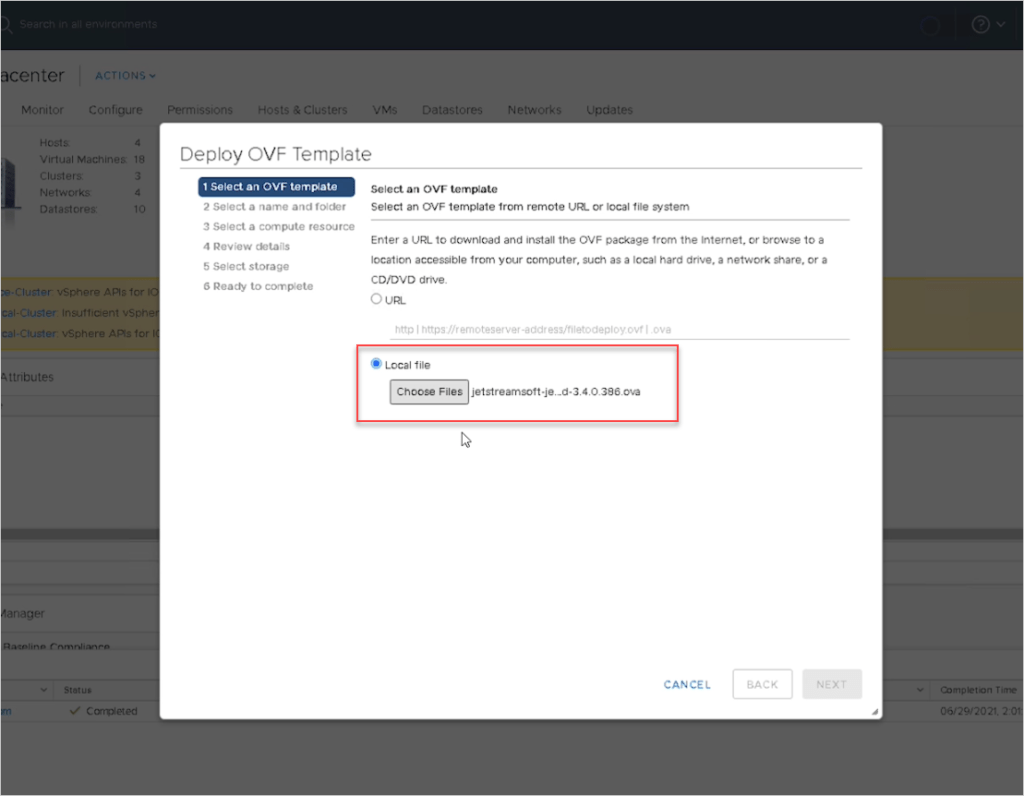
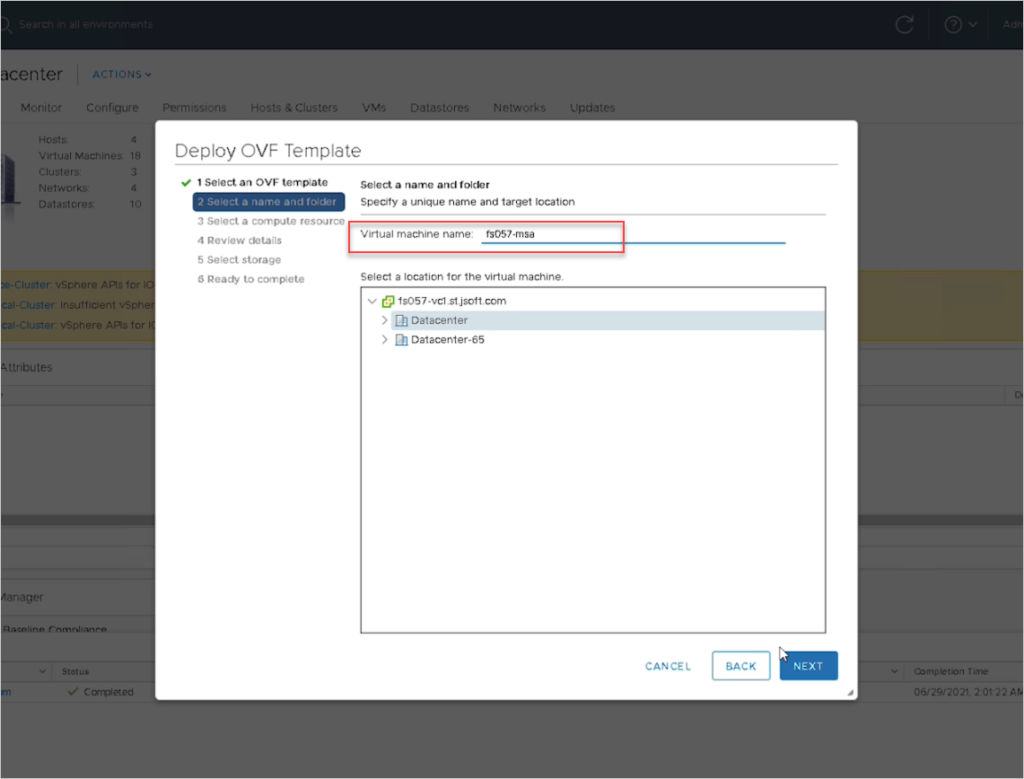
- Name the management server:
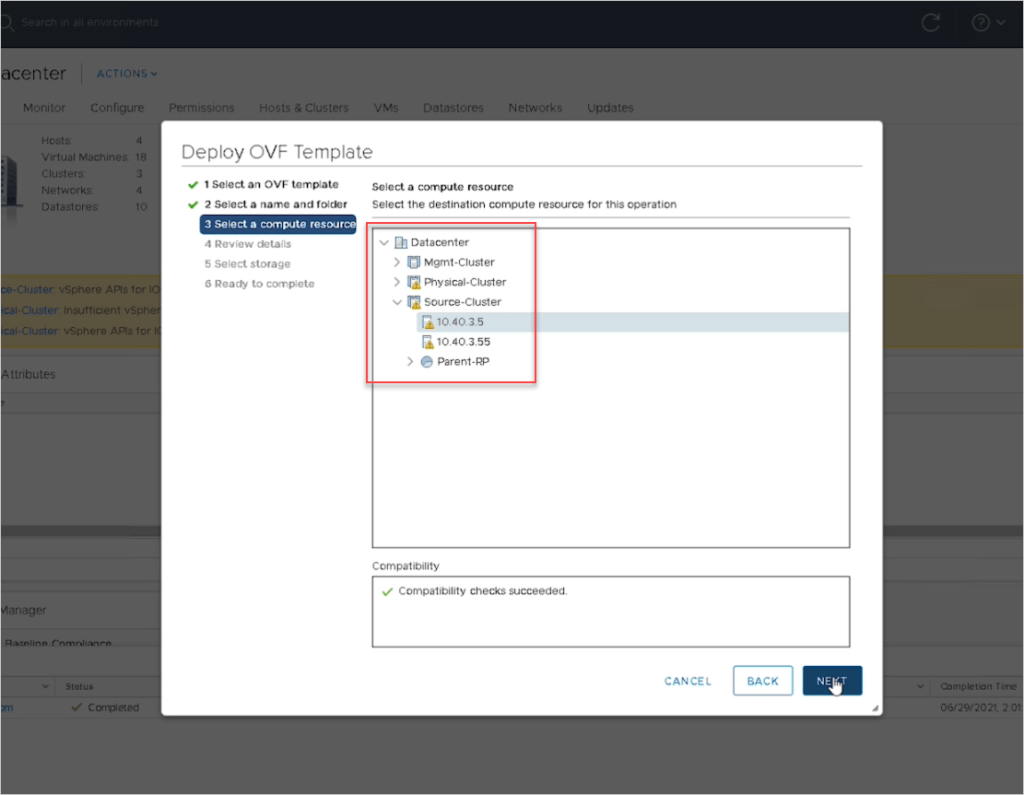
- Specify a compute resource for the management server:
- Review the template details:
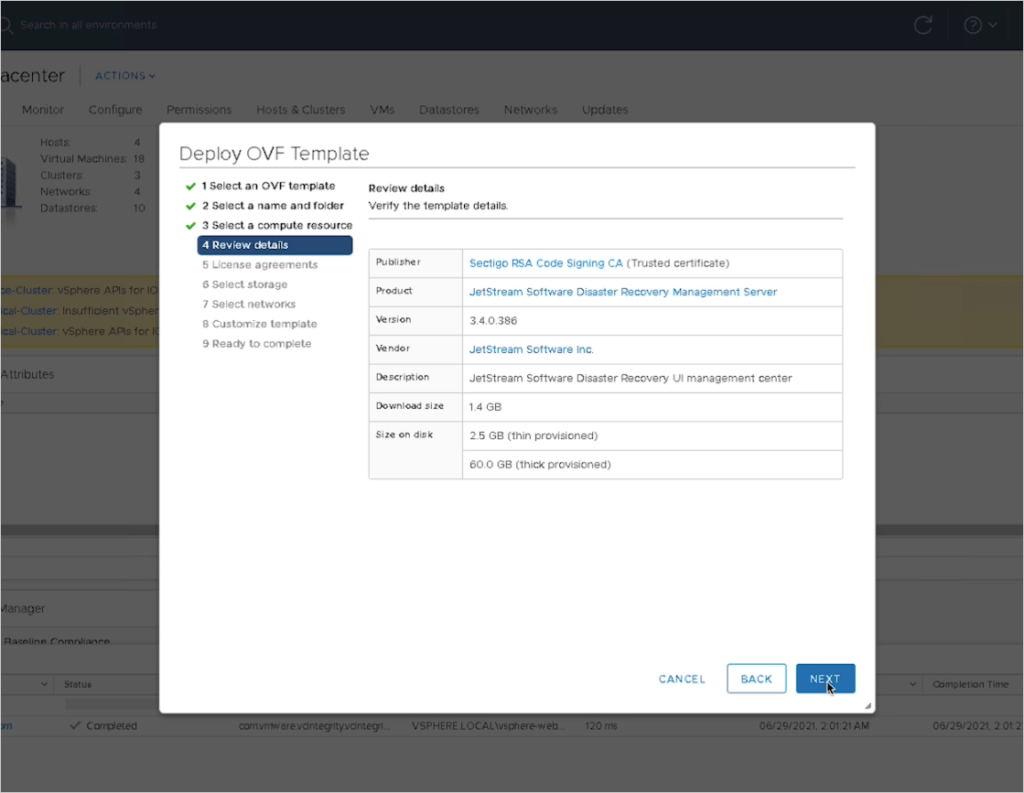
- Accept the end user license agreement:
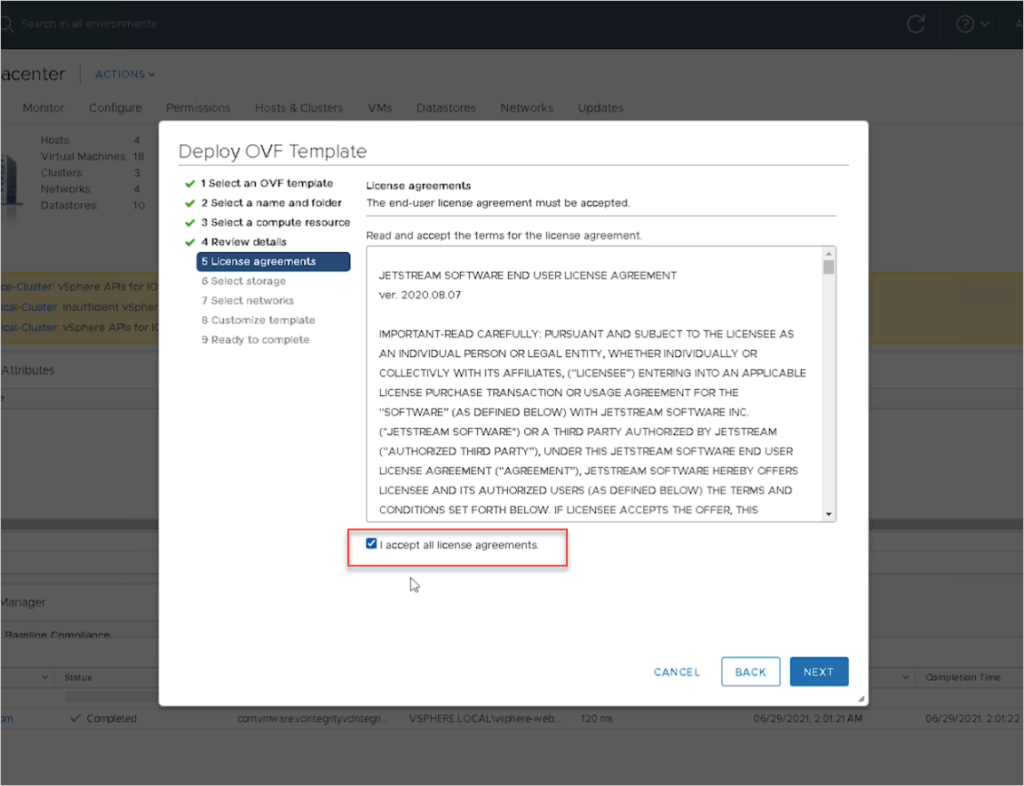
- Specify the virtual disk format, VM storage policy, and the datastore for the management server:
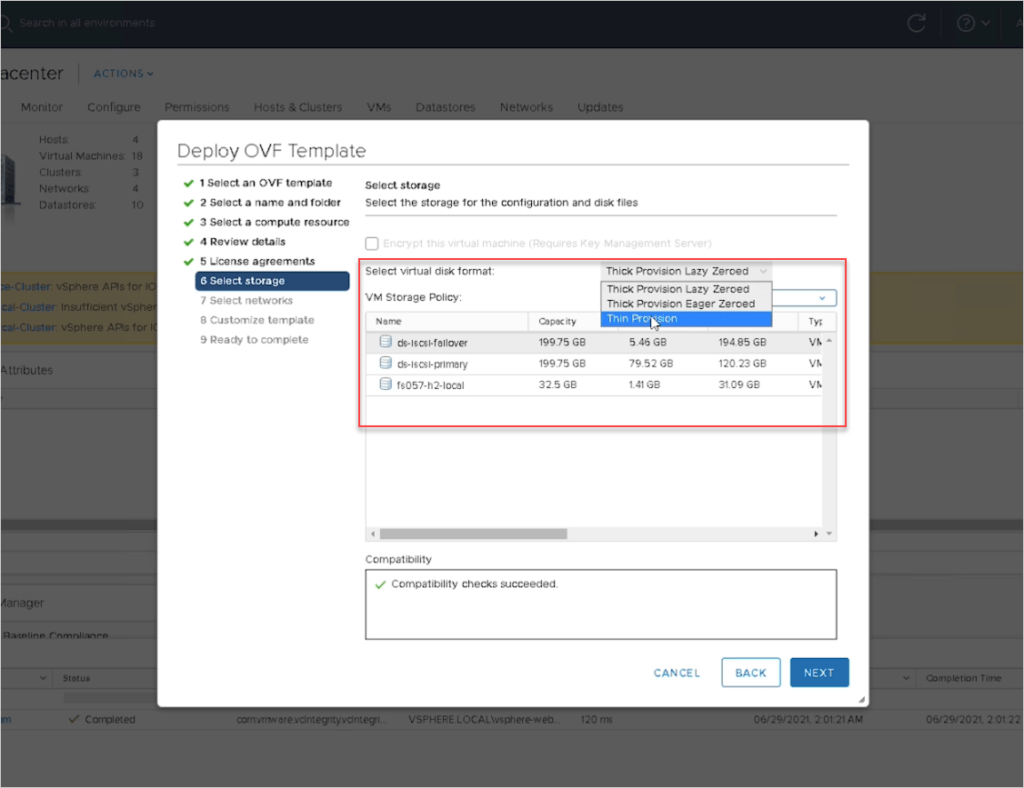
- Configure network options for the management server:
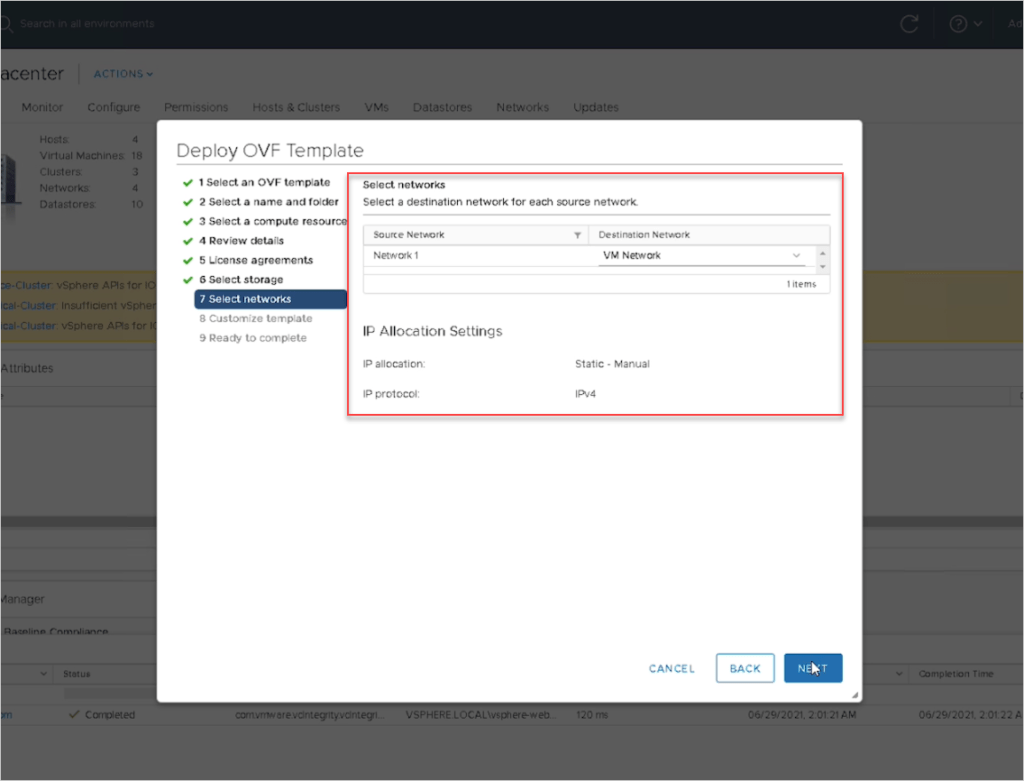
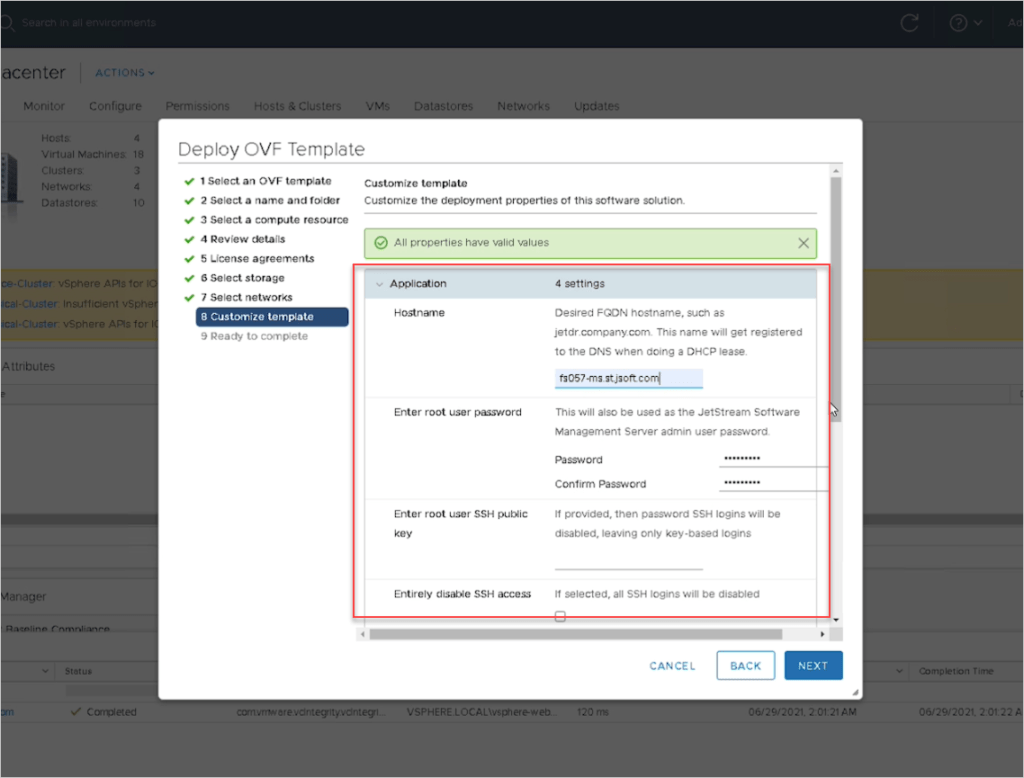
- Customize the template by entering a hostname and password for the management server and complete the remaining network details:
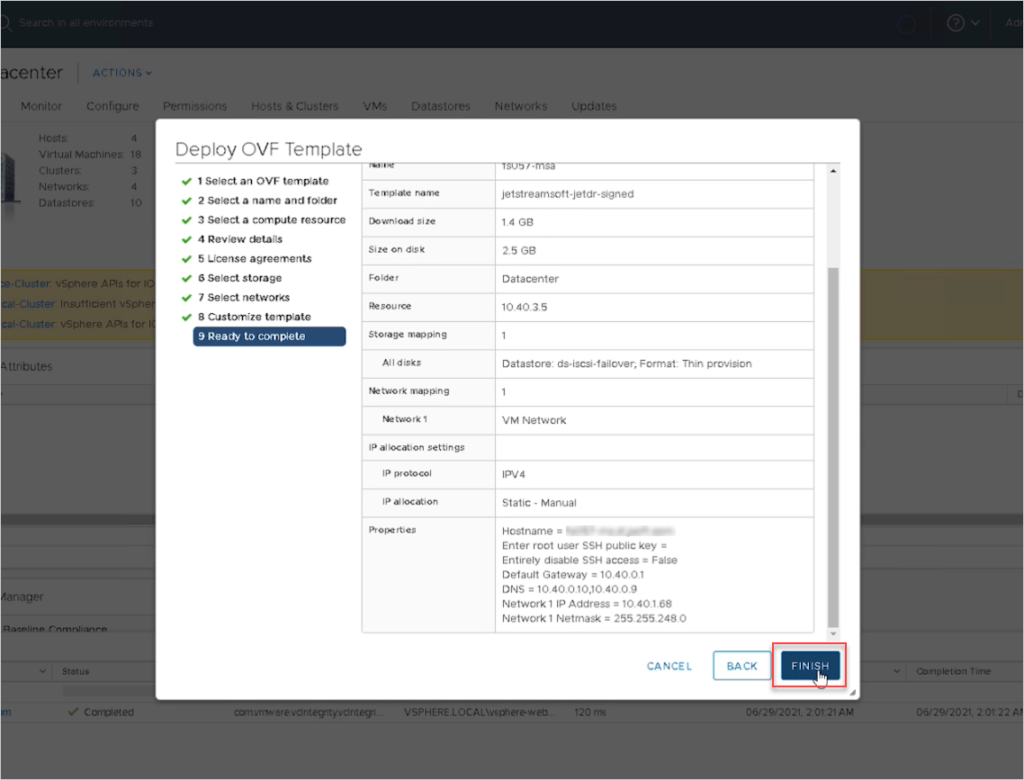
- Review the summary page then click the Finish button.
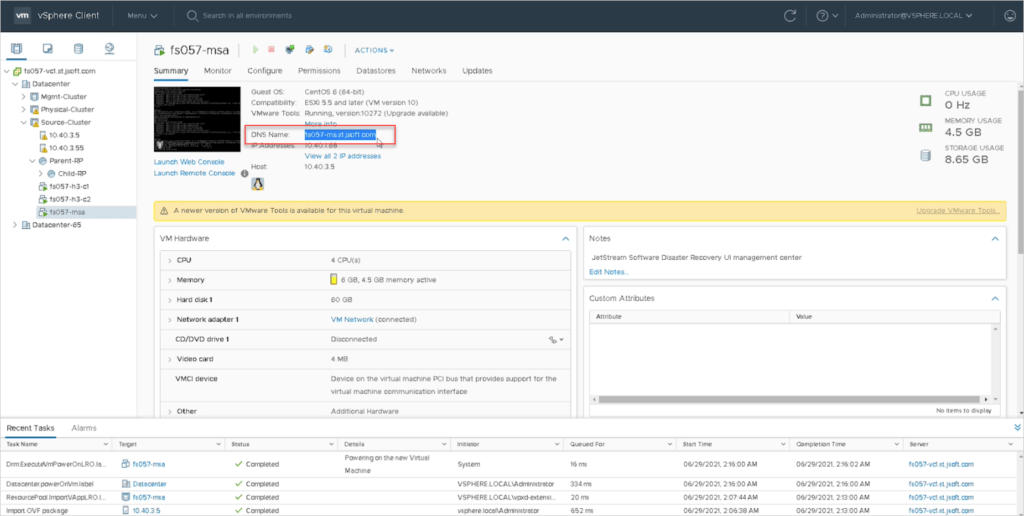
- After the MSA VM has deployed, power it on and copy its DNS name (it will be used in the following step).
Install the vCenter Server plugin
The final step of installation is to register the vCenter Server with the Management Server Appliance.
- Open a browser window and launch the MSA using its DNS name.
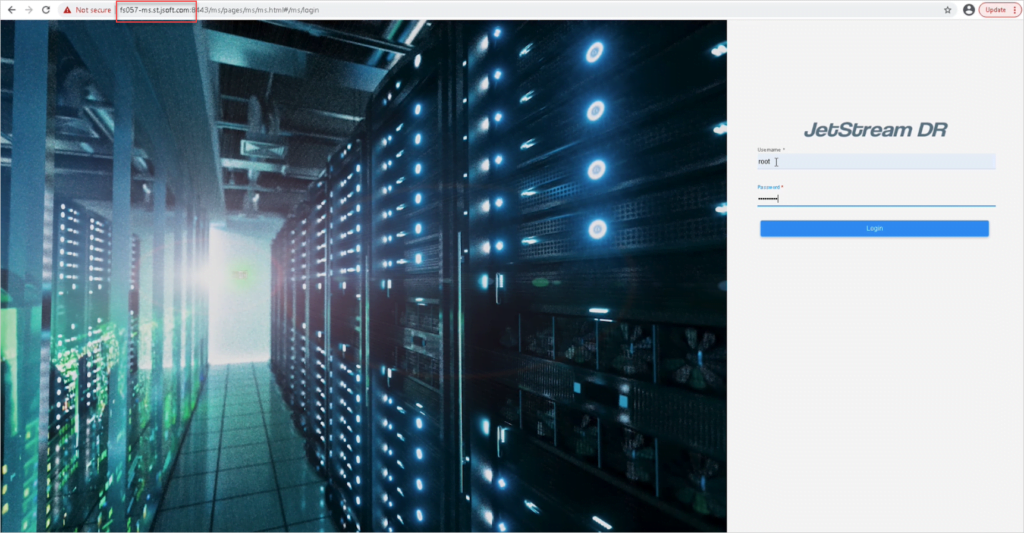
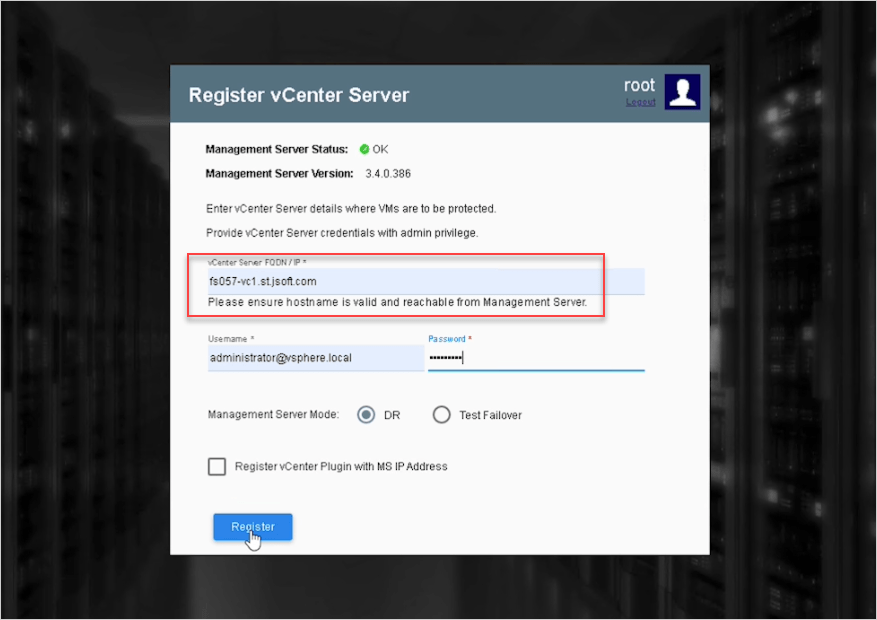
- Register the vCenter server with the MSA. Note the FQDN – it will be used to log into the vCenter server.
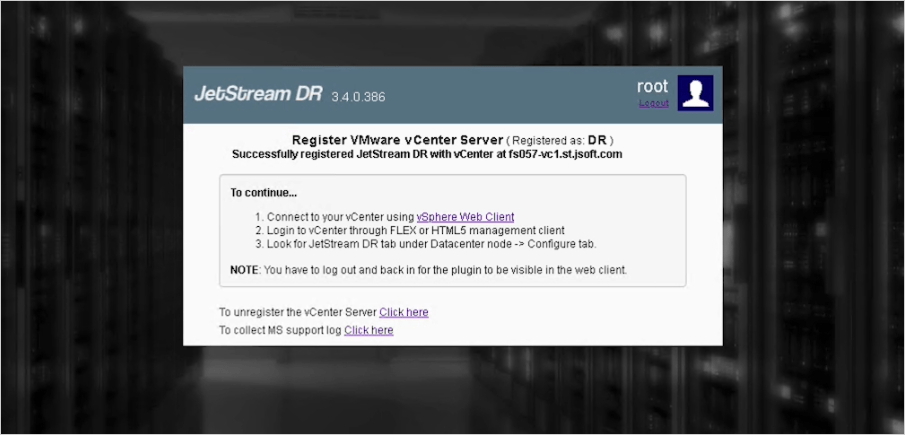
- vCenter server is now registgered with the MSA.
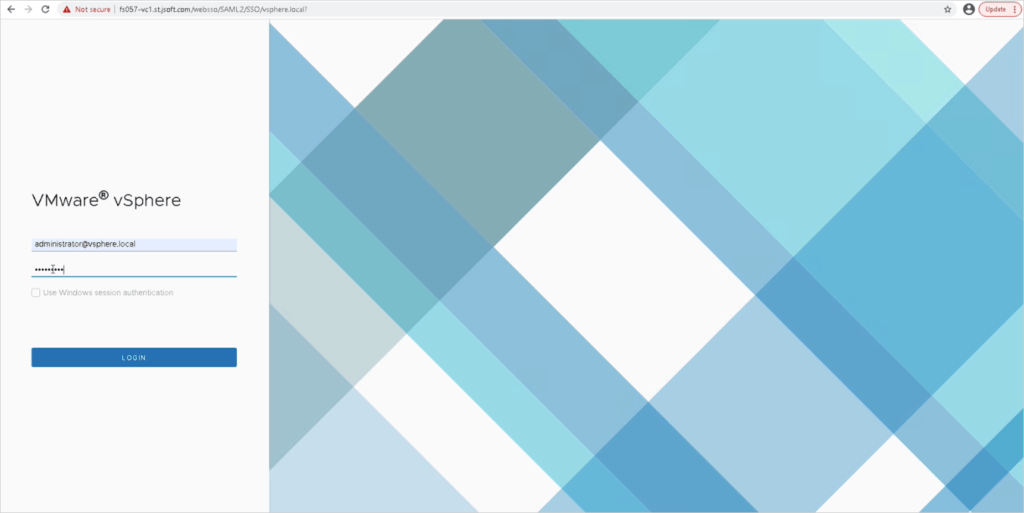
- Using a browser window, log into the registered vCenter server.
- JetStream DR software can now be accessed from within vSphere.
