Failback Protected VMs
Failback of protected VMs is conducted from the AROVA UI and its operation is fully automated.
These actions are orchestrated by AROVA during failback:
- Create secondary disks and start replication for all VMs of the Domain.
- Complete initial synchronization of RGs and independent VMs.
- The VMs are now recoverable at this stage.
- Stop (power-off) all VMs in the Domain.
- Stop all disk replication.
- Delete all VMs from the secondary region Domain.
- Disks of the VMs will also be deleted even if the deletion rule: "keep disk" is on.
- Create and power on recovered VMs in the primary region.
- If any VM’s properties are not compatible with the primary region or it does not have appropriate resources, the VM will be skipped. (This is handled in a manner similar to that for failover described previously.)
- Delete old Consistency Groups.
- Finalize failback (update CDB, cleanups, etc.).
- Start forward replication (protection) for Protected Domain VMs according to PDAR design.
Example
The following example illustrates working with a single Protected Domain with one 3-VM Recovery Group and one independent VM:
- Navigate to the Protected Domains screen.
- Select a Protected Domain to view its details screen.
- Click the Failback option.
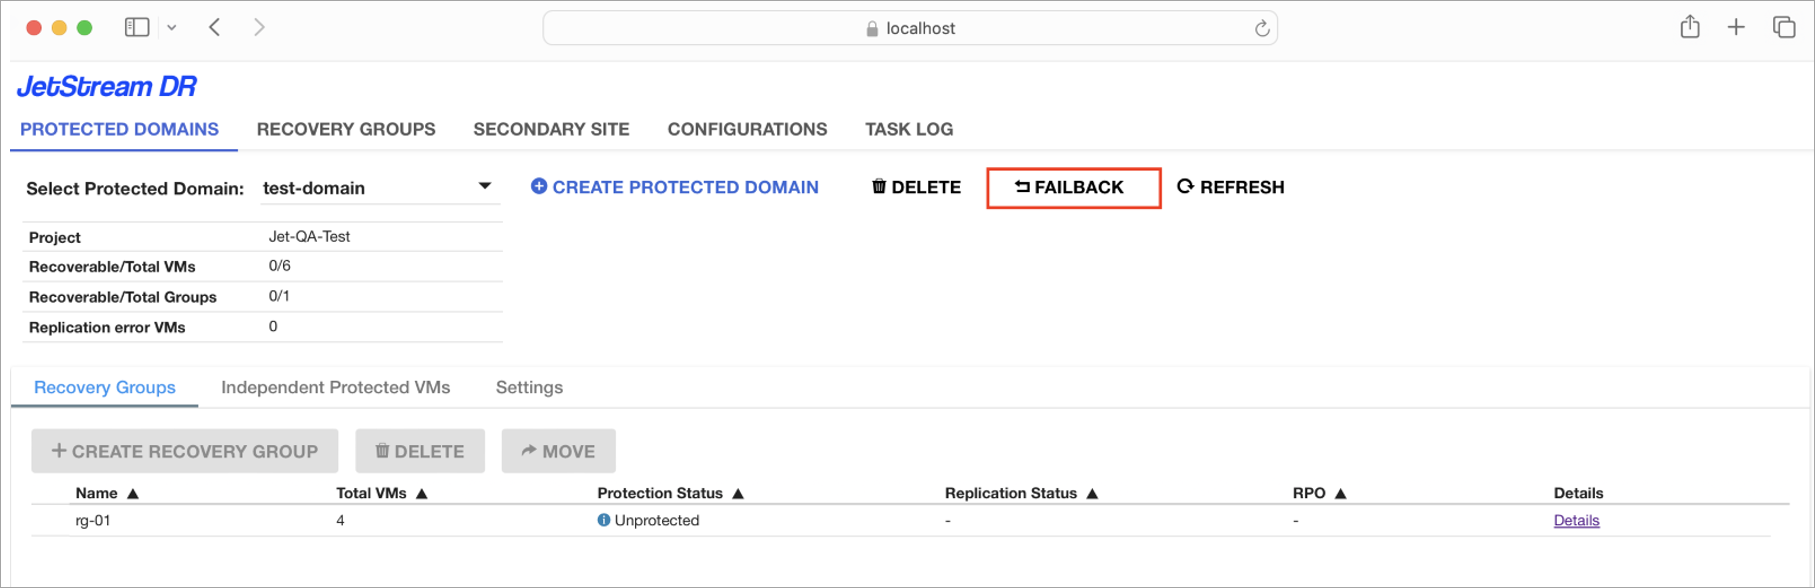
Figure: From the within the Domain, click the Failback option.
- A window will appear showing the VMs of the Domain that will be failed back.
- Specify secondary zones for the VMs.
- Click the Failback button.
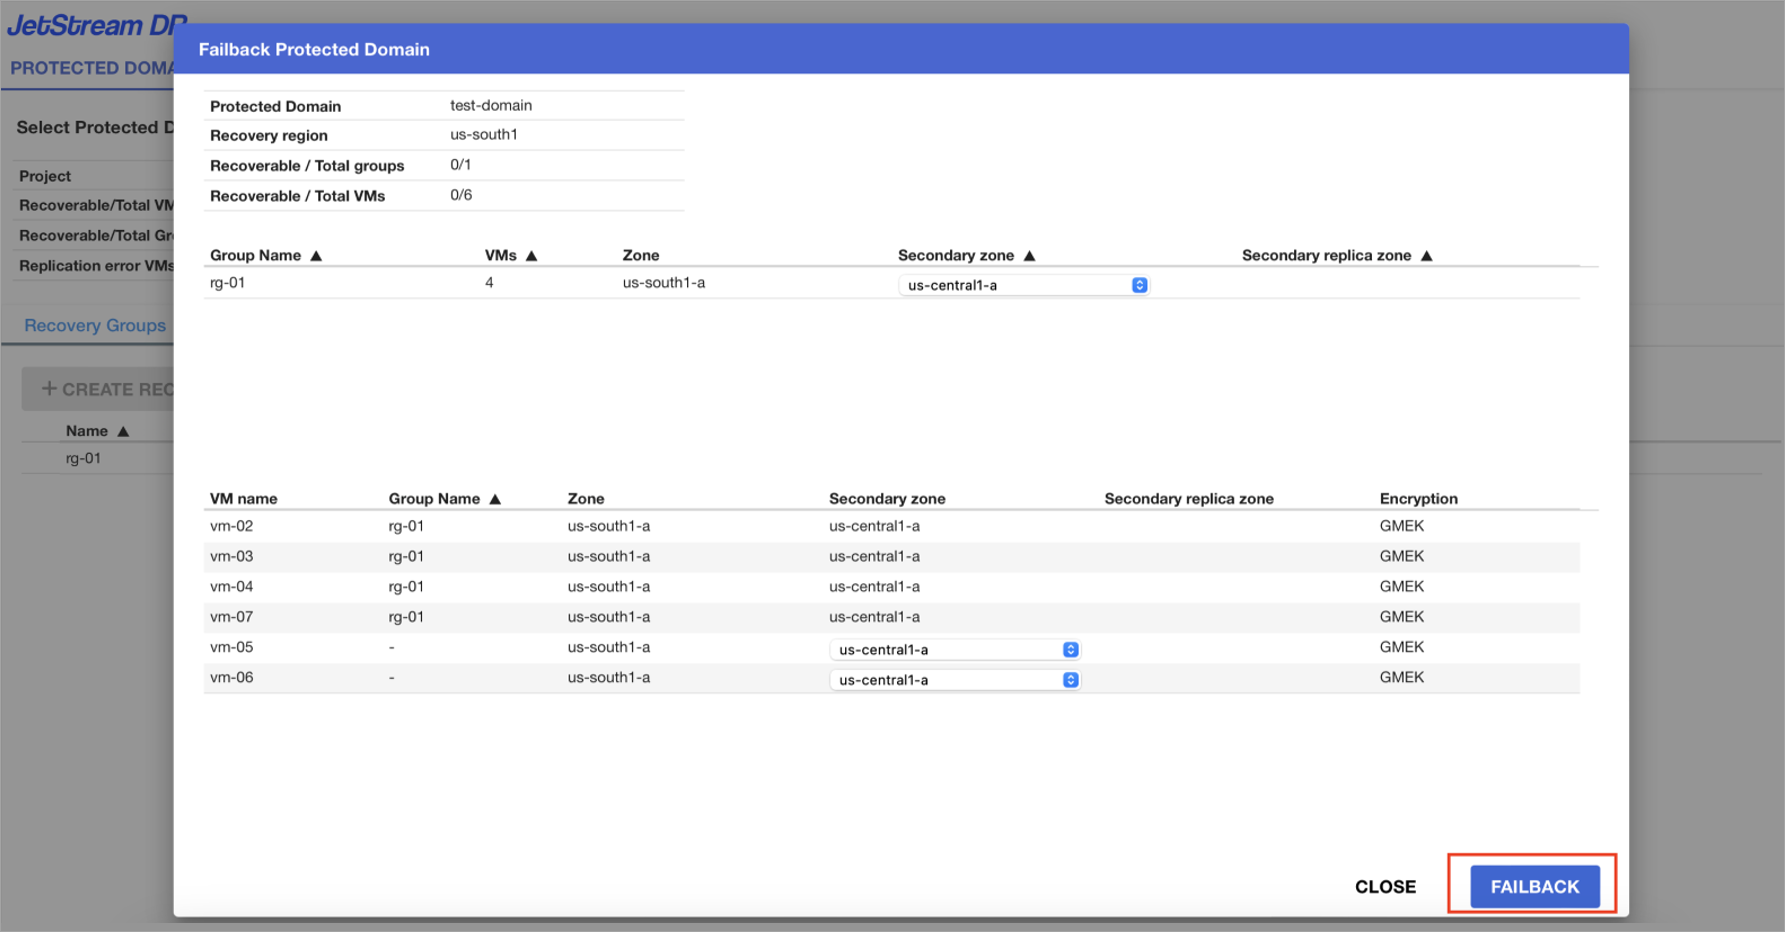
Figure: Specify secondary zones for failback VMs.
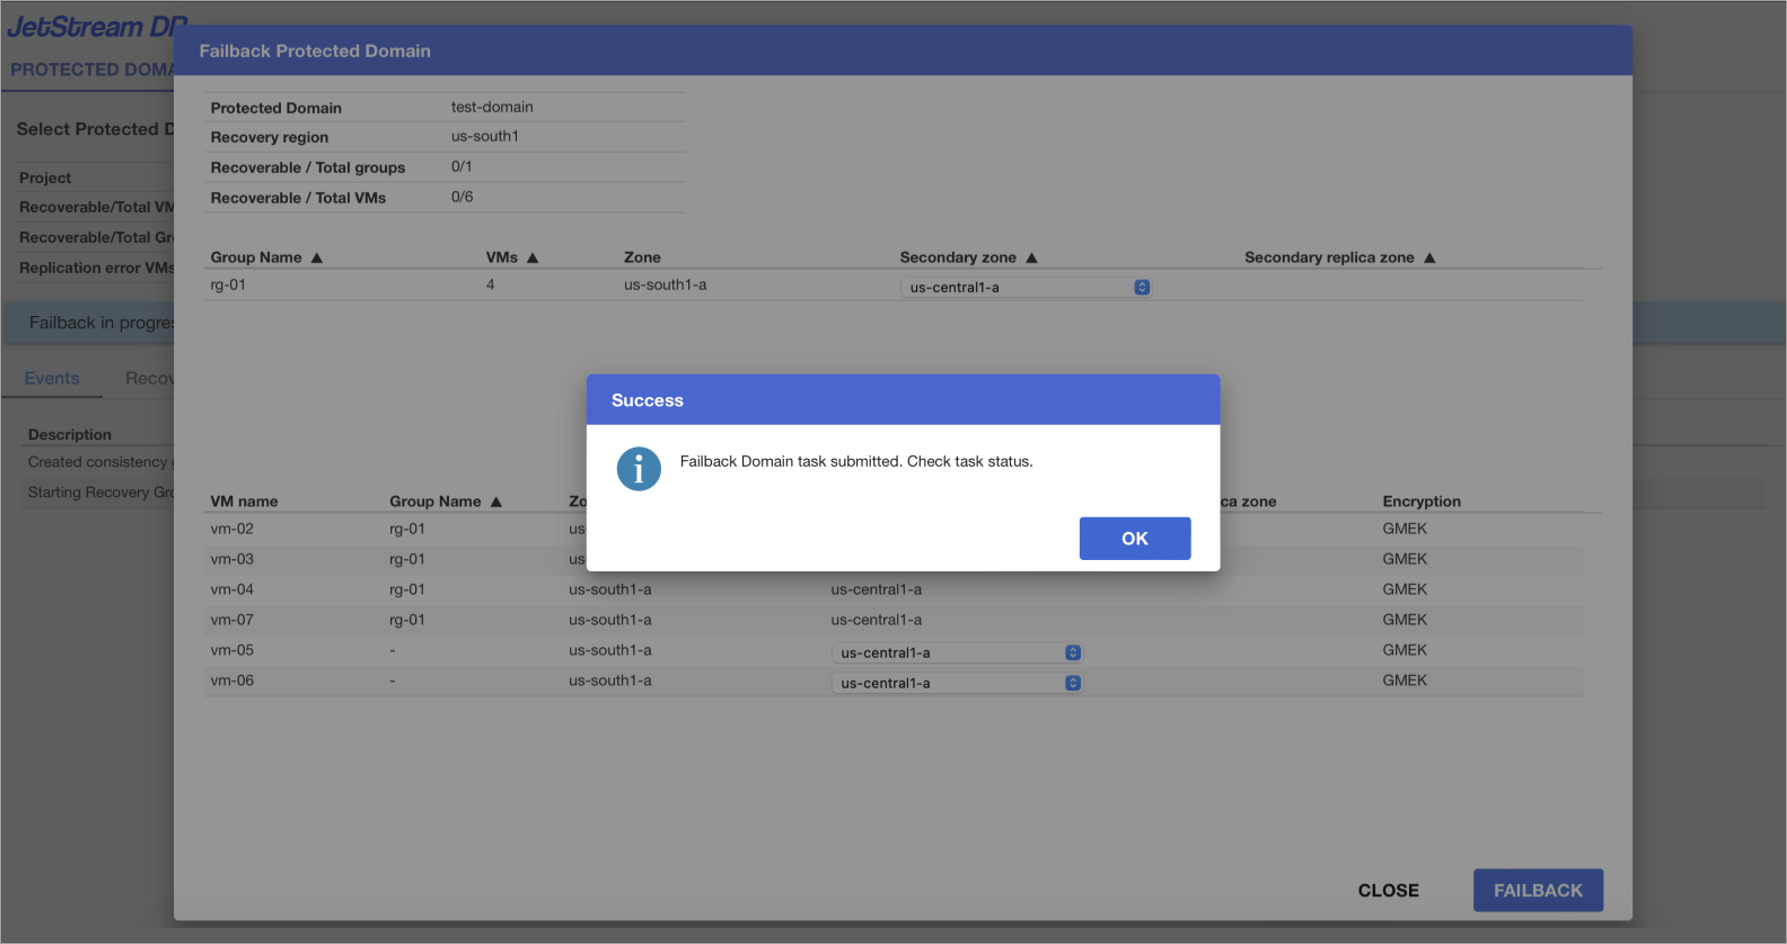
Figure: Failback starts.
- Click the Task Log tab to view details about the failback task and VM replication.
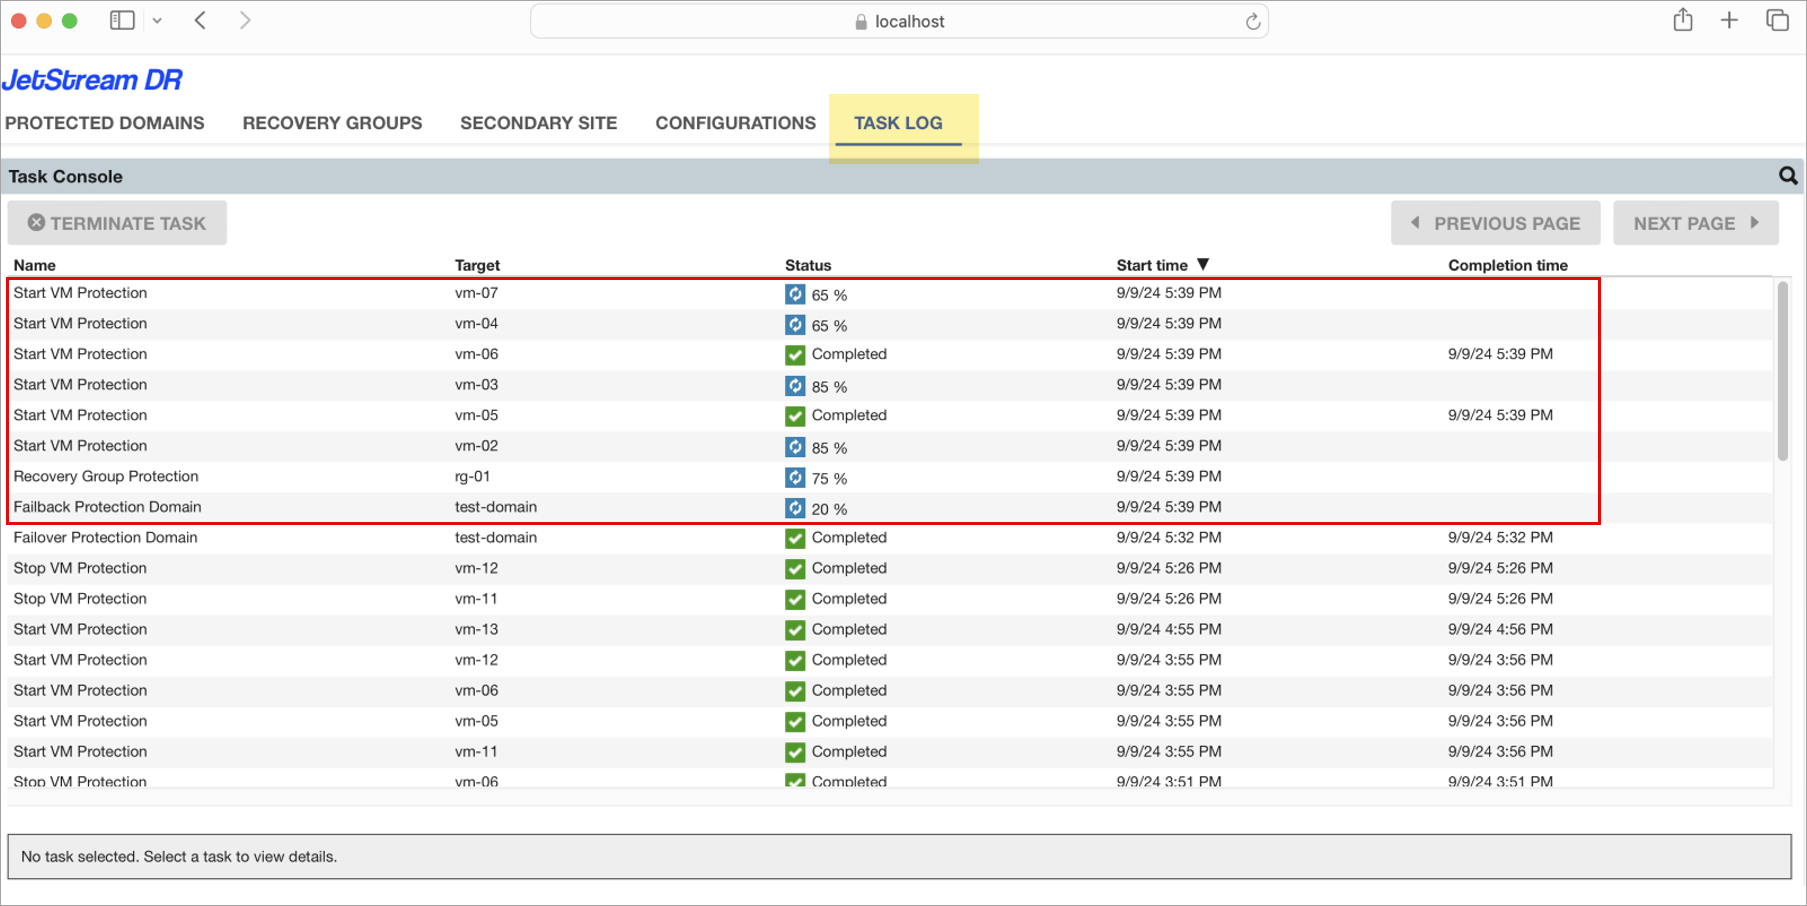
Figure: The Task Log displays details of the failover and VM replication jobs.
- A dialog window will appear when the failback task is complete.
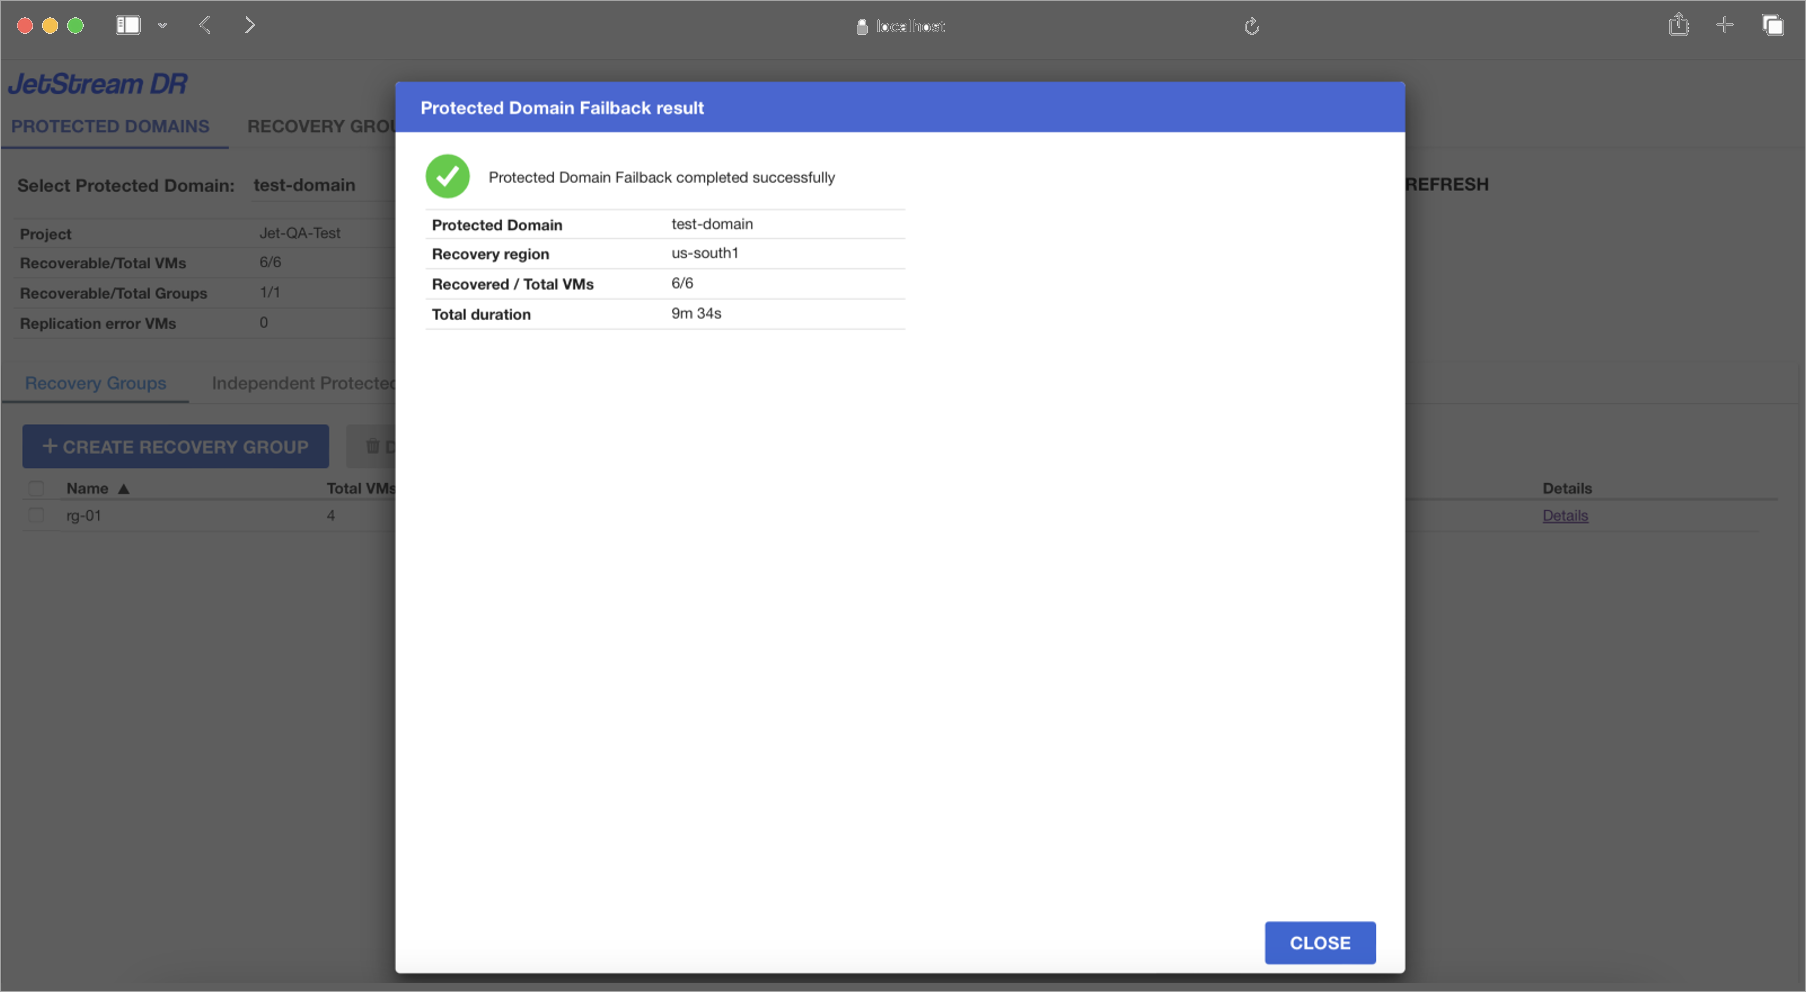
Figure: The failback task is complete.
Note: If the Domain contains a Recovery Group that has an associated Runbook, the Runbook will be applied to the RG VMs during failback.
Also see:
View: Cleaning the Primary Region