Recovery Group
A Recovery Group is a group of VMs that are replicated together and recovered to the same point in time, ensuring application consistency across the entire group.
- Under the Protected Domain tab, select the Recovery Groups tab then click the CREATE RECOVERY GROUP button to create a new Recovery Group.
- This will open a page listing all VMs associated with the protected project in the primary region.
- VMs that do not meet all protection requirements will appear grayed out.
- To see why a VM is not eligible for protection, hover the mouse over its row.
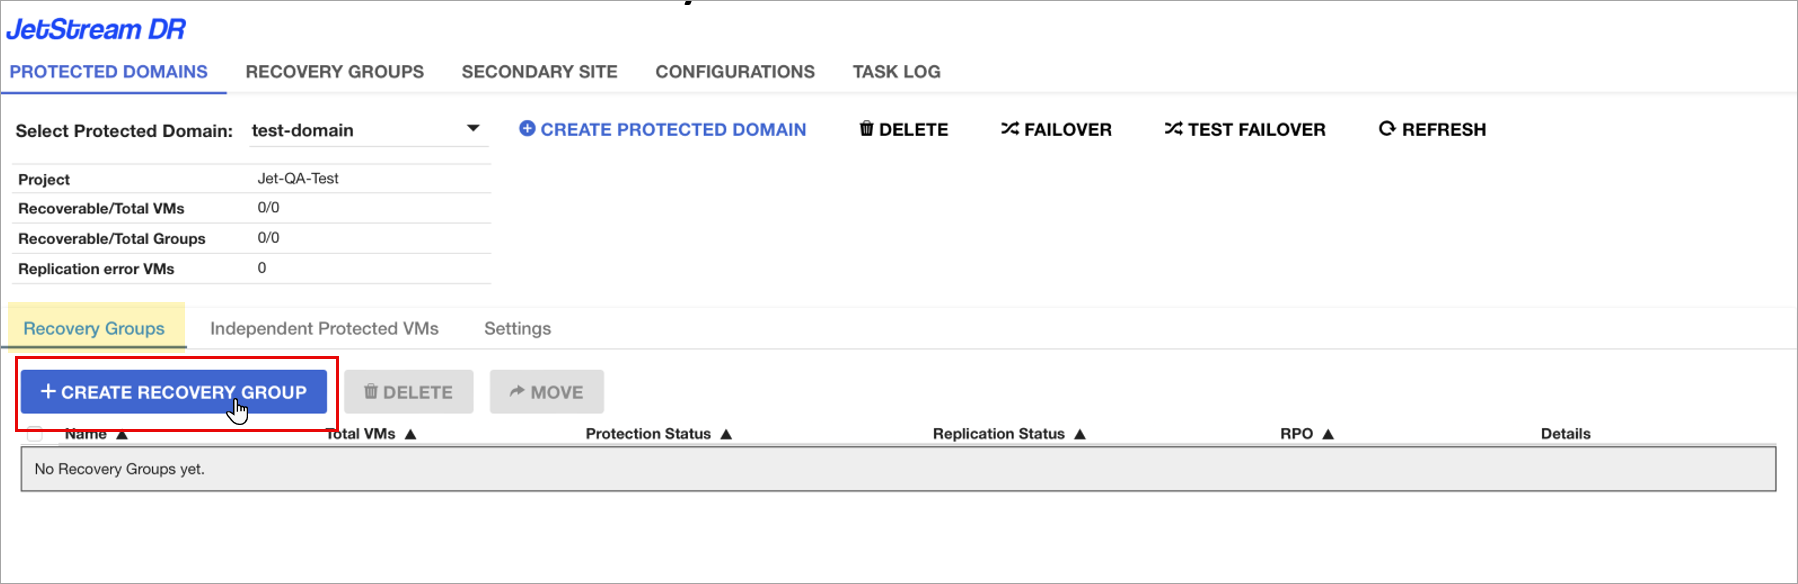
Figure 42: Create a new Recovery Group.
- Provide the inputs required to create the Recovery Group:
- Name – Name to uniquely identify the Recovery Group.
- Disk scope – Zonal or regional scope of the VM disks that will added to this Recovery Group.
- Disk zone – Zone where VM disks are located.
- Disk replica zone – For regional disks, specify replica zone of the VM disks.
- Secondary zone – Zone in the secondary region where VM disks will be replicated.
- Secondary replica zone – For regional disks, specify a replica zone for secondary disk replicas.
- Disk Encryption – If disk encryption is CMEK, configure the key for secondary disks.
- Instance Encryption – If VM instances are encrypted using CMEK, configure the key to apply to recovered VMs.
- Select VMs to include in the Recovery Group.
- Click the CREATE button.
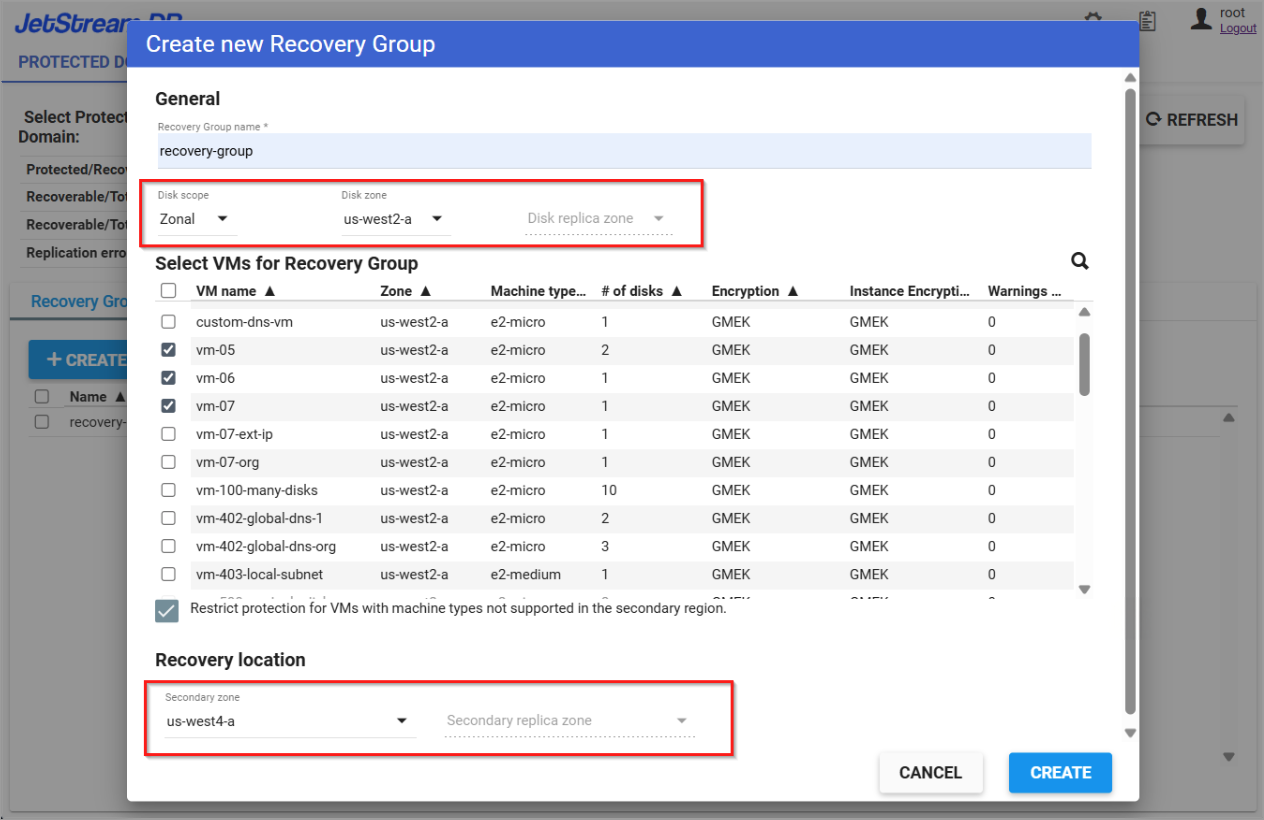
Figure 43: Name the Recovery Group and specify its details.
- Once the Recovery Group has been created, the UI redirects to the Recovery Groups tab, where you can view its details and status.
- Clicking the Details link will expose status information about each of the VMs included in the Recovery Group.
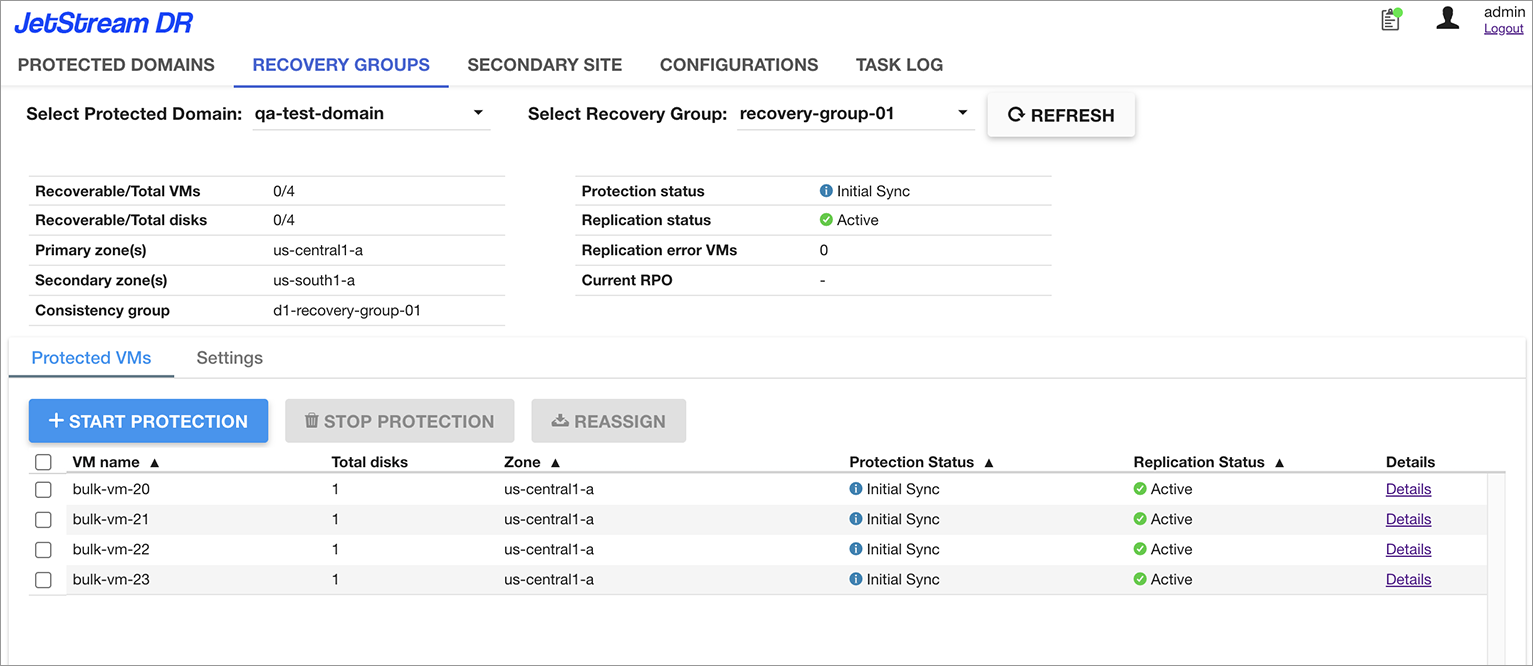
Figure 44: View Recovery Group VM status details.