Configure Test Failover
Do the following to configure and start a test failover session:
- Go to the recovery site.
- On the Storage Sites screen, click the Scan Domains button then import the Protected Domain to test.
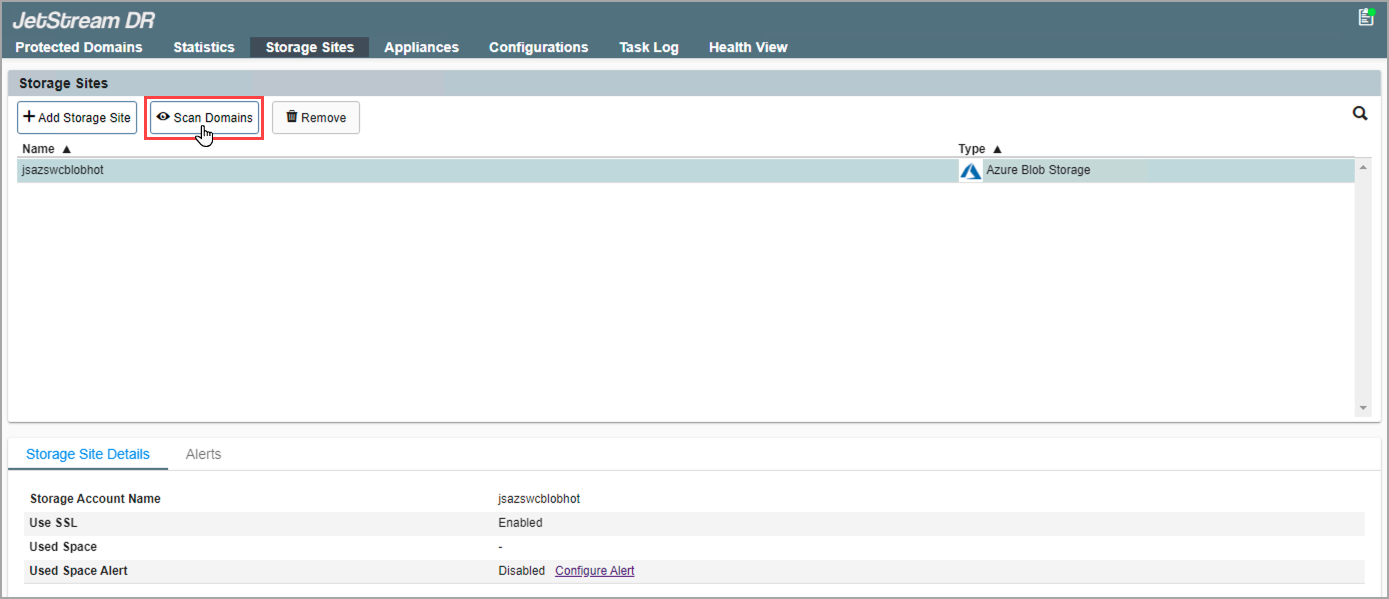
Figure 236: Scan Protected Domains from the storage site.
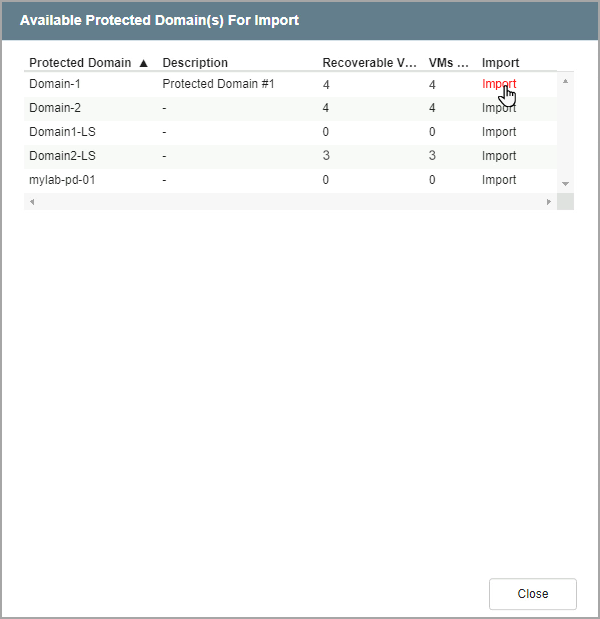
Figure 237: Import a Protected Domain.
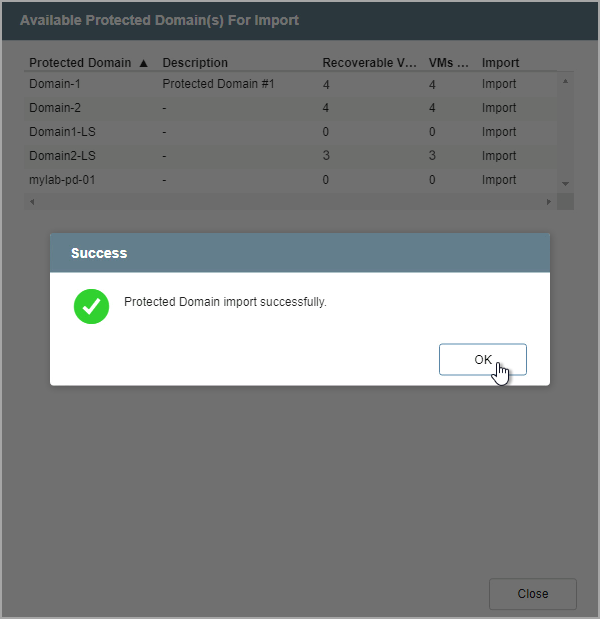
Figure 238: The Protected Domain has been imported.
- On the Protected Domains screen, open the More menu and select the Test Failover option.
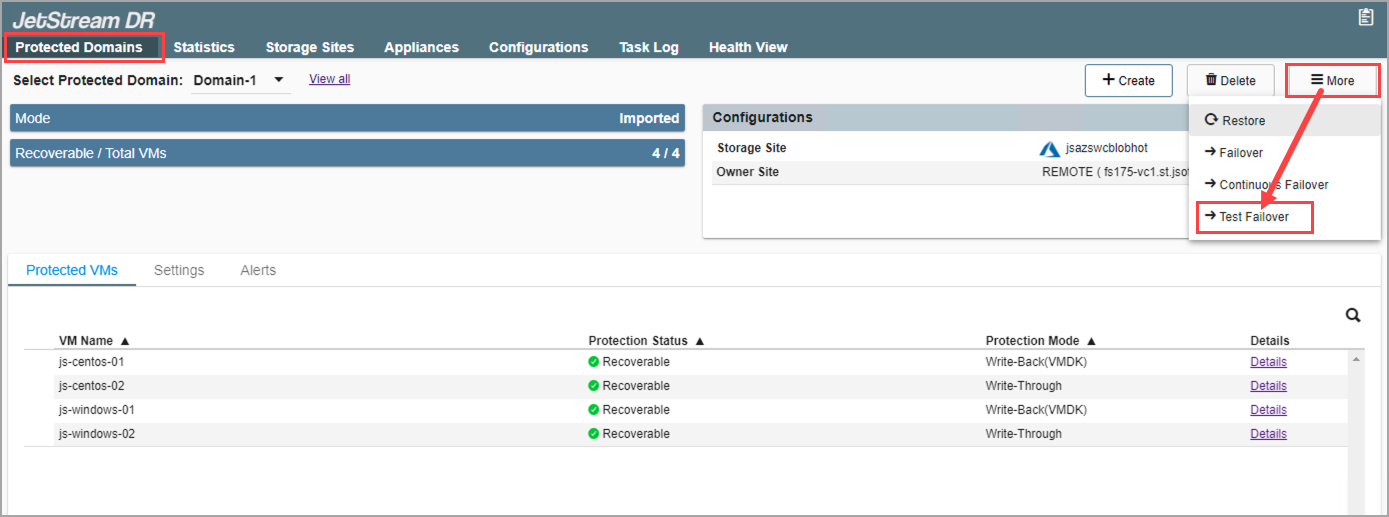
Figure 239: Select the Test Failover option.
- A message will appear announcing conditions necessary to test failover. Click the Continue button.
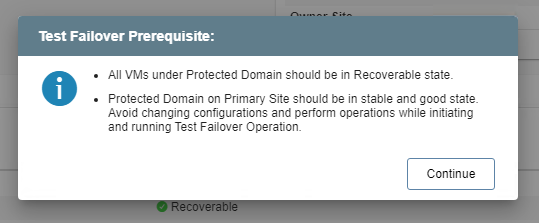
Figure 240: Test failover prerequisites are announced.
- Follow the guided steps of the dialog window to configure test failover.
Note: The steps and parameters specified for test failover are essentially the same as used for failover in the actual production environment.
Step: General
- Review the Protected Domain name and selected storage site.
- If the information is correct, click the Next button.
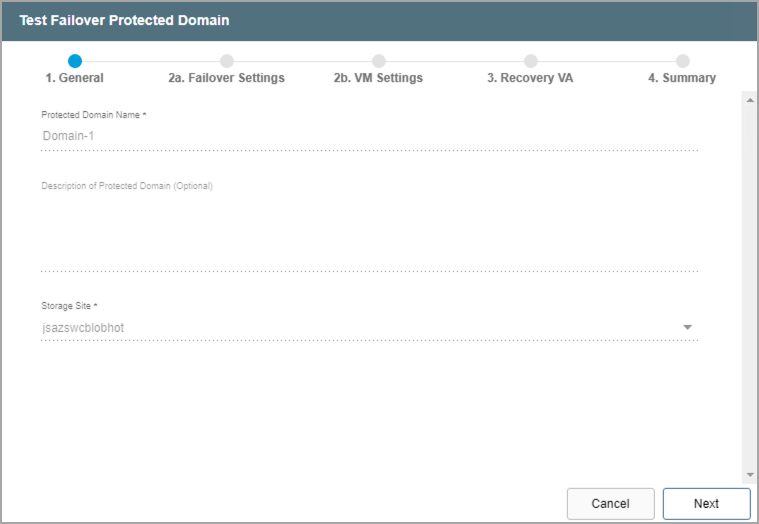
Figure 241: Review details of the imported Domain.
Note: This step does not display the "estimated data to be protected" or PITR values of the Domain. These functions are not applicable since data and ownership will not be transferred to the recovery site.
Step: Failover Settings
- Make selections from the drop-down menus to specify recovery settings of the recovery site, including: datacenter, cluster, resource pool, and datastore.
- Select options to automatically start recovery groups and gracefully shut down VMs.
- Click the Next button.

Figure 242: Configure failover settings.
Step: VM Settings
- Map a recovery VM network to the protected VM network.
- Specify a storage policy for VMs (optional).
- Click the Next button.
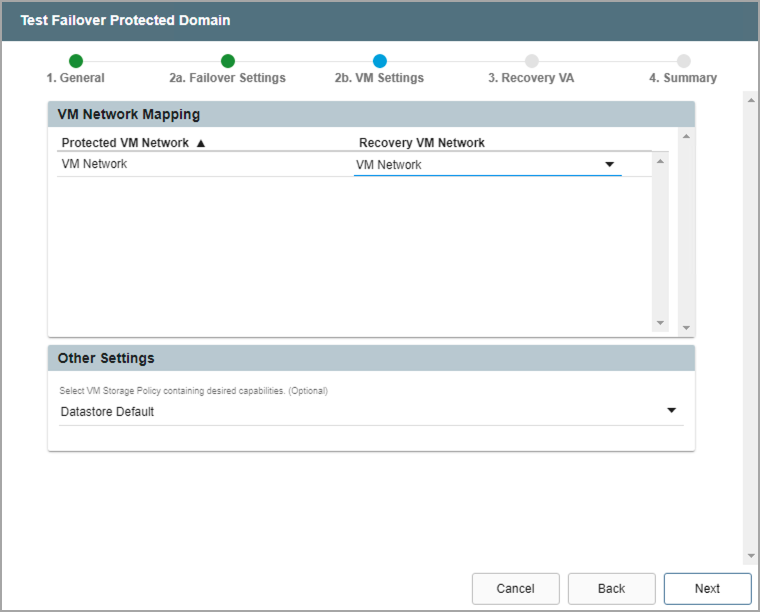
Figure 243: Configure VM settings.
Step: Recovery VA
- Specify network settings for the Management Network, Host (IOFilter)/RocVA to DRVA Network, and Recovery Network to Object Store.
- DHCP will be used by default.
- Static IP addresses can be manually assigned by de-selecting the Apply same network settings to all checkbox then selecting a network's Static IP checkbox and clicking its Configure button.
- A mix of static and dynamic IP addresses can be used.
- Specify a Default Gateway Network.
- This is not necessary if DHCP is used.
- Click the Next button.
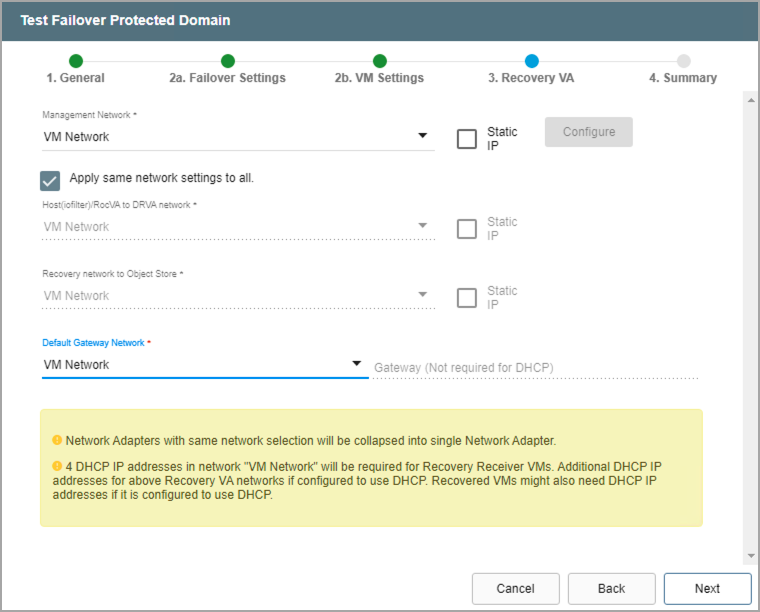
Figure 244: Configure a recovery virtual appliance (RocVA).
Step: Summary
- Review all entered settings on the Summary step.
- Use the Back button to modify any settings that need to be changed.
- Click the Test Failover button to begin the failover process.
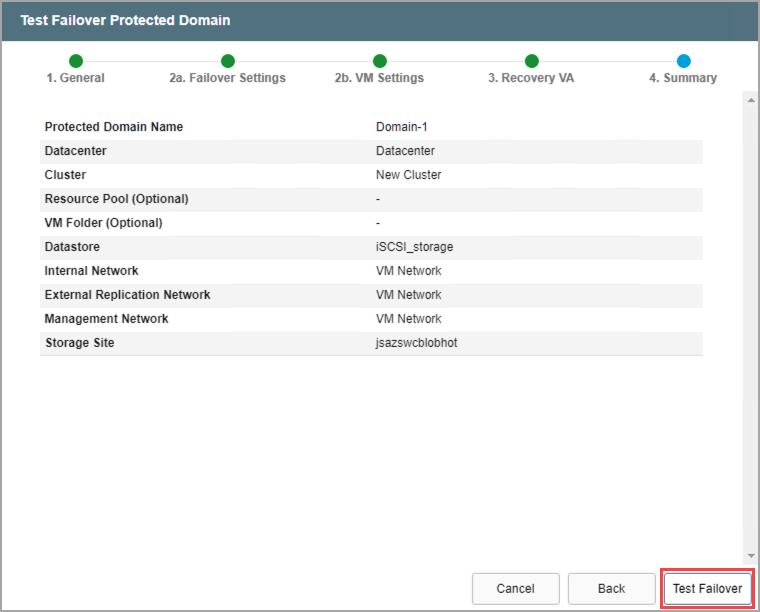
Figure 245: Review settings then start the test failover process.