Configure and Start Failover
A pop-up dialog window appears with guided steps to configure and start failover:
Note: The configuration steps are the same for both Failover and Continuous Failover modes; however, steps to complete failover are unique for each failover mode.
Step: General
- Review information about the imported Domain to be failed over.
- If the information is correct, click the Next button.
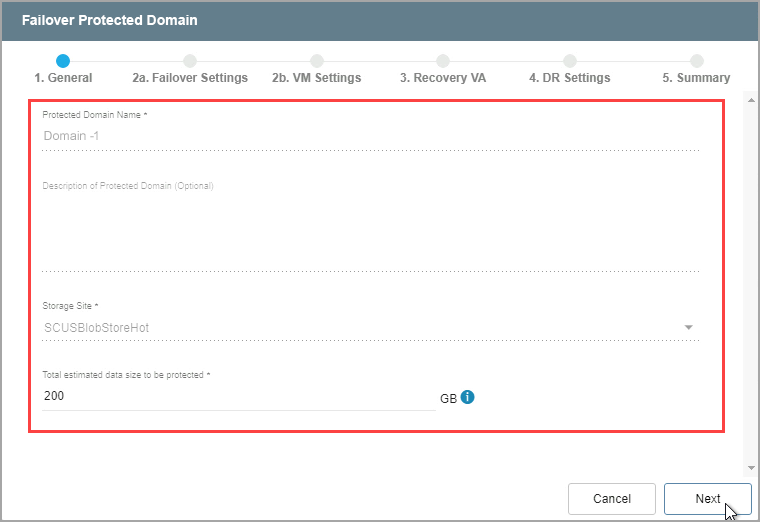
Figure 206: Review details of the imported Domain.
Step: Failover Settings
- Make selections from the drop-down menus to specify recovery settings of the recovery site, including: Datacenter, Cluster, Resource Pool, VM Folder, and Datastore.
- Specify a failover type (post-failover state). Different sub-options may appear depending upon your selection:
- Indicate if PITR (Point-In-Time Recovery) should automatically be launched after the VMs have been failed over.
- This only applies if the Domain was created with the PITR option enabled.
- Click the Next button.
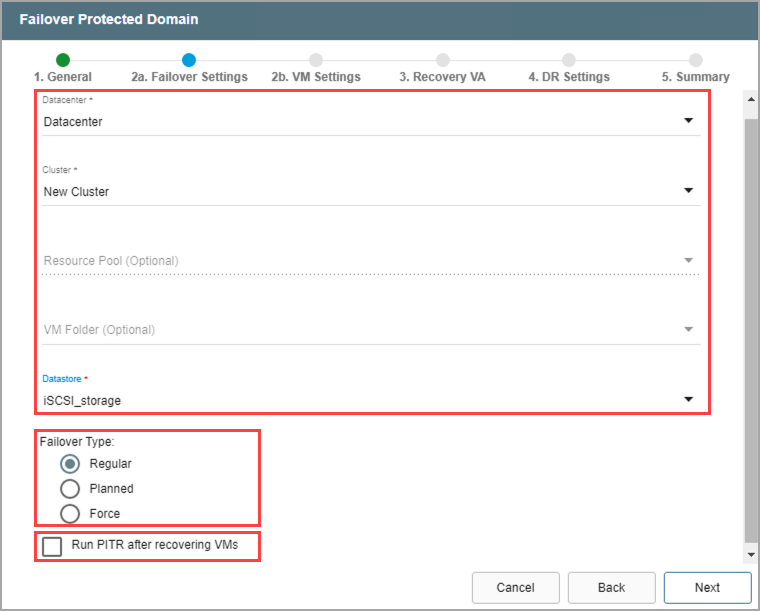
Figure 207: Configure failover settings.
Step: VM Settings
- Map a Recovery VM Network to the Protected VM Network.
- Specify a storage policy for VMs (optional)
- If necessary, supply VM guest credentials for network configuration.
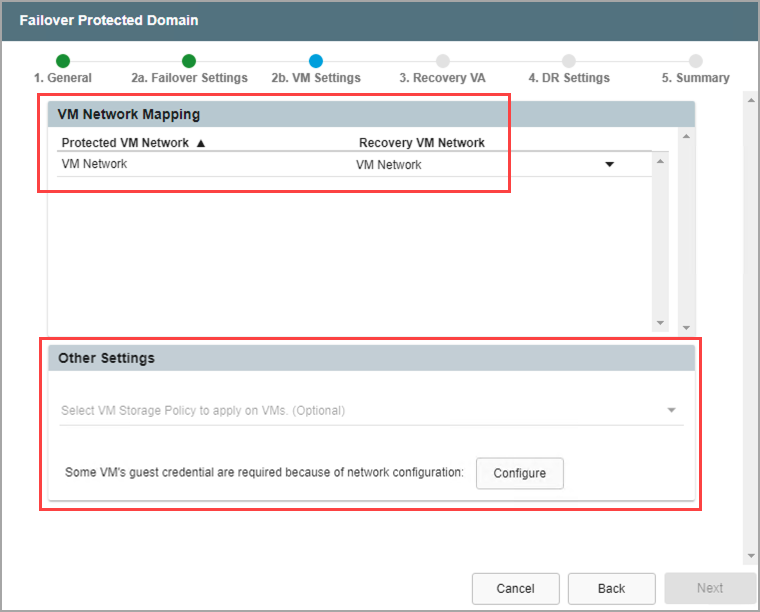
Figure 208: Configure VM settings.
- VM guest credentials are specified in a pop-up dialog window.
- Click the Save button when done.
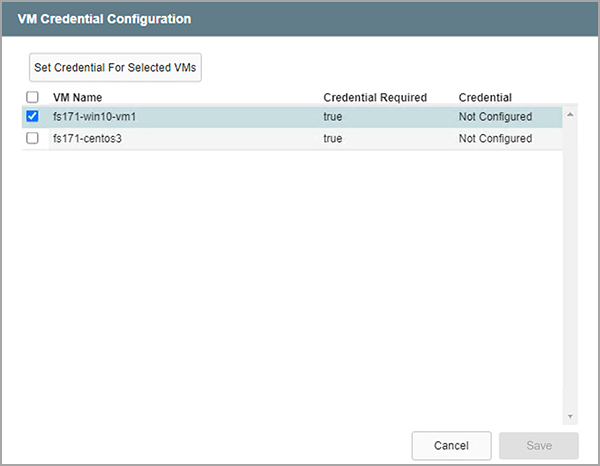
Figure 209: Configure VM guest credentials.
- Click the Next button on the main screen to move to the next configuration step.
Step: Recovery VA
- Specify network settings for the Management Network, Host (IOFilter)/RocVA to DRVA Network, and Recovery Network to Object Store.
- DHCP will be used by default.
- Static IP addresses can be manually assigned by de-selecting the Apply same network settings to all checkbox then selecting a network's Static IP checkbox and clicking its Configure button.
- A mix of static and dynamic IP addresses can be used.
- Specify a default Gateway Network.
- Click the Next button.
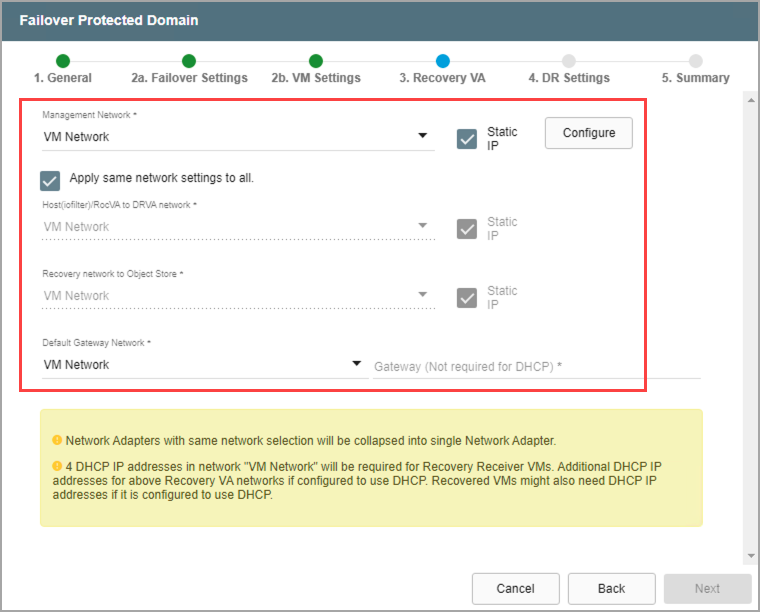
Figure 210: Configure a Recovery Virtual Appliance (RocVA).
Note: Learn more about Recovery Virtual Appliances (RocVA).
Step: DR Settings
- Select the DRVA and Replication Log Storage from the drop-down menus.
- Specify a Replication Log Size. (Note: Metatdata Size is not directly editable. It is derived from the Total estimated data size to be protected specified when the Protected Domain was configured – it can also be adjusted from the General step, above.)
- Click the Next button.
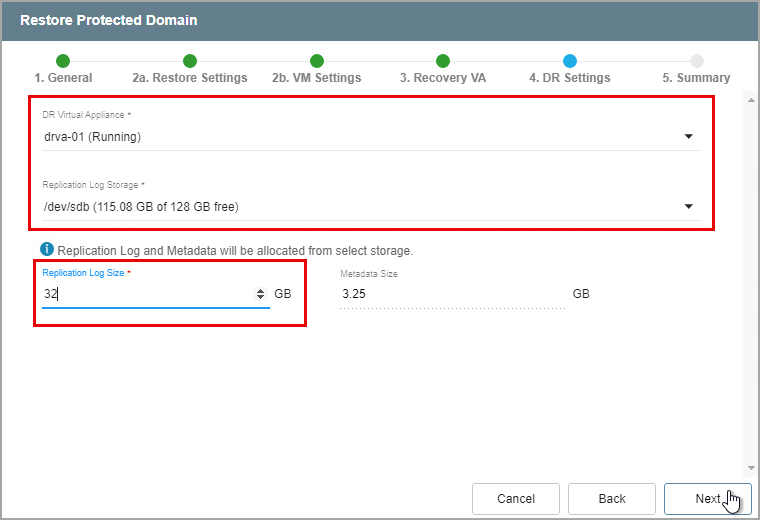
Figure 211: Specify DRVA and replication log details.
Note: The replication log and metadata will be allocated from the selected replication log storage.
Step: Summary
- Review all entered settings on the Summary step.
- Use the Back button to modify any settings that need to be changed.
- Click the Failover button to initiate the failover process.
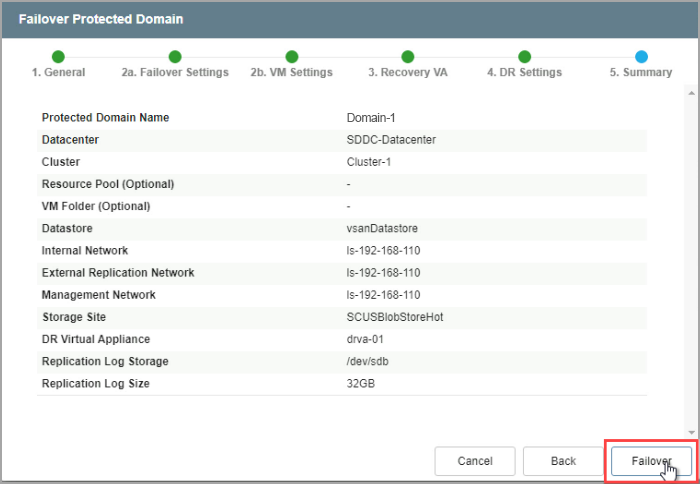
Figure 212: Review settings then start the failover process.
Note: The label of the failover button will indicate the failover mode being used (e.g., “Failover” or “Continuous Failover”).
- The failover process will begin and the mode of the Domain will change to "Failover in Progress."
- Details of each task step can be viewed by clicking the blue "info" icon of the Current Step section.
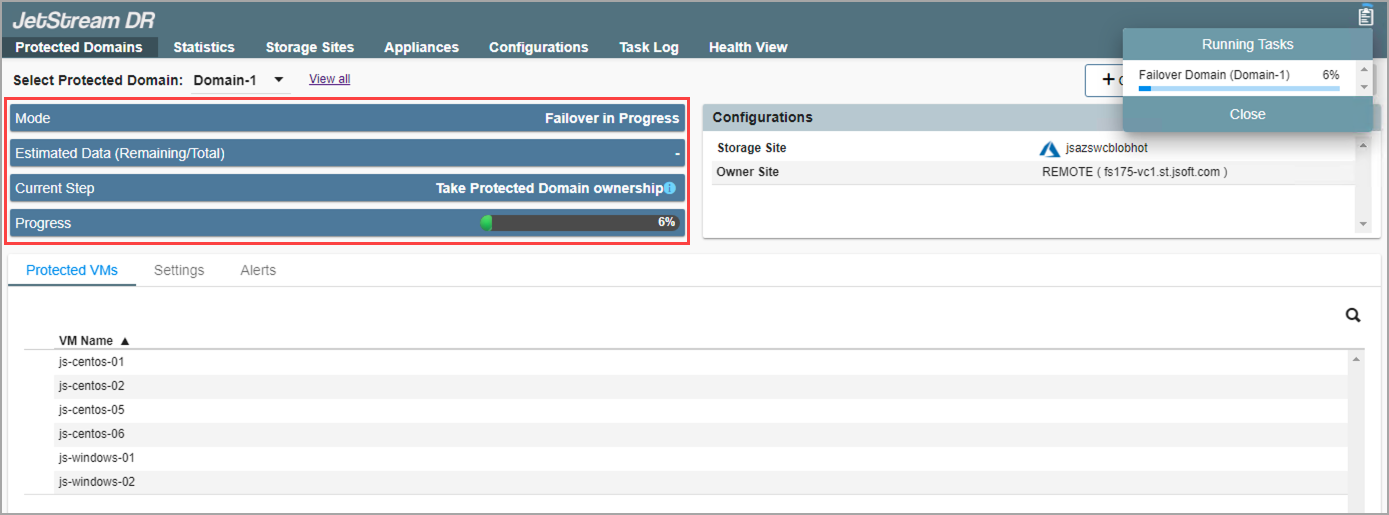
Figure 213: The failover process has begun.
Note: Failover is run as needed and is used to perform the entire process to recover Protected Domains to a recovery site. Continuous Failover mode should be configured and initiated prior to a disaster event. When a disaster occurs, "near-zero RTO" recovery can be performed by "completing" the failover process.
Also see: