Failover Settings
Failover can be operated in two different modes. Both failover modes are configured using the same steps; however, they differ at which point in time certain configuration steps are performed.
- Failover: steps are configured and performed together in response to a disaster event.
- Continuous Failover: can be configured at any point in time and then allowed to run in the background during normal system operation. After a disaster event has occurred, continuous failover is “completed” to immediately transfer ownership of the protected VMs to the recovery site (near-zero RTO).
- Start by selecting a failover mode.
- A pop-up dialog window will appear with guided steps.
Note: The initial configuration steps are the same for either failover mode.
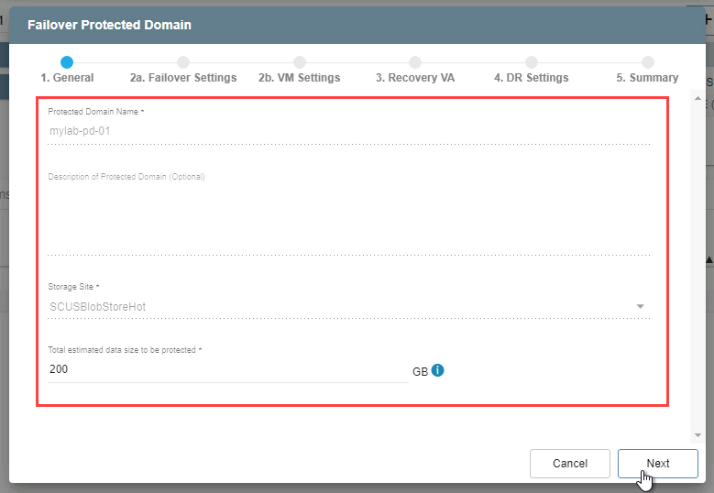
- General
- Review the information about the imported protected domain.
- If the information is correct, click the Next button.
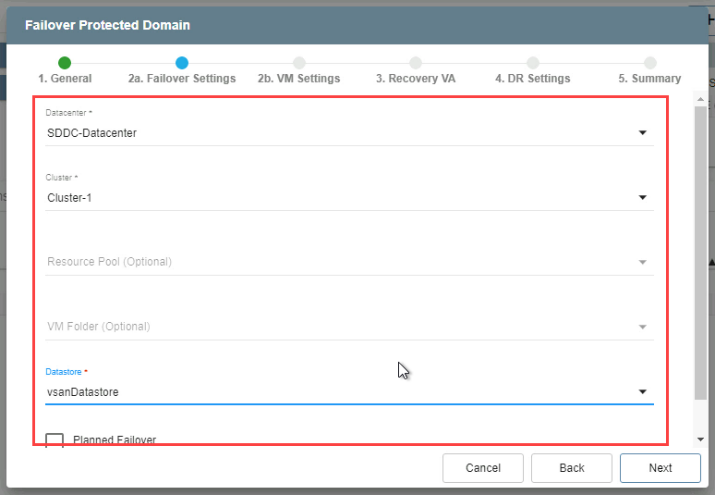
- (a) Failover Settings
- Make selections from the drop-down menus to specify the recovery site datacenter, cluster, resource pool (if any), datastore, and if it is a planned or forced failover.
- Click the Next button.
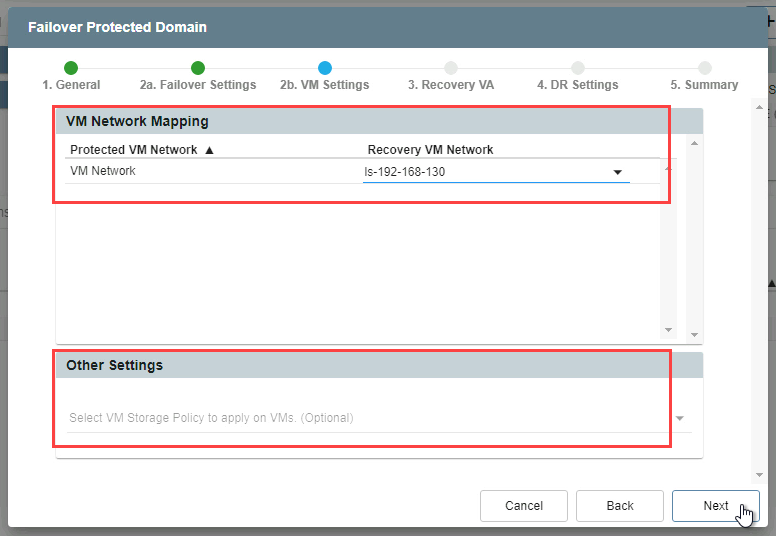
- (b) VM Settings
- Map a Recovery VM Network to the Protected VM Network.
- Specify a storage policy for VMs (optional).
- Click the Next button.
- Recovery VA
- Make selections from the drop-down menus to specify: Replication Network to Object Store, Host to DRVA Data Network, and Management Network.
- Click the Next button.
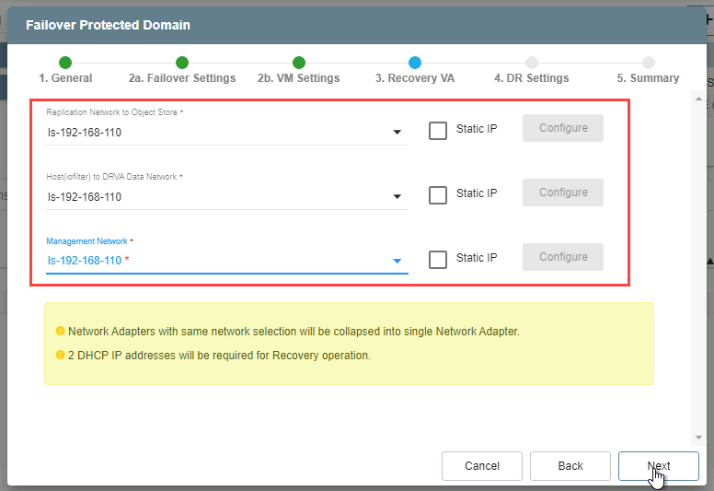
Note: Refer to Chapter 10 for additional information about RocVA.
- DR Settings
- Select the DRVA and replication log storage of the recovery site from the drop-down menus.
- Specify sizes for the replication log and metadata.
- Click the Next button.
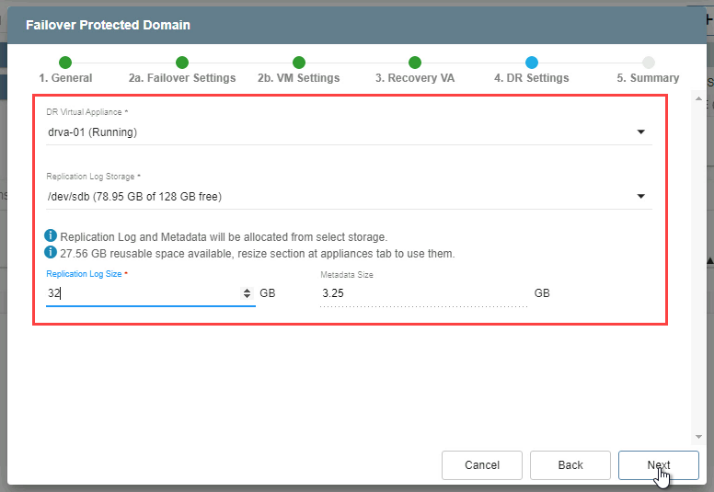
Note: The replication log and metadata will be allocated from the selected replication log storage.
- Summary
- Review all entered settings on the Summary step.
- Use the Back button to modify any settings that need to be changed.
- Click the Failover button to begin the failover process.
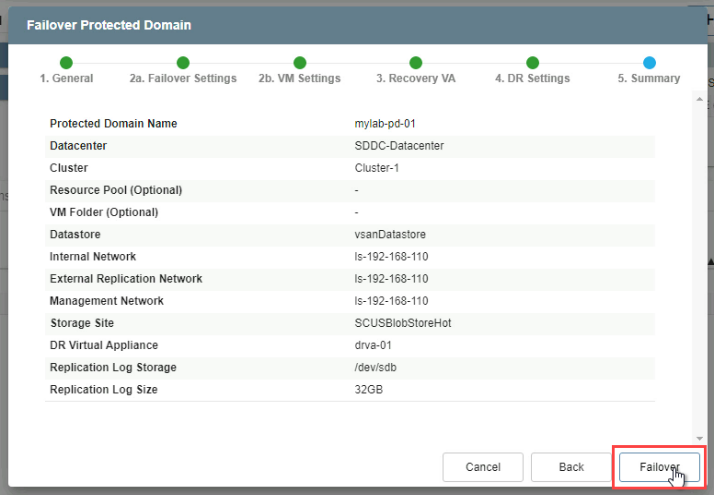
Note: The label of the failover button will indicate the failover mode selected (e.g., “Failover” or “Continuous Failover”)
- The failover process begins, and its progress can be monitored from the UI.
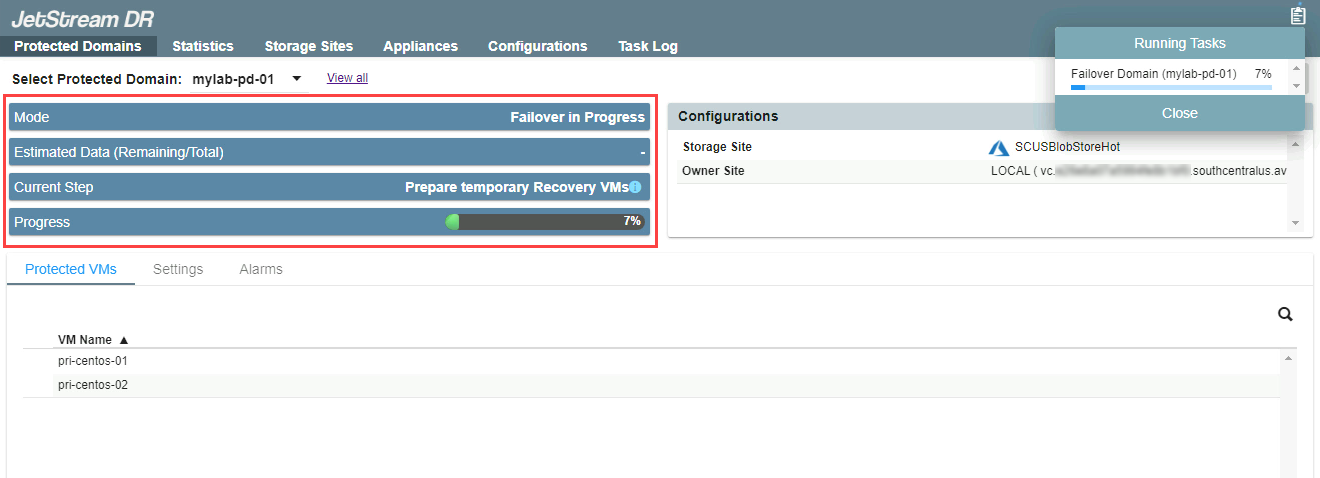
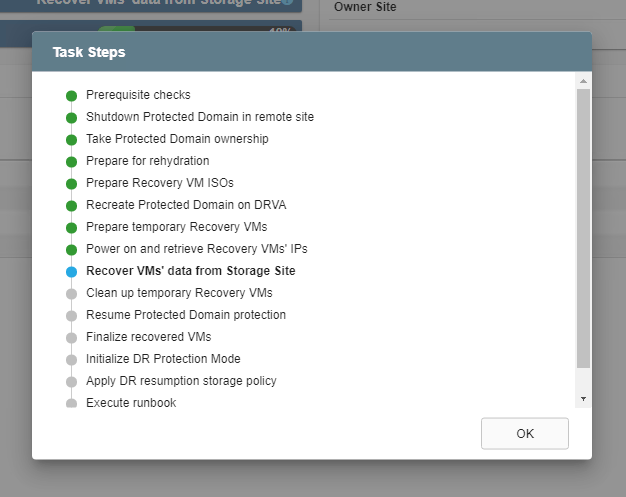
- Clicking the blue icon in the Current Step section exposes a pop-up window showing details of the current step of the failover process.

