Recover PITR VMs
Once the PITR session has started, it is possible to roll back the selected VMs and their data to previous points in time to test and restore them.
- On the Protected Domains tab while the point-in-time recovery session is active, open the More menu and select the PITR option.
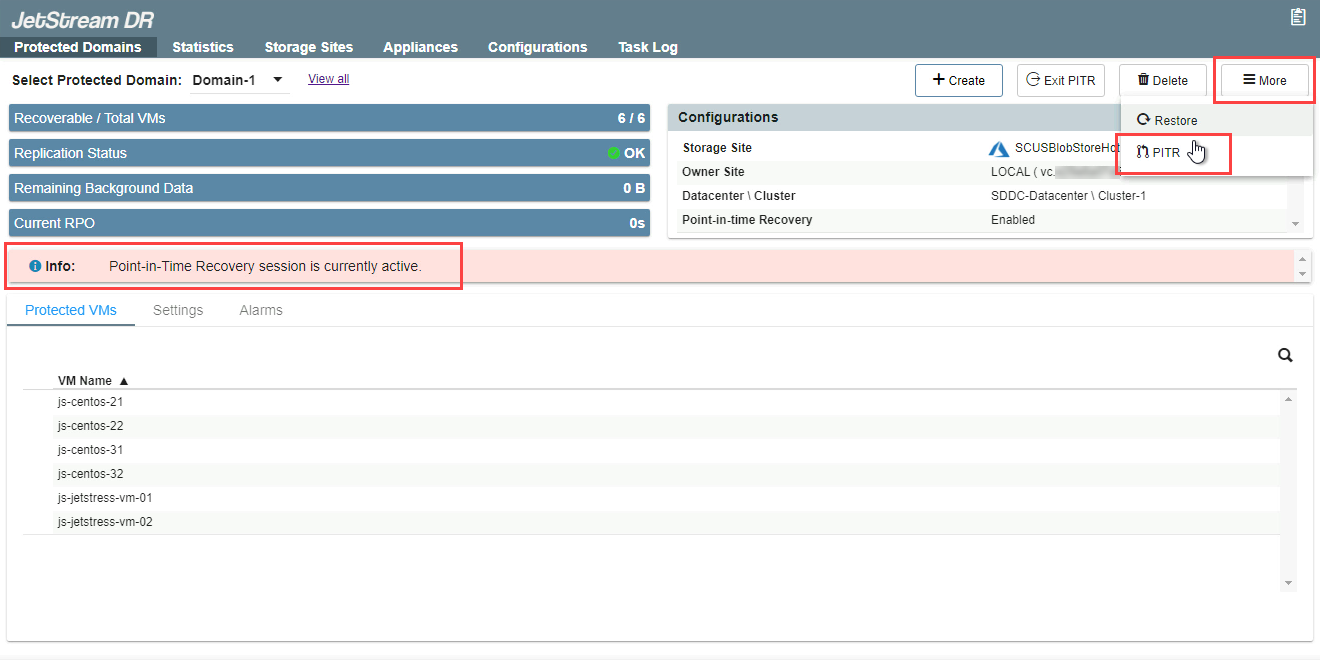
- Follow the guided steps of the pop-up dialog window that appears.
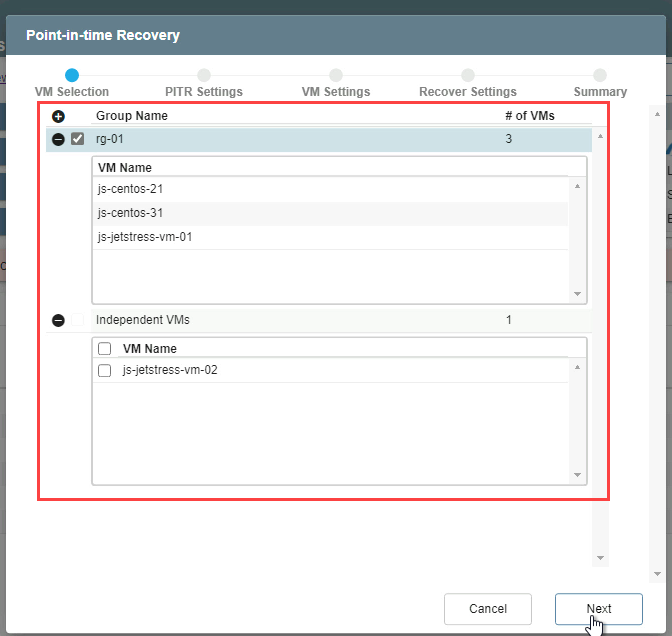
- VM Selection
- Select VMs from the list to recover.
- The full list of recovery groups and independent VMs added to the session will be displayed.
- Select the specific VMs you are interested in recovering and testing.
- PITR Settings
- Select a point in time to roll back the VMs and their data.
- Specify the day, hour, and minute to restore.
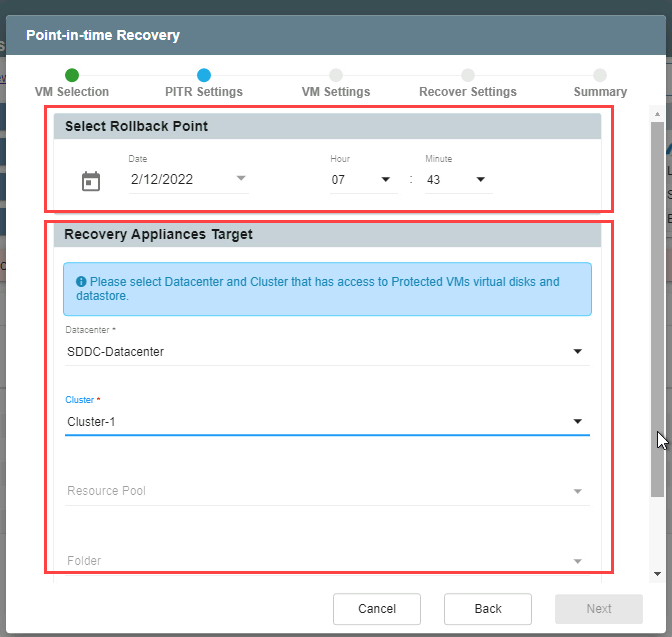
Note: The range of possible time is constrained by the time window chosen when the PITR protected domain was configured.
- VM Settings
- Specify details for the recovery target (datacenter, cluster, resource pool, datastore, etc.)
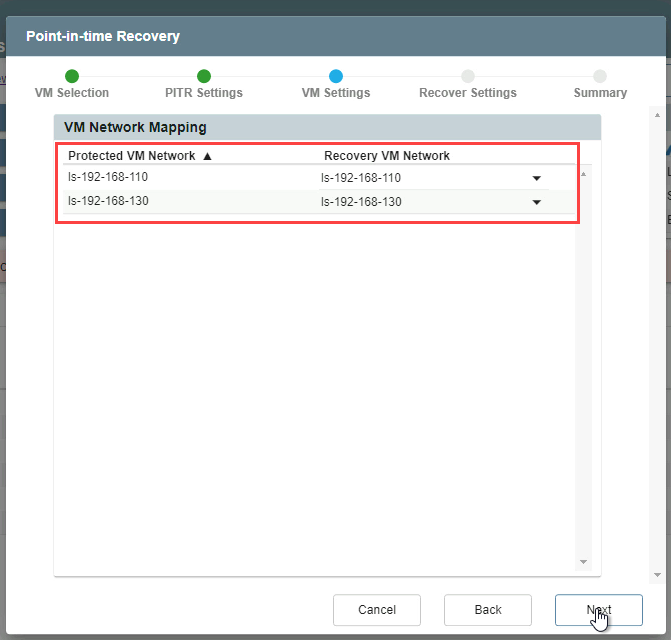
- Map Recovery VM Network(s) to Protected VM Network(s).
- Recover Settings
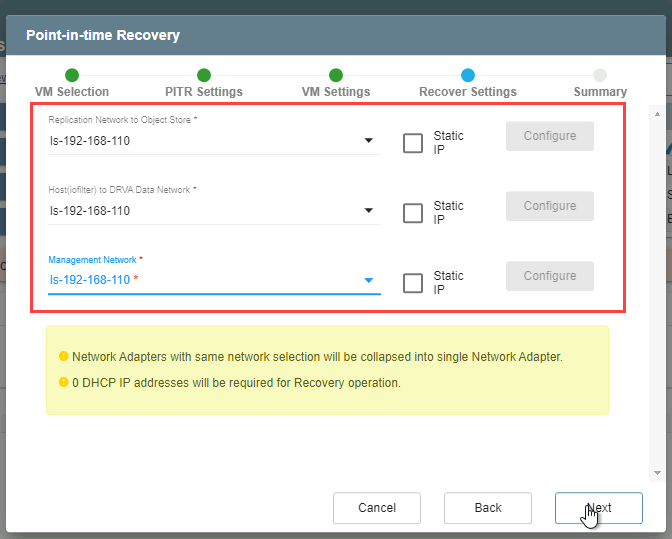
- Make selections from the drop-down menus to specify: Replication Network to Object Store, Host to DRVA Data Network, and Management Network.
- The networks selected must be available to all hosts of the cluster.
- By default, the IP addresses used for the selected networks are defined by DHCP.
- If necessary, select and configure static IP addresses.
- Click the Static IP checkbox of the network option then click the Configure button to specify IP options.
- A mix of static and dynamic IP addresses can be used.
- Summary
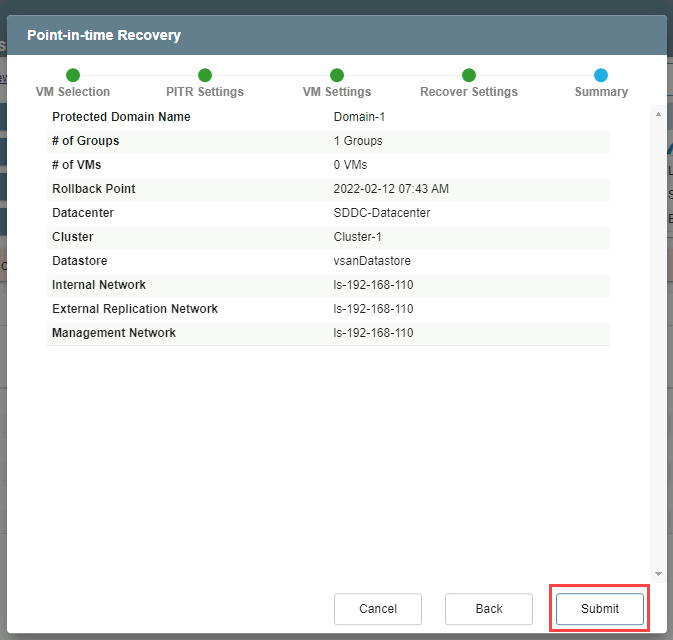
- Review the PITR recovery settings then click the Submit button.
- The VMs and their data will be recovered to the specified point in time.
- In the domain selection menu, select the view to see PITR VMs.
- An alert message will indicate the VMs of the protected domains have been recovered and can be tested.
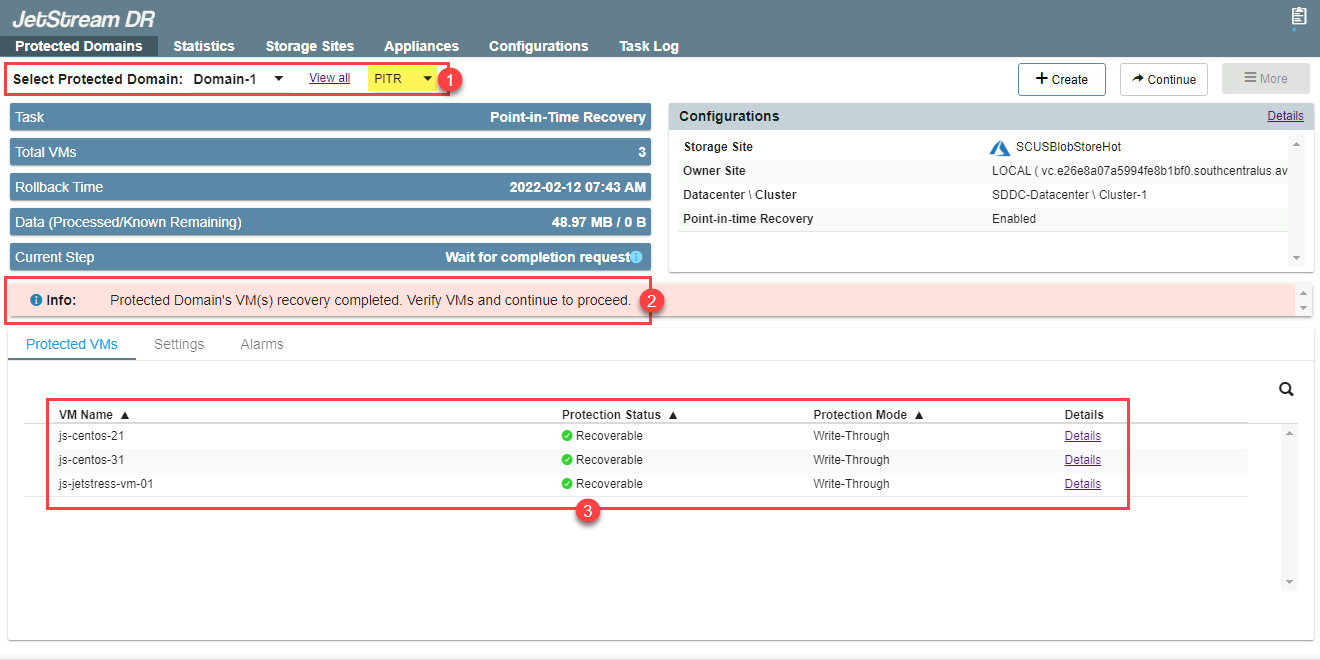
- A list of the recovered VMs and their protection status is displayed.
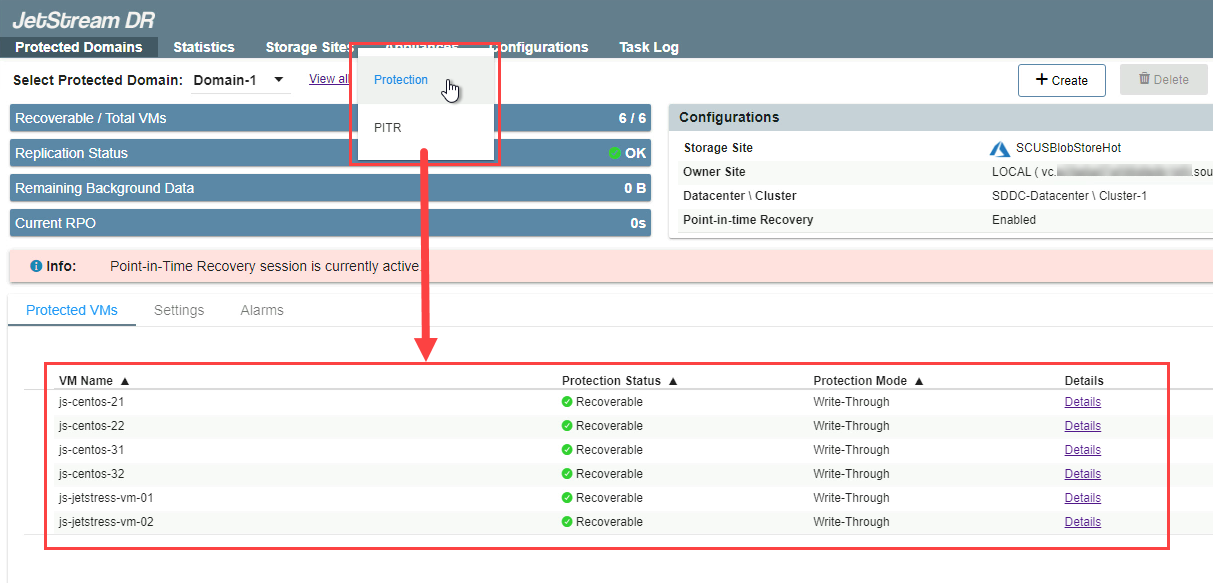
Note: The domain selection menu allows you to switch views of the VMs in the protected domain: Filtering the display of those that are included in the PITR session, and those that continue to operate under normal DR protection (not included in the PITR session). Make sure the correct view is selected while working with VMs.
- Power on and test the recovered VMs.
- The recovered VMs will be uniquely identified with “_test-pitr” appended to the VM name to differentiate them from the original protected VMs.
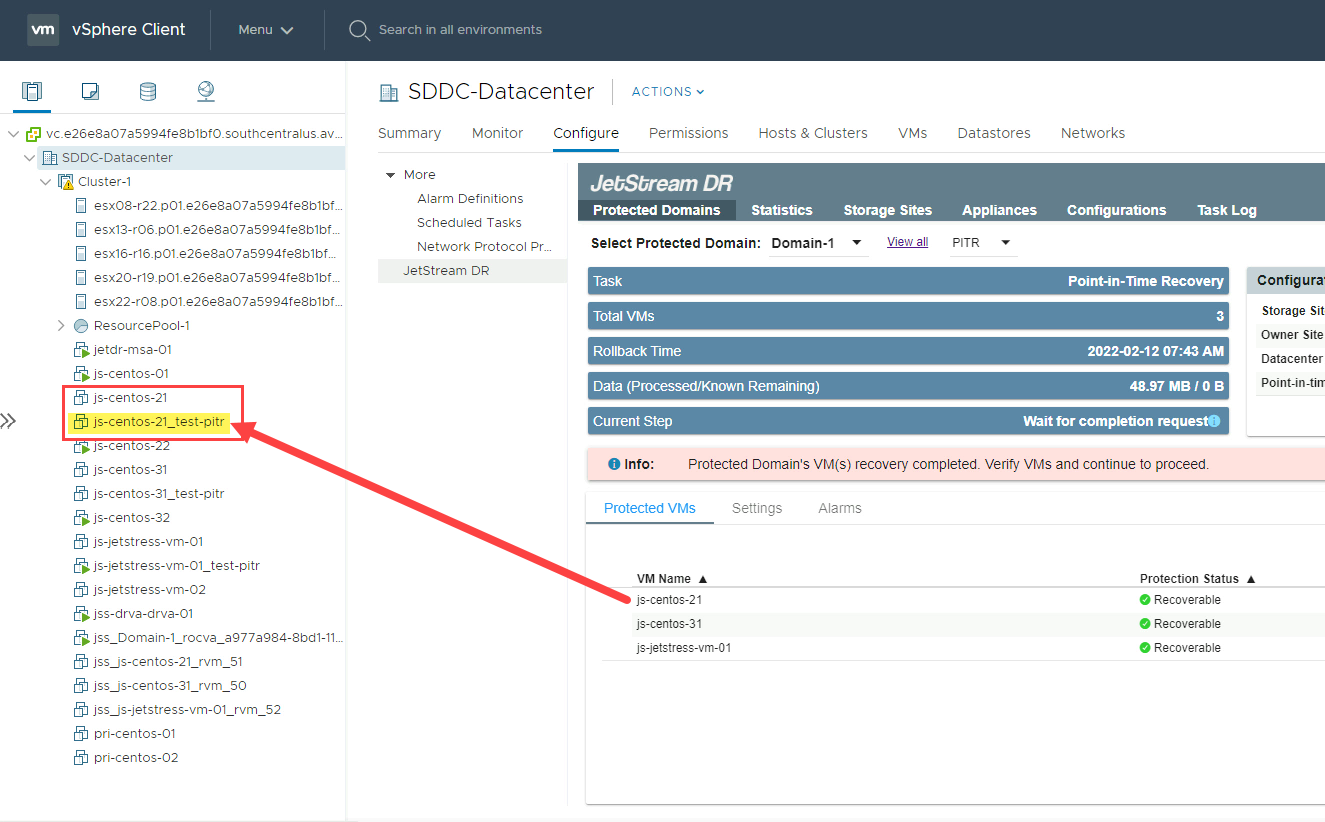
⚠︎ IMPORTANT: Do not power on or operate the original VMs. This may cause conflict within the system.
- If the recovered VM(s) are not as expected, a different point in time can be selected by clicking the Redo PITR option from the Continue menu.
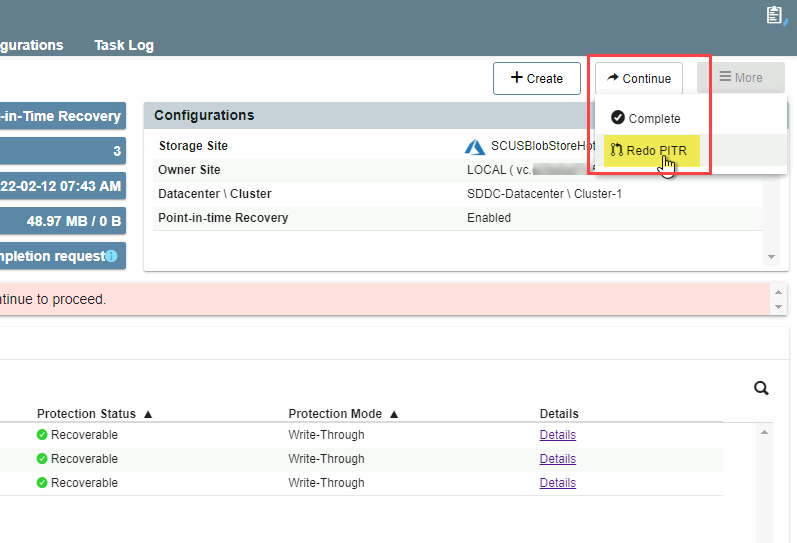
- A dialog window will appear allowing you to specify a different rollback point to try.
- Select a different date and time and click the Next button.
- A history of previously tested rollback points is displayed for your convenience.
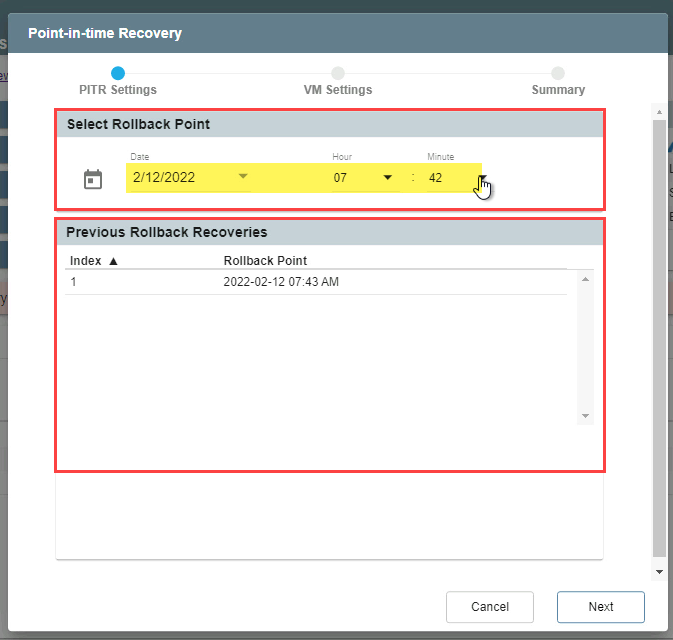
Note: When new rollback points are recovered to replace previous ones for testing, the specific points of time of the older rollback points will no longer be available for selection. If the point in time you wish to use is unavailable, a best practice is to select a new point in time “just before” the rollback point you prefer, or start over again with a new PITR session.
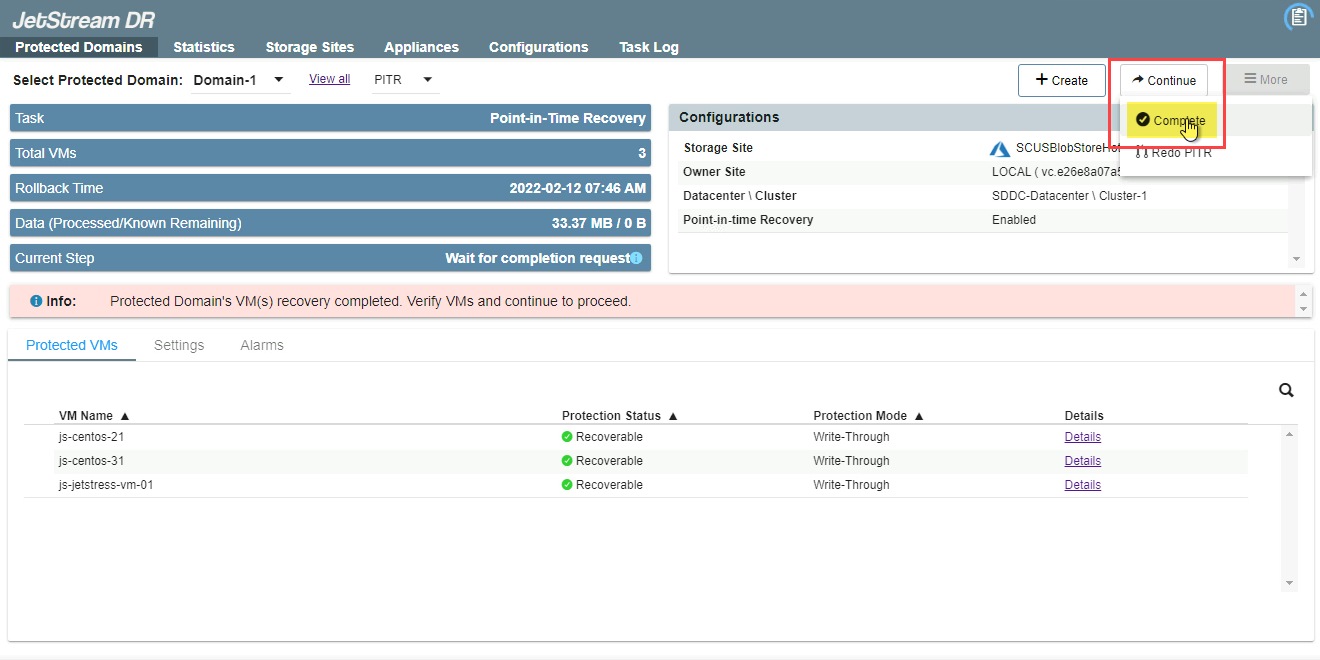
- Once a satisfactory rollback point has been recovered, open the Continue menu and click Complete.
- The recovered VMs will be restored to the live environment and any unused PITR test VMs will be cleaned up.
- The same steps can be repeated to recover a different set of VMs to a different point in time.
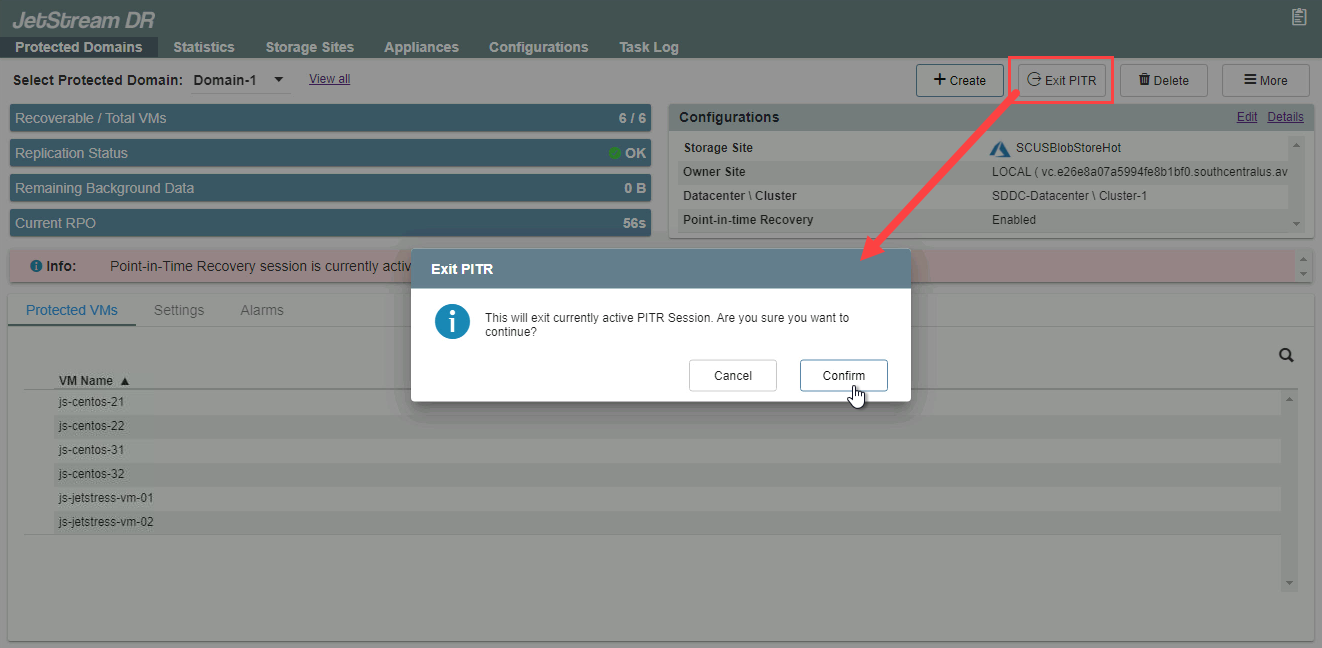
- After VMs have been restored, end the PITR session by clicking the Exit PITR button.
- The PITR session will be ended and normal protection of all VMs in the protected domain will resume.
