Restore the Protected Domain
Once the MSA is available at the primary site and the desired protected domain has been selected, begin the restore process.
- With the desired protected domain selected, open the More menu and click the Restore option.
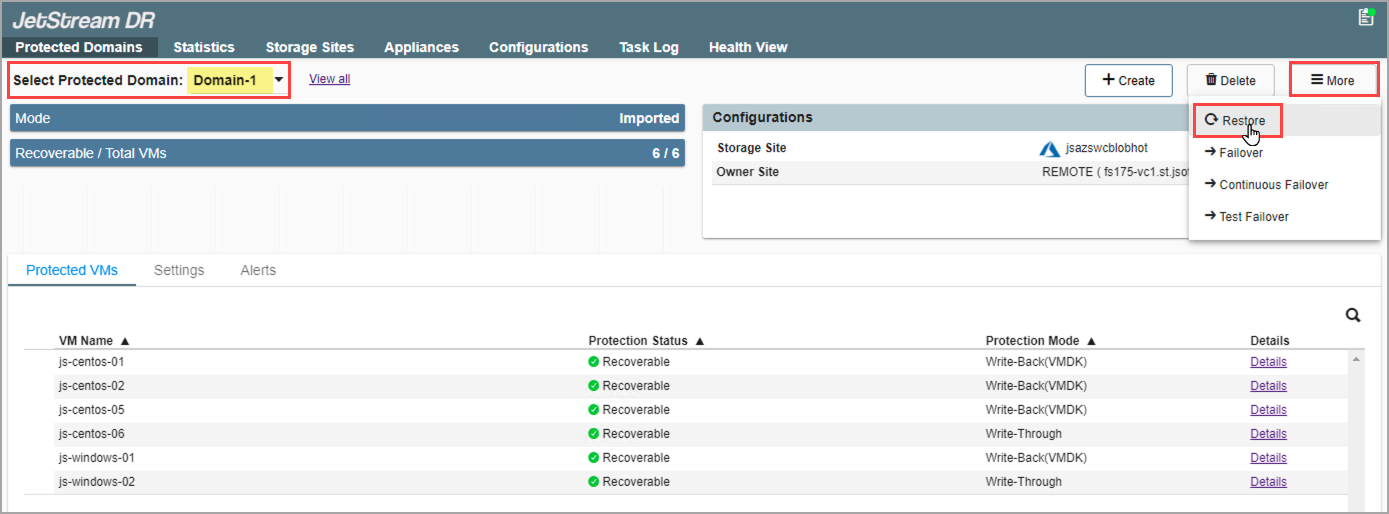
Select the Restore option.
- Follow the guided steps of the pop-up dialog window to configure and initiate the restore process:
1. General
- Review information about the imported protected domain to be restored.
- If the information is correct, click the Next button.
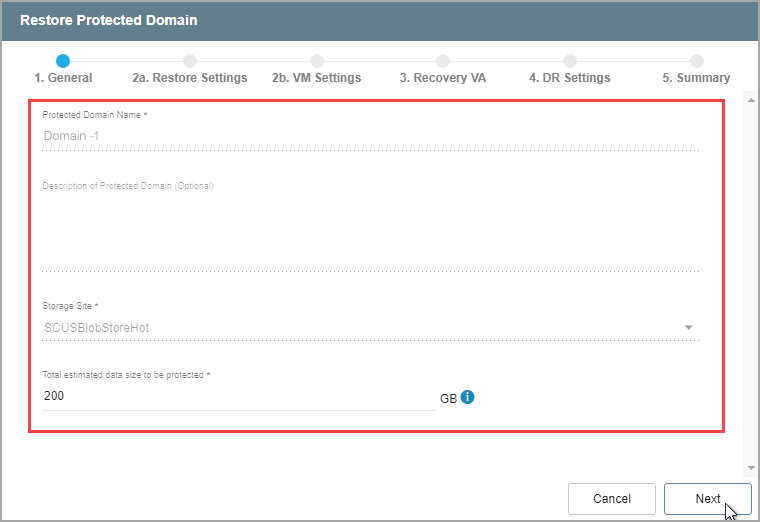
Review details of the imported domain.
2(a). Restore Settings
- Make selections from the drop-down menus to specify recovery settings of the primary site, including: datacenter, cluster, resource pool, and datastore.
- Click the Next button.
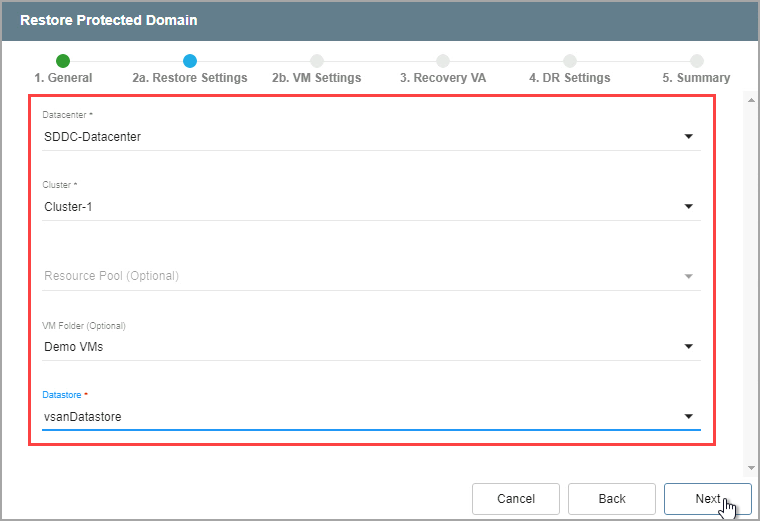
Configure restore settings.
2(b). VM Settings
- Map a Recovery VM Network to the Protected VM Network.
- Under the Other Settings section select options to:
- Retain VM MAC addresses
- Retain UUID and Instance UUID
- Power Off VMs during restoration
- Specify a VM storage policy
- Click the Next button.
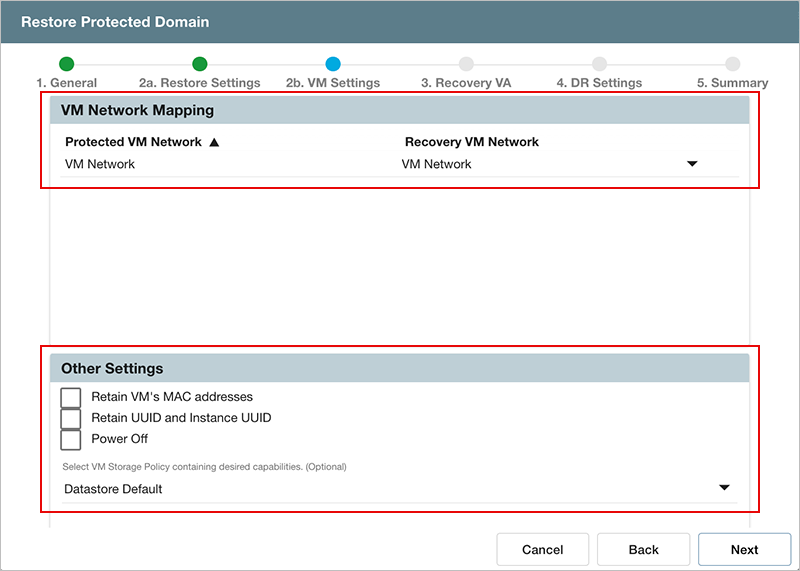
Configure VM settings.
3. Recovery VA
- Specify network settings for the Management Network, Host (IOFilter)/RocVA to DRVA Network, and Recovery Network to Object Store.
- DHCP will be used by default.
- Static IP addresses can be manually assigned by de-selecting the Apply same network settings to all checkbox then selecting a network's Static IP checkbox and clicking its Configure button.
- A mix of static and dynamic IP addresses can be used.
- Specify a default Gateway Network.
- This is not necessary if DHCP is used.
- Click the Next button.

Configure a recovery virtual appliance (RocVA).
Note: Learn more about Recovery Virtual Appliances (RocVA).
4. DR Settings
- Select the DRVA and replication log storage of the primary site from the drop-down menus.
- Specify sizes for the Replication Log and Metadata.
- Click the Next button.
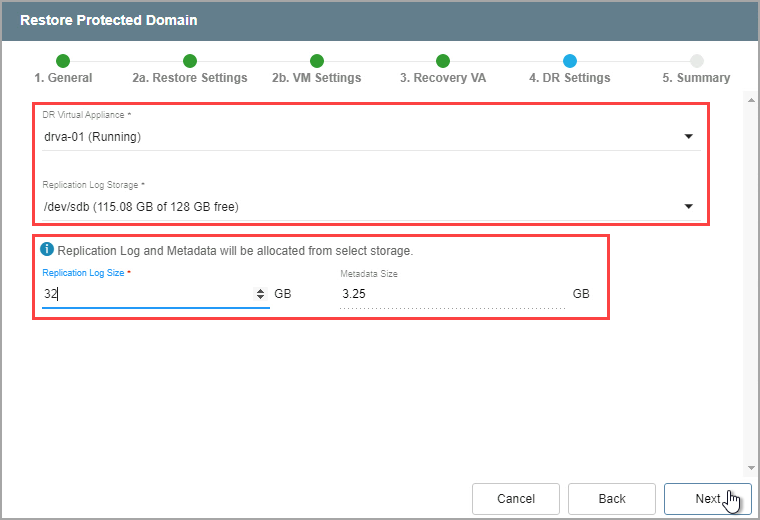
Specify DRVA and replication log details.
Note: The replication log and metadata will be allocated from the selected replication log storage.
5. Summary
- Review all entered settings on the Summary step.
- Use the Back button to modify any settings that need to be changed.
- Click the Restore button to begin the restore process.
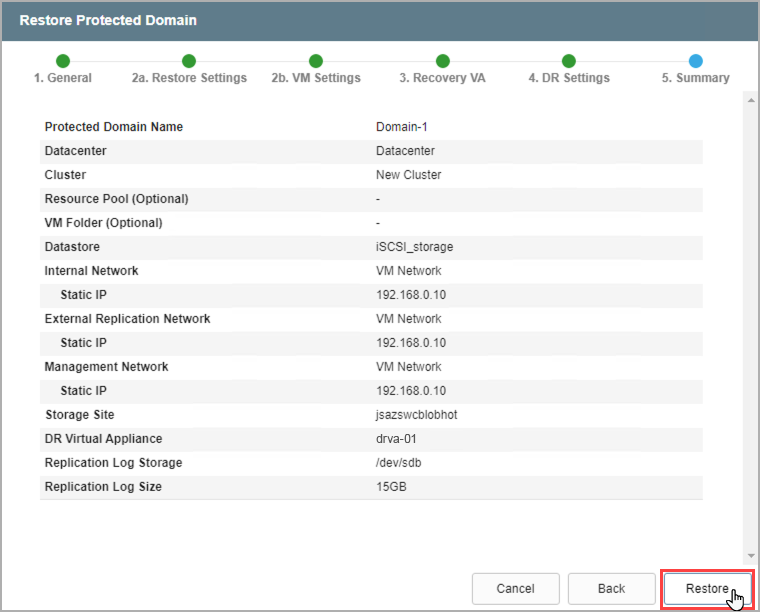
Review settings then start the restore process.
- The restore process will begin and the mode of the protected domain will change to “Recovery in Progress.”
- Details of each task step can be viewed by clicking the blue "info" icon of the Current Step section.
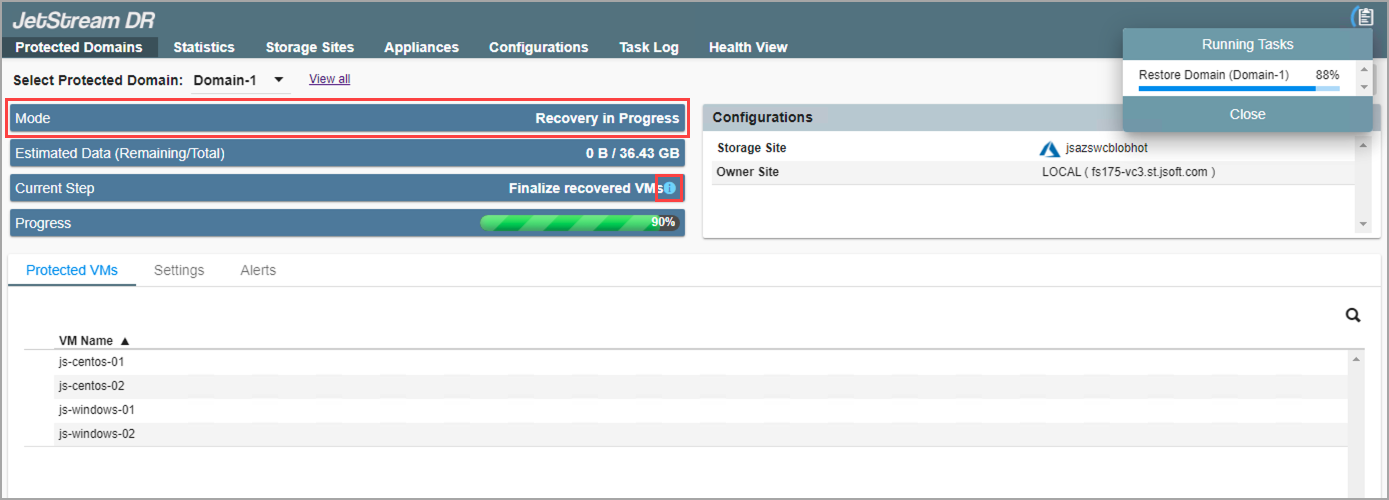
The restore process has begun.
- When the restore process is complete the VMs of the protected domain will be fully operational and their status will be “recoverable” again and they will continue to be protected.
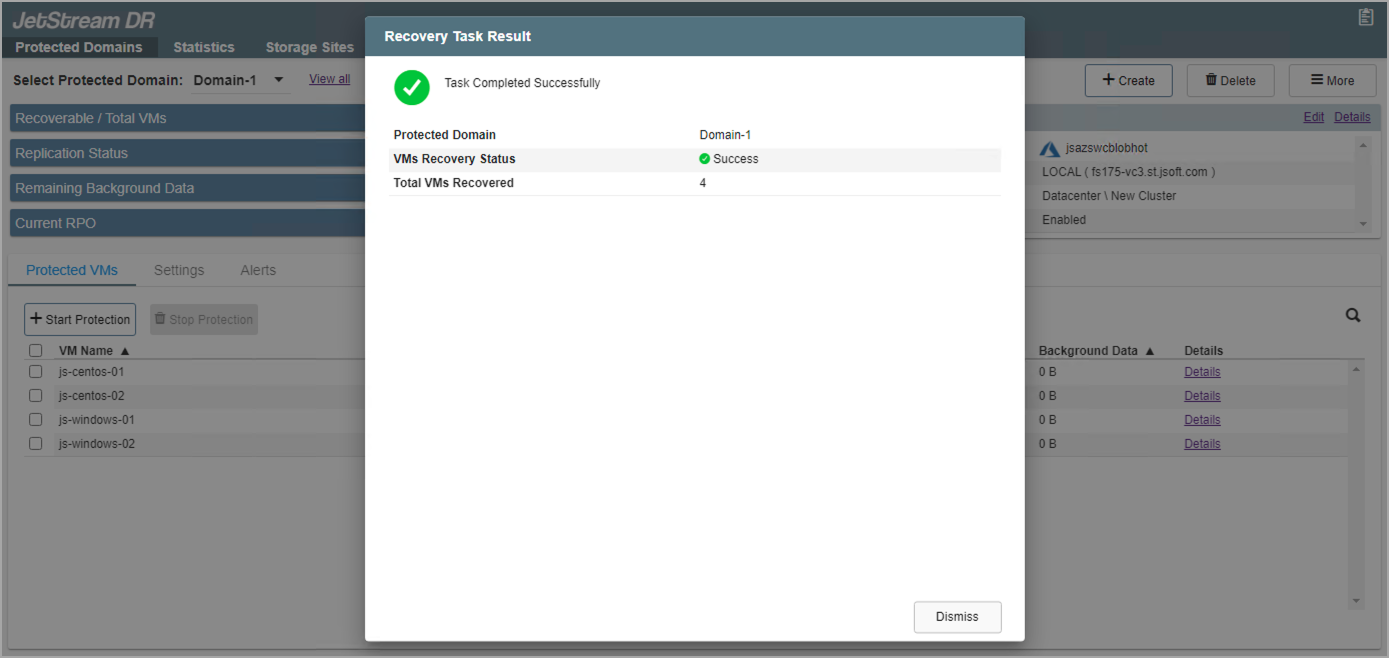
The restore process is complete.