Configure and Initiate Test Failover
Initiate test failover:
- Go to the recovery site.
- On the Storage Sites screen, click the Scan Domains button then import the Protected Domain to test.

Figure 206: Scan protected domains from the storage site.

Figure 207: Import a protected domain.
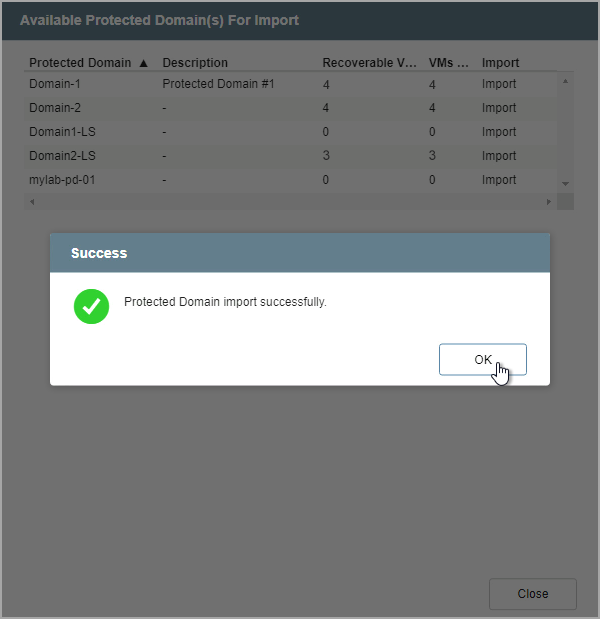
Figure 208: The protected domain has been imported.
- On the Protected Domains screen, open the More menu and select the Test Failover option.

Figure 209: Select the Test Failover option.
- A message will appear announcing conditions necessary to test failover. Click the Continue button.
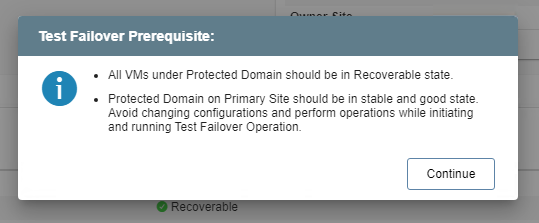
Figure 210: Test failover prerequisites are announced.
- Follow the guided steps of the dialog window to configure test failover.
Note: The steps and parameters specified for test failover are essentially the same as used for failover in the actual production environment.
Step: General
- Review the Protected Domain name and selected storage site.
- If the information is correct, click the Next button.
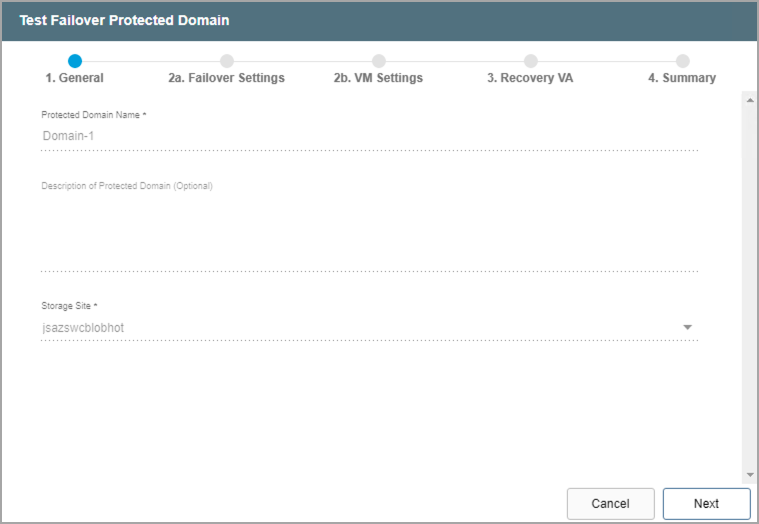
Figure 211: Review details of the imported domain.
Step: Failover Settings
- Make selections from the drop-down menus to specify recovery settings of the recovery site, including: datacenter, cluster, resource pool, and datastore.
- Select options to automatically start recovery groups and gracefully shut down VMs.
- Click the Next button.

Figure 212: Configure failover settings.
Step: VM Settings
- Map a recovery VM network to the protected VM network.
- Specify a storage policy for VMs (optional).
- Click the Next button.

Figure 213: Configure VM settings.
Step: Recovery VA
- Specify network settings for the Management Network, Host (IOFilter)/RocVA to DRVA Network, and Recovery Network to Object Store.
- DHCP will be used by default.
- Static IP addresses can be manually assigned by de-selecting the Apply same network settings to all checkbox then selecting a network's Static IP checkbox and clicking its Configure button.
- A mix of static and dynamic IP addresses can be used.
- Specify a Default Gateway Network.
- This is not necessary if DHCP is used.
- Click the Next button.
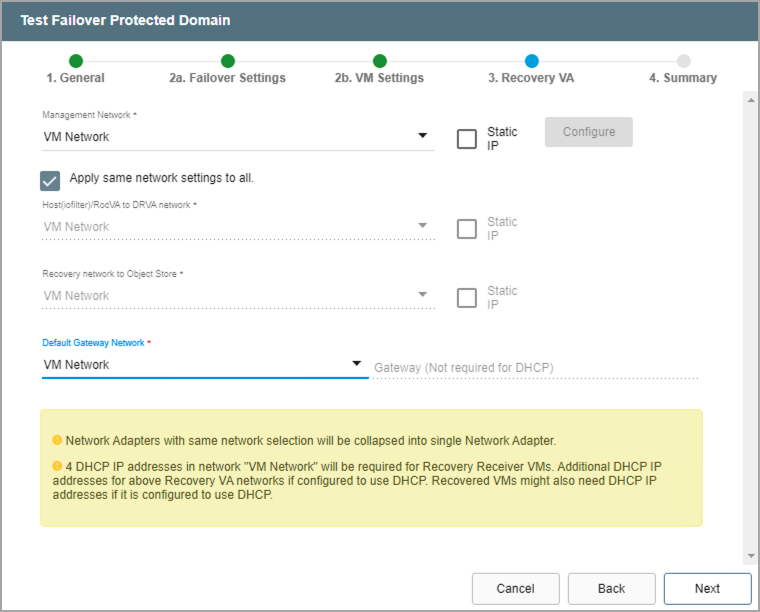
Figure 214: Configure a recovery virtual appliance (RocVA).
Step: Summary
- Review all entered settings on the Summary step.
- Use the Back button to modify any settings that need to be changed.
- Click the Test Failover button to begin the failover process.
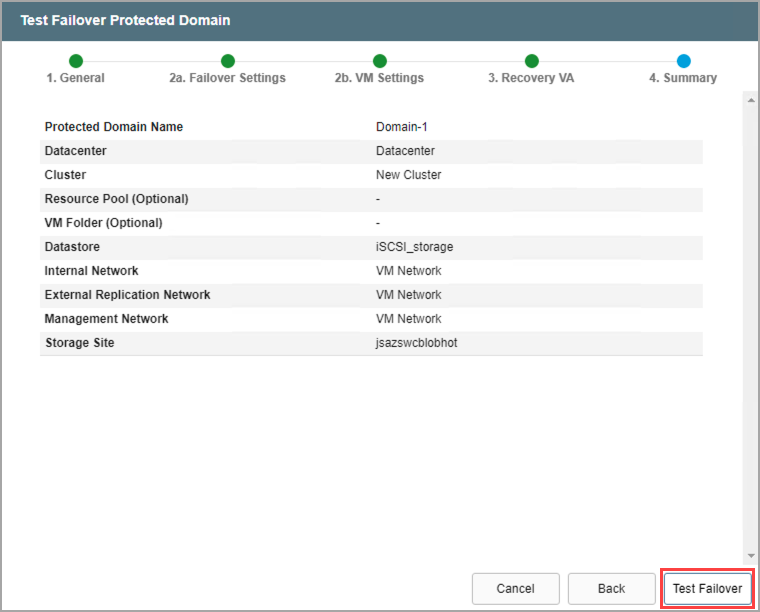
Figure 215: Review settings then start the test failover process.