Recover and Test PITR VMs
While a Point-In-Time-Recovery session is active it is possible to roll back selected VMs and data to a previous point in time to test and restore them.
Recover PITR VMs
- The Point-in-Time Recovery session should currently be active.
- Go to the recovery site.
- On the Protected Domains screen, open the More menu then click the option Run PITR.
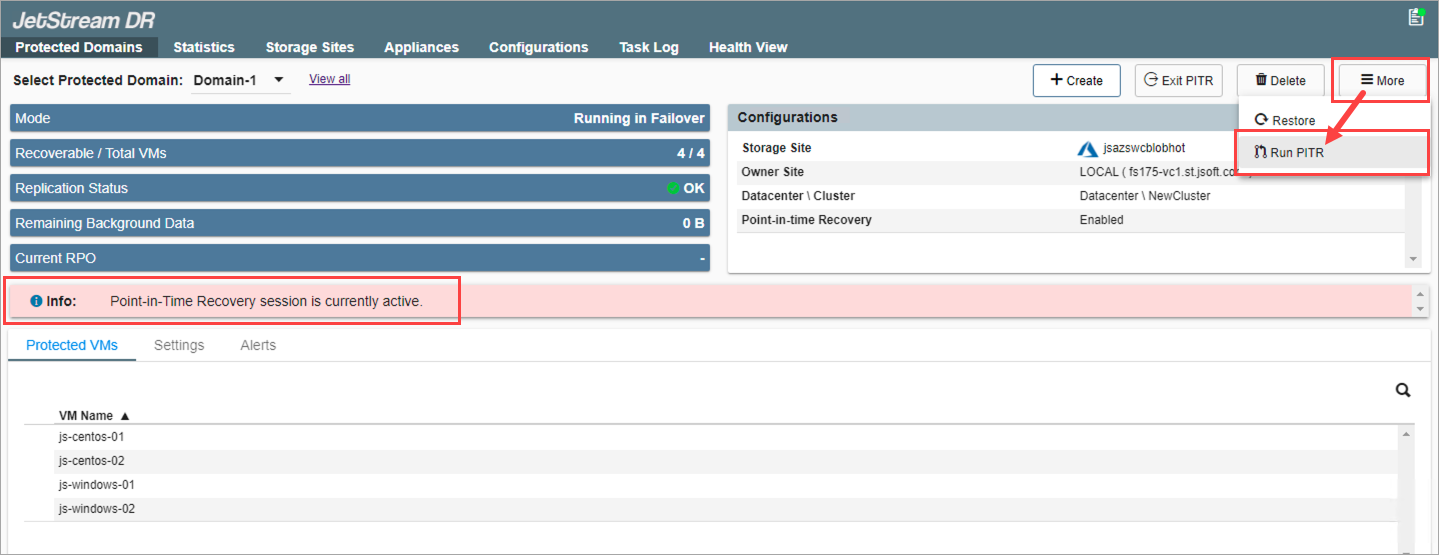
Figure 264: While the PITR session is active, Run PITR to roll back VMs.
Step: VM Selection
- Select VMs to recover from the PITR Protected Domain.
- VMs from recovery groups and independent VMs are displayed and can be selected.
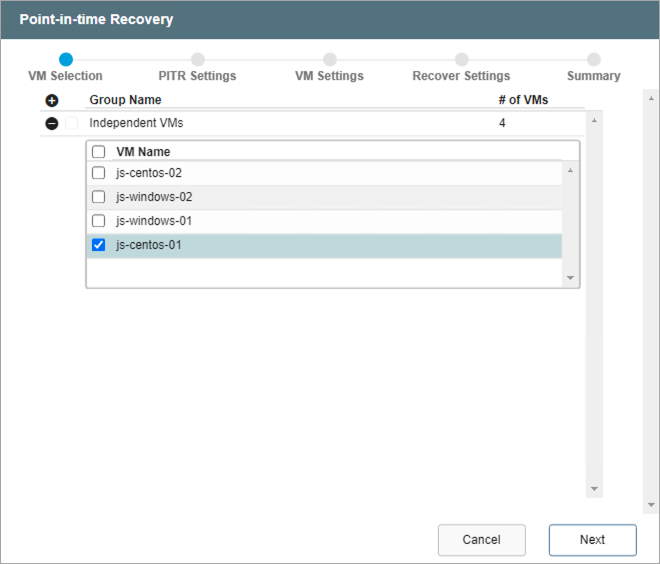
Figure 265: Select VMs to roll back.
Note: Only VMs that were originally included in the PITR Protected Domain will appear in the selection lists.
Step: PITR Settings
- Specify a point in time to roll back to and a target recovery appliance that has access to the protected VMs being recovered.
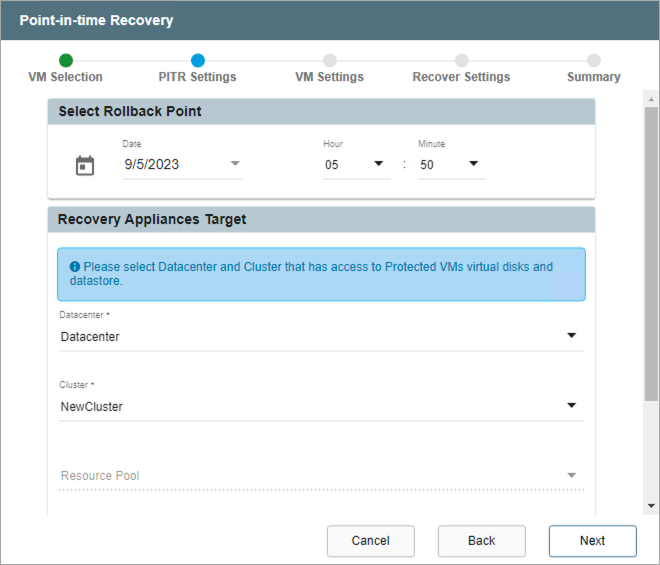
Figure 266: Specify the point in time to roll back to.
Note: The range of time that can be selected for the rollback point is constrained by the time window specified when the PITR Protected Domain was created.
VM Settings
- Map the Recovery VM Network to the Protected VM Network.
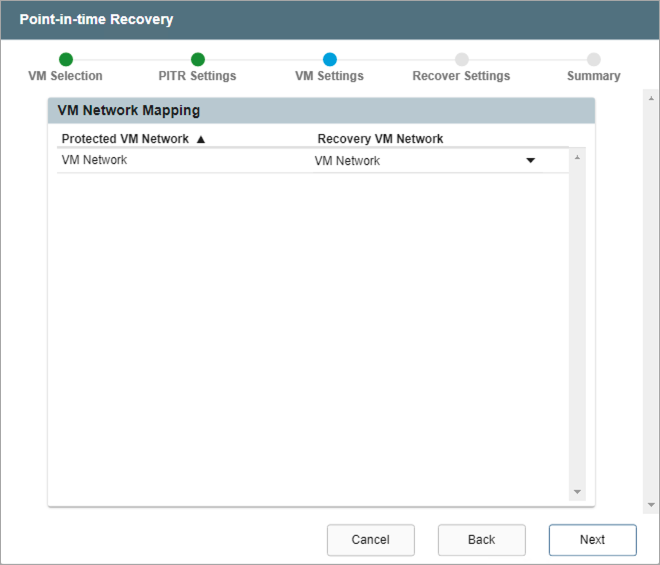
Figure 267: Map the VM network.
Step: Recover Settings
- Specify network settings for the Management Network, Host (IOFilter)/RocVA to DRVA Network, and Recovery Network to Object Store.
- DHCP will be used by default.
- Static IP addresses can be manually assigned by de-selecting the Apply same network settings to all checkbox then selecting a network's Static IP checkbox and clicking its Configure button.
- A mix of static and dynamic IP addresses can be used.
- Specify a Default Gateway Network.
- This is not necessary if DHCP is used.

Figure 268: Configure recovery settings.
Step: Summary
- Review the settings specified in the previous steps.
- If OK, click the Submit button to recover the selected PITR protected VMs.
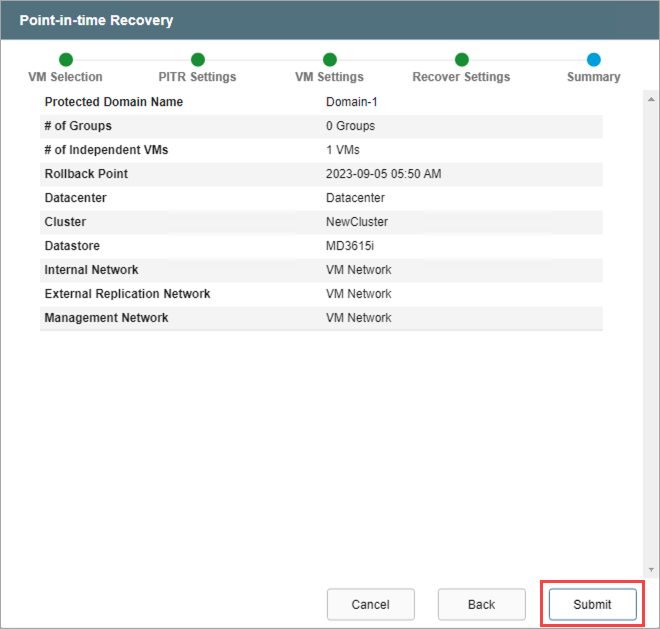
Figure 269: Review all settings then begin recovering VMs.
- The selected PITR VMs will be recovered.
- Complementary PITR "test VMs" representing the selected point in time will be created for testing.
- From the Select Protected Domain menu at the top of the screen, set the View to PITR to see the list of PITR recoverable VMs (1).
- An alert message (2) will indicate the VMs of the Domain have been recovered and can be tested to check their content.
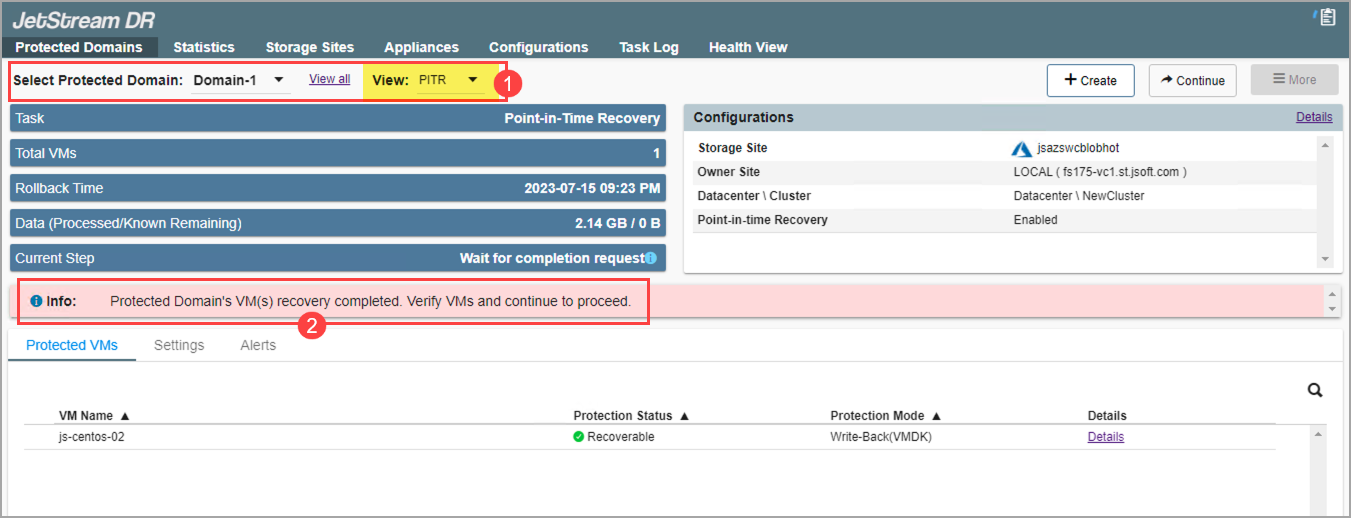
Figure 270: After PITR protected VMs have been recovered they can be tested.
Note: While the PITR session is active, protection of the selected PITR recoverable VMs is suspended. The VMs of the Protected Domain that were not selected for PITR recovery will continue to operate and be protected normally.
- Switching the View toggles the display to show PITR-recoverable VMs or (normally) protected VMs and indicates their current status.
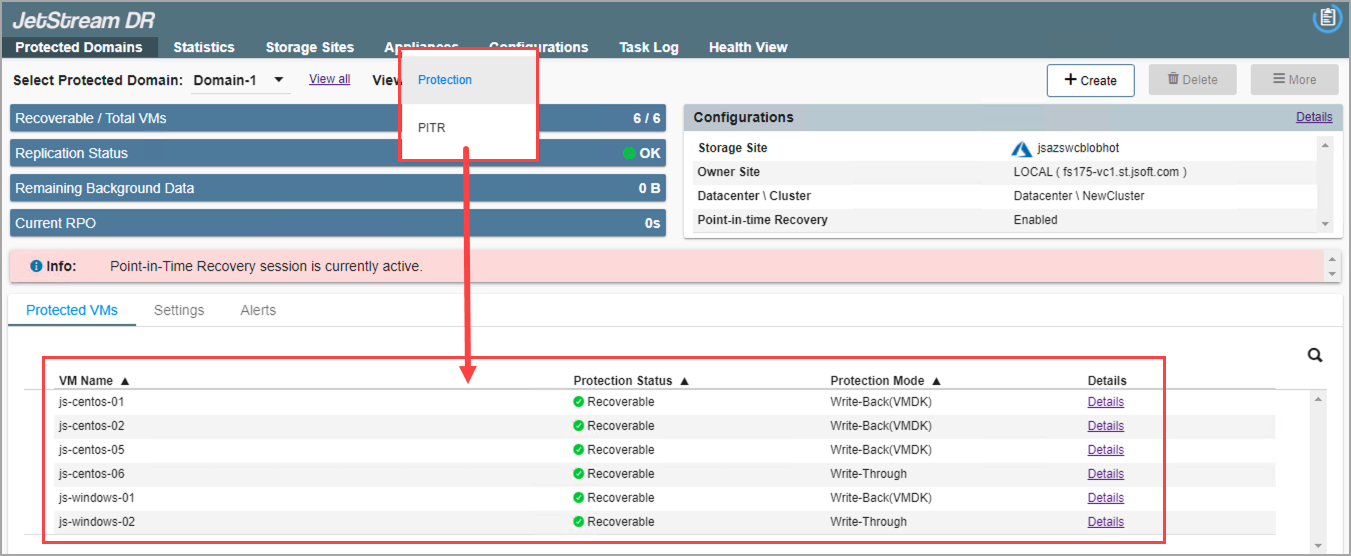
Figure 271: Toggle the view between PITR VMs and normally protected VMs contained in the protected domain.
Note: The Domain selection menu allows you to switch views of the VMs from the Protected Domain – Filtering the display of those that (1) are included in the PITR session and (2) those that are continuing to operate with normal DR protection (not included in the PITR session). Make sure the correct view is selected while working with VMs.
Test PITR VMs
- Power on and test the PITR-recoverable VMs.
- The PITR-recoverable VMs will be uniquely identified with “_test-pitr” appended to the VM name to differentiate them from the original protected VMs.
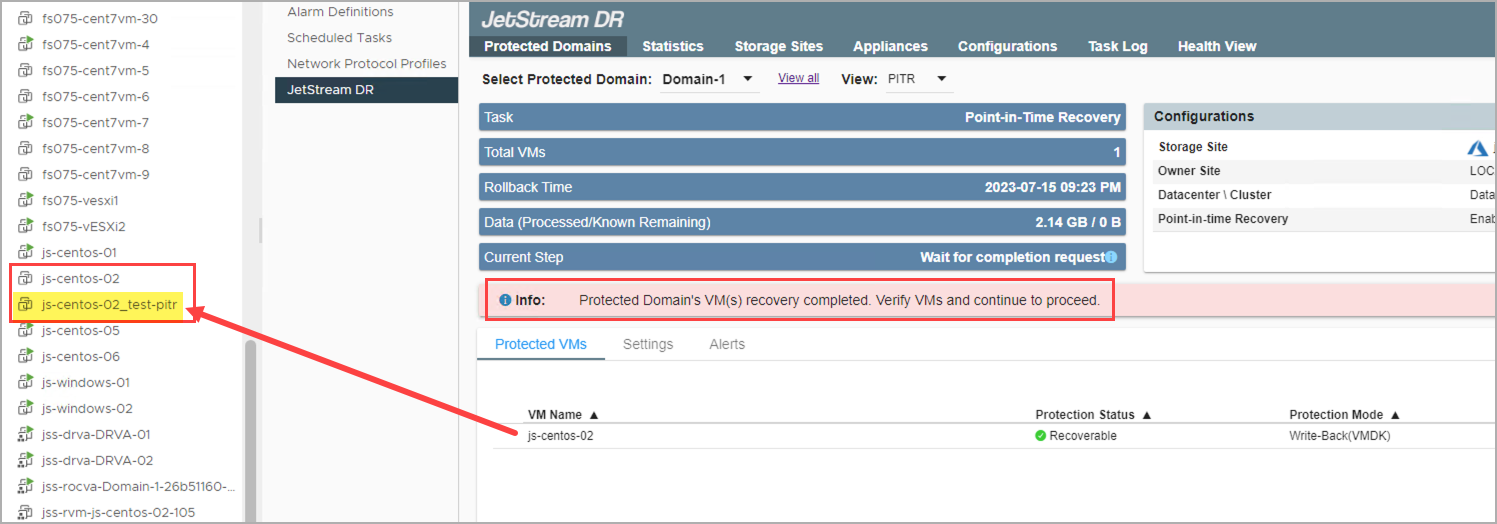
Figure 272: PITR VMs are uniquely named with the identifier "_test-pitr."
Important: Do not power on or operate the original VMs while the PITR session is active. This can cause conflict within the system.
- If the tested PITR VMs are not the desired version, "redo" the selection choosing a different point in time.
- If the tested PITR VMs are acceptable, "complete" the PITR session.
Also see: