Configure and Start Failback
Configure and start the failback operation:
- Go to the primary site.
- Go to the Protected Domains screen and open the More menu.
- Select the "Failback" or "Continuous Failback" option.
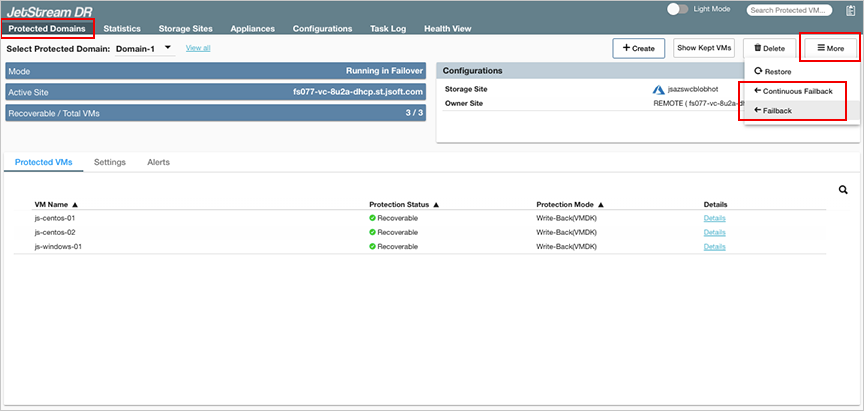
Figure 253: Select a Failback option.
Notes:
1) Continuous failback allows changes to be made to Domains and VMs at the protected site including: disk grow, disk add, disk remove, add/remove protected VMs, etc.
2) Continuous failback allows the user to determine when to shut down VMs at the failover site and complete failback to the primary site.
3) These options are not possible using (standard) failback because all actions and timing are automated by the MSA.
- Follow the guided steps of the dialog window to configure failback (of either type) to the primary site.
Step: General
- Review general details about the imported Protected Domain for failback.
- If the information is correct, click the Next button.
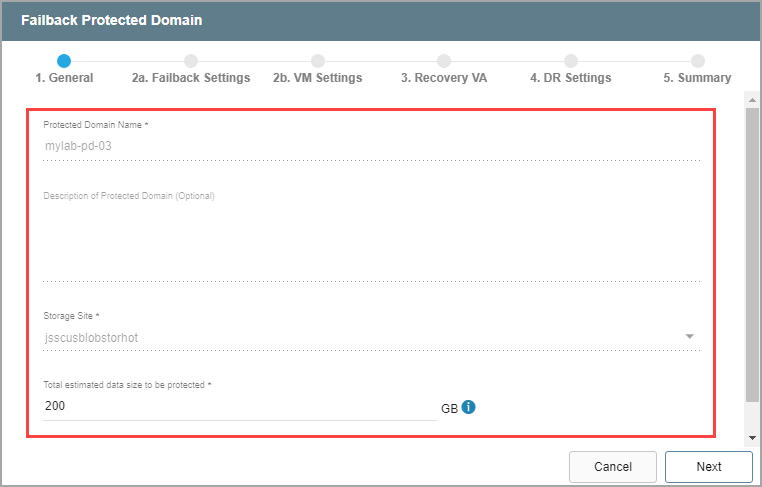
Figure 254: Review details of the imported Domain.
Step: Failback Settings
- Make selections from the drop-down menus to specify recovery settings of the primary site, including: Failback Cluster, Resource Pool, VM Folder, and Datastore.
- Specify how remote site VMs should be handled after failback:
- Keep Protected Domain's VMs intact at Remote Site: This option preserves the VMs and corresponding replication log at the remote site after failback is completed. The VMs will be unregistered from vCenter.
- Destroy Protected Domain's VMs at Remote Site: This option destroys the VMs and corresponding replication log at the remote site after failback is completed. If the Domain was failed over using CFO, this option will resume continuous failover using existing disks.
- Click the Next button.
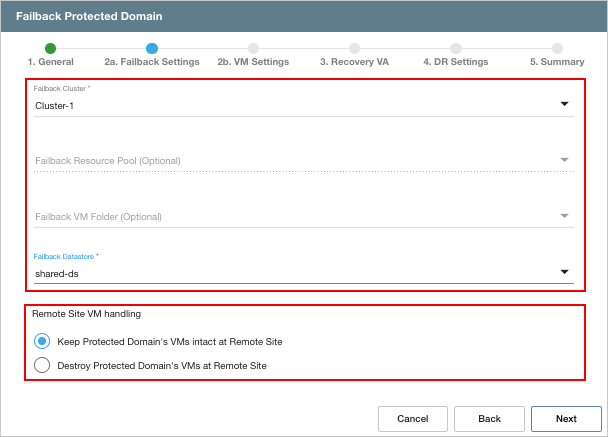
Figure 255: Configure failback settings.
Step: VM Settings
- Map a Recovery VM Network to the Protected VM Network.
- Specify a storage policy for VMs (optional)
- Set a value for Maximum Delay After Stopping.
- Click the Next button.
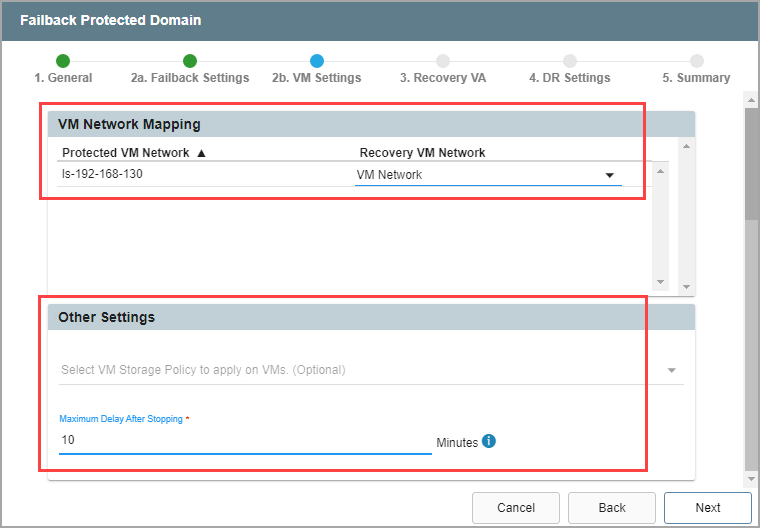
Figure 256: Configure VM settings.
Maximum Delay: During the final stage of failback, VMs running on the remote failover site are shut down as final bits of data are transferred prior to switching back to the primary site. Depending upon the amount of remaining data, this process may create some downtime on the VMs. The maximum delay function allows a hard limit to be set on allowable downtime introduced by this process.
Step: Recovery VA
- Specify network settings for the Management Network, Host (IOFilter)/RocVA to DRVA Network, and Recovery Network to Object Store.
- DHCP will be used by default.
- Static IP addresses can be manually assigned by de-selecting the Apply same network settings to all checkbox then selecting a network's Static IP checkbox and clicking its Configure button.
- A mix of static and dynamic IP addresses can be used.
- Specify a Default Gateway Network.
- Click the Next button.
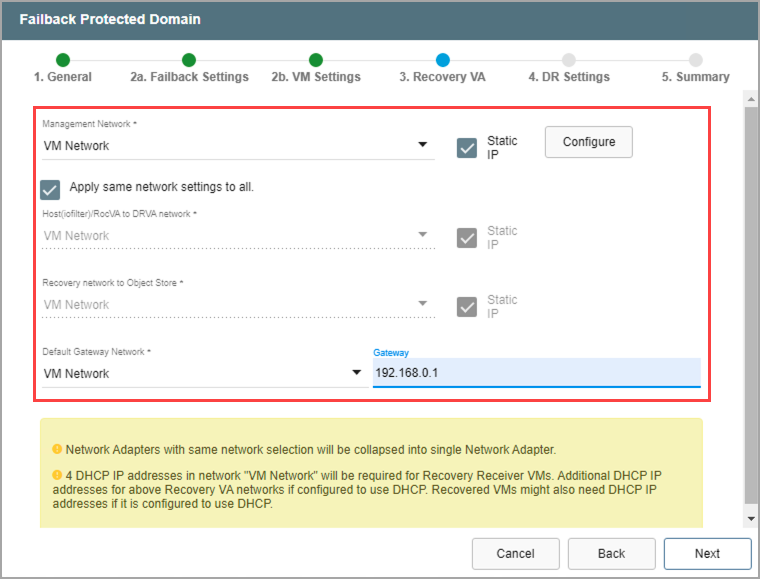
Figure 257: Configure a recovery virtual appliance (RocVA).
Step: DR Settings
- Select the DRVA and Replication Log Storage from the drop-down menus.
- Specify a Replication Log Size. (Note: Metatdata Size is not directly editable. It is derived from the Total estimated data size to be protected specified when the Protected Domain was configured – it can also be adjusted from the General step, above.)
- Click the Next button.
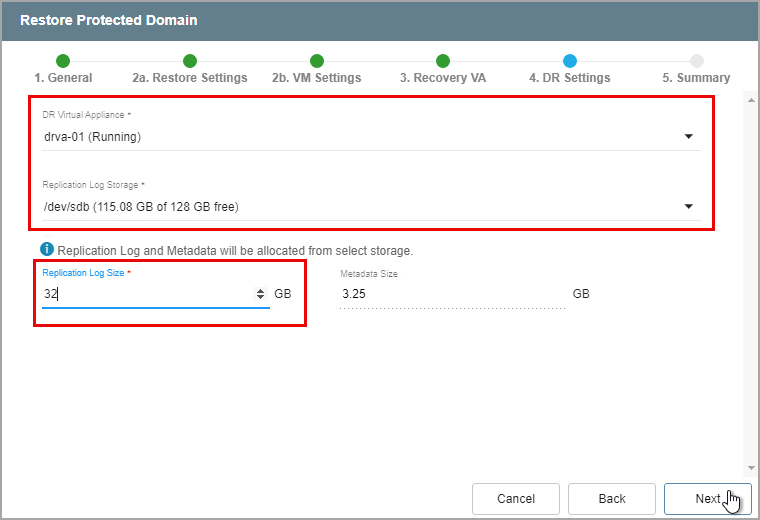
Figure 258: Specify DRVA and replication log details.
Note: The replication log and metadata will be allocated from the selected replication log storage.
Step: Summary
- Review all entered settings on the Summary step.
- Use the Back button to modify any settings that need to be changed.
- Click the Failback button to begin the failback process.
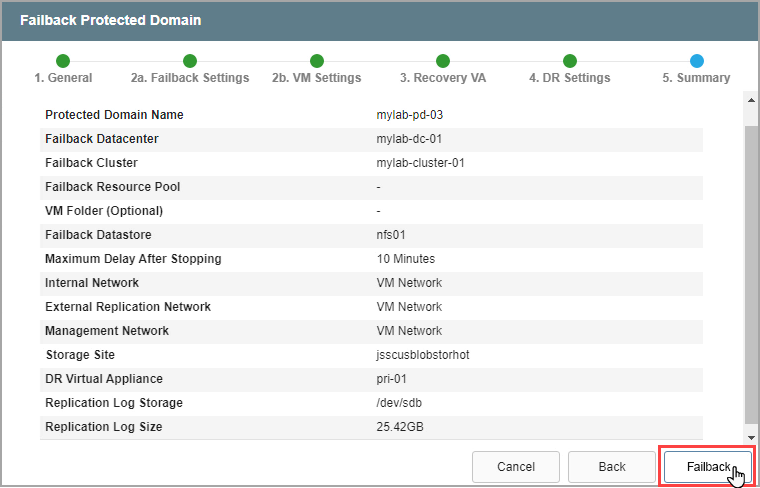
Figure 259: Review settings then start the failback process.
Note: If (standard) failback was selected, the MSA will manage the operations and timing necessary to failback all Domains to the primary site. If continuous failback was selected, the system will begin rehydating data from the failover site to the primary site. The user can specify when to complete failback and additional management options will be offered.
Important: When performing (standard) failback, the MSA controls the timing of the failover site shutdown (based upon data IO rates, amount of remaining data to be rehydrated, etc.). If it is important to manage system downtime during failback, use the continuous failback option to control specifically when VMs at the failover site can be shutdown to transfer ownership back to the primary site.
Also see: