Restore the Protected Domain
After the Protected Domain has been imported, begin the restore process:
- On the Protected Domains screen, select the Domain then open the More menu and click the Restore option.
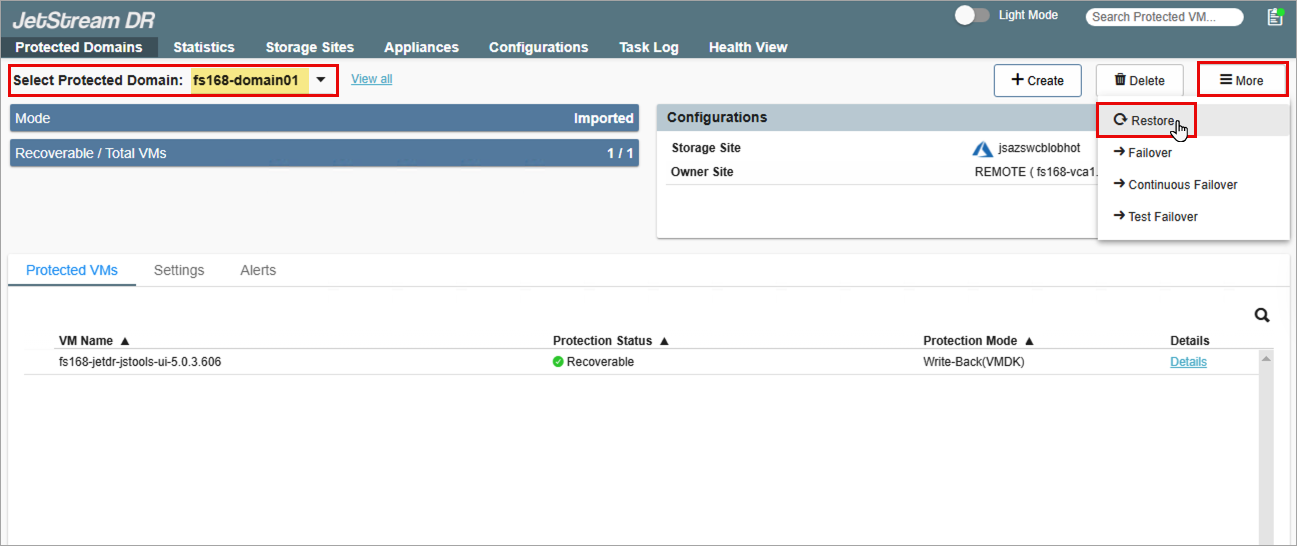
Figure 163: Select the Restore option.
- Follow the guided steps of the pop-up dialog window.
Step: General
- Review information about the imported Domain to be restored.
- If the information is correct, click the Next button.
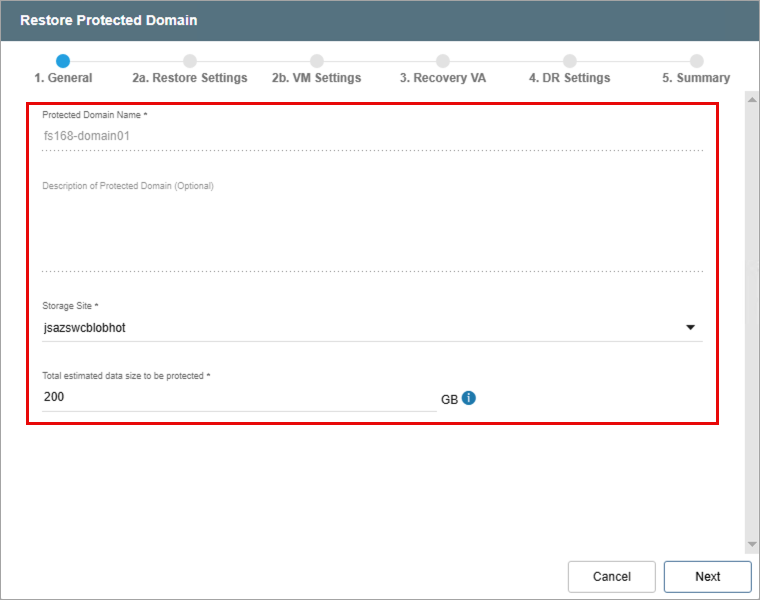
Figure 164: Review details of the imported Domain.
Step: Restore Settings
- Make selections from the drop-down menus to specify recovery settings for the remote site, including: Datacenter, Cluster, Resource Pool, VM Folder, and Datastore.
- Click the Next button.
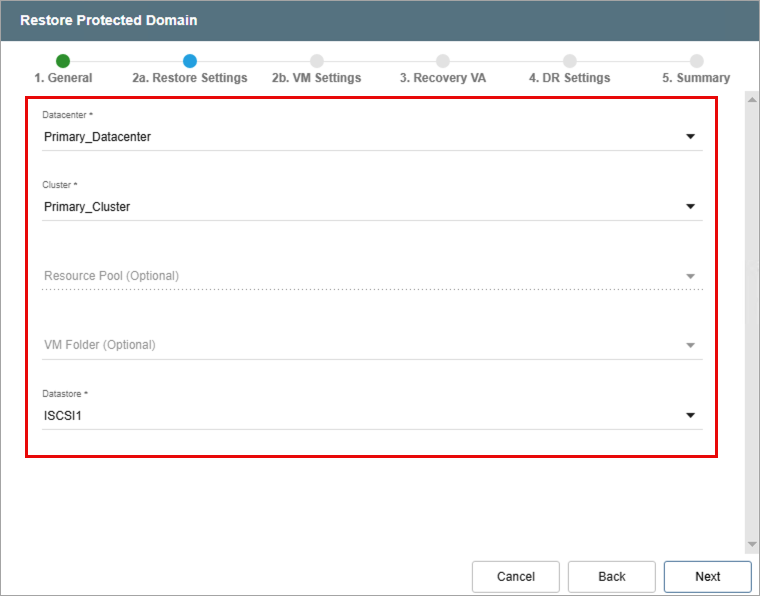
Figure 165: Configure restore settings.
Step: VM Settings
- Map a Recovery VM Network to the Protected VM Network.
- Under the Other Settings section select options to:
- Retain VM MAC addresses
- Retain UUID and Instance UUID
- Keep restored VMs in powered off state
- Select a VM Storage Policy
- Click the Next button.
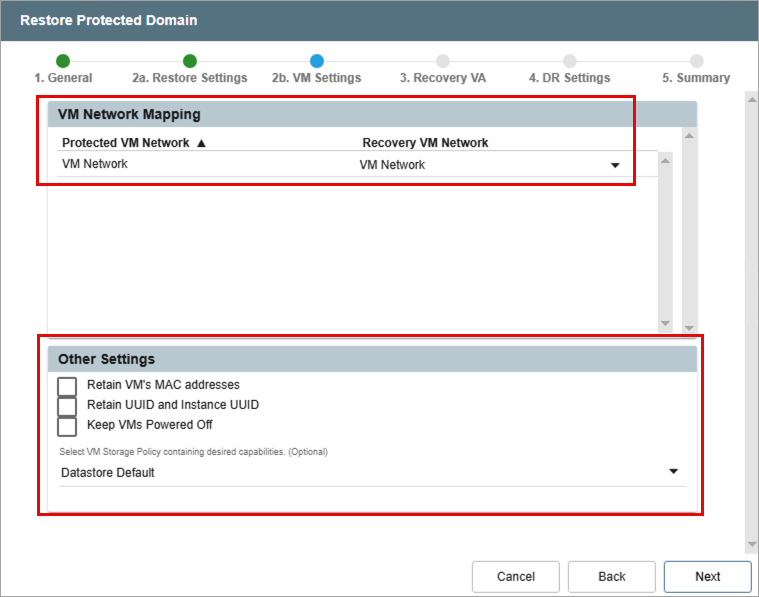
Figure 166: Configure VM settings.
Step: Recovery VA
- Specify network settings for the Management Network, Host (IOFilter)/RocVA to DRVA Network, and Recovery Network to Object Store.
- DHCP will be used by default.
- Static IP addresses can be manually assigned by de-selecting the Apply same network settings to all checkbox then selecting a network's Static IP checkbox and clicking its Configure button.
- A mix of static and dynamic IP addresses can be used.
- Specify a default Gateway Network.
- Click the Next button.

Figure 167: Configure a recovery virtual appliance (RocVA).
Note: Learn more about Recovery Virtual Appliances (RocVA).
Step: DR Settings
- Select the DRVA and Replication Log Storage from the drop-down menus.
- Specify a Replication Log Size. (Note: Metatdata Size is not directly editable. It is derived from the Total estimated data size to be protected specified when the Protected Domain was configured – it can also be adjusted from the General step, above.)
- Click the Next button.
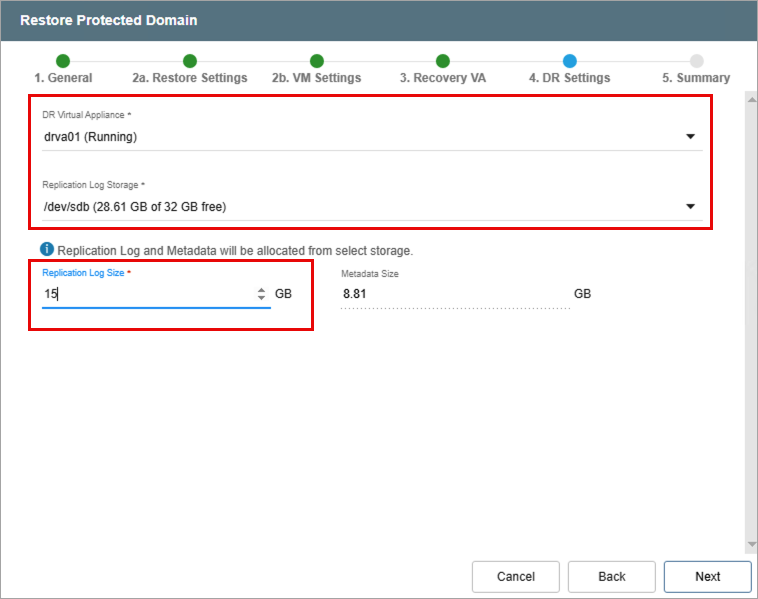
Figure 168: Specify DRVA and replication log details.
Note: The replication log and metadata will be allocated from the selected replication log storage.
Step: Summary
- Review all entered settings on the Summary step.
- Use the Back button to modify any settings that need to be changed.
- Click the Restore button to begin the restore process.
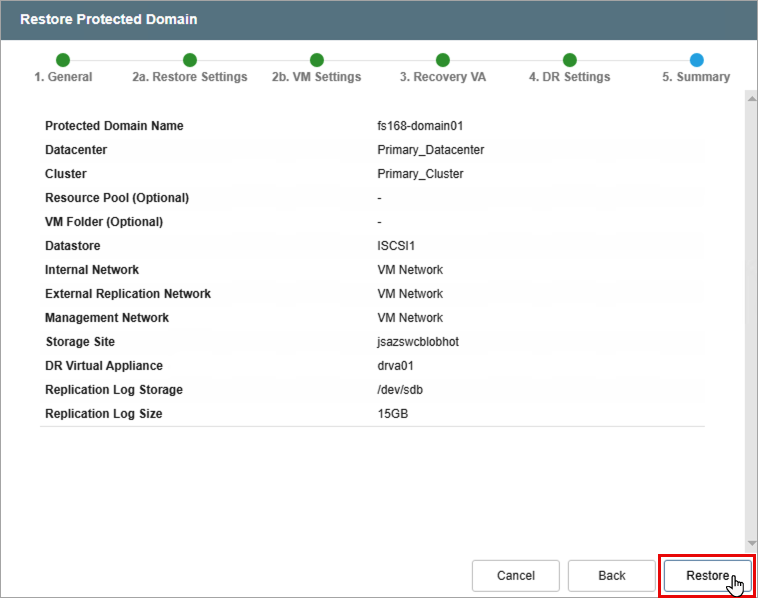
Figure 169: Review settings then start the restore process.
- The restore process will begin and the mode of the Protected Domain will change to “Recovery in Progress.”
- Details of each task step can be viewed by clicking the blue "info" icon of the Current Step section.
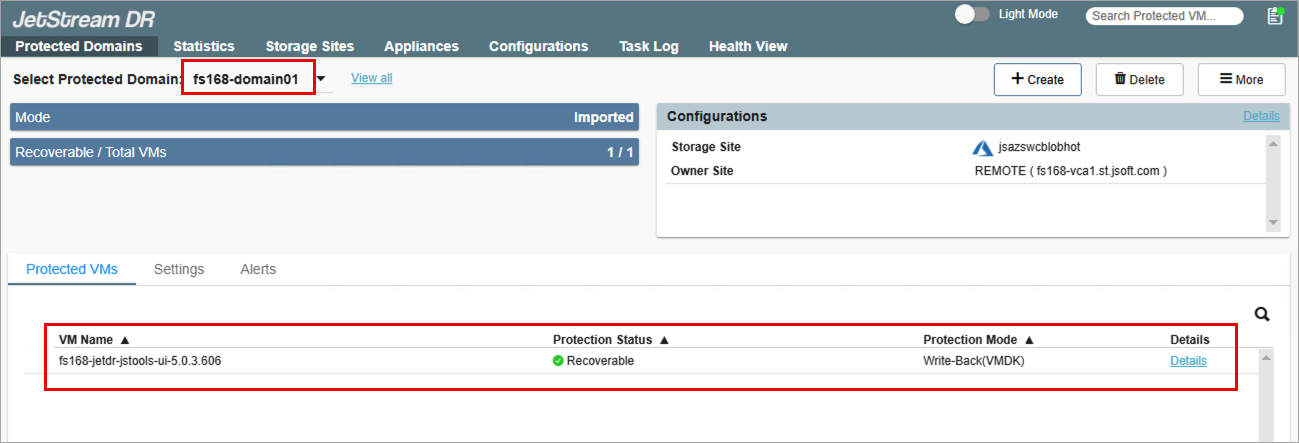
Figure 170: The restore process has begun.
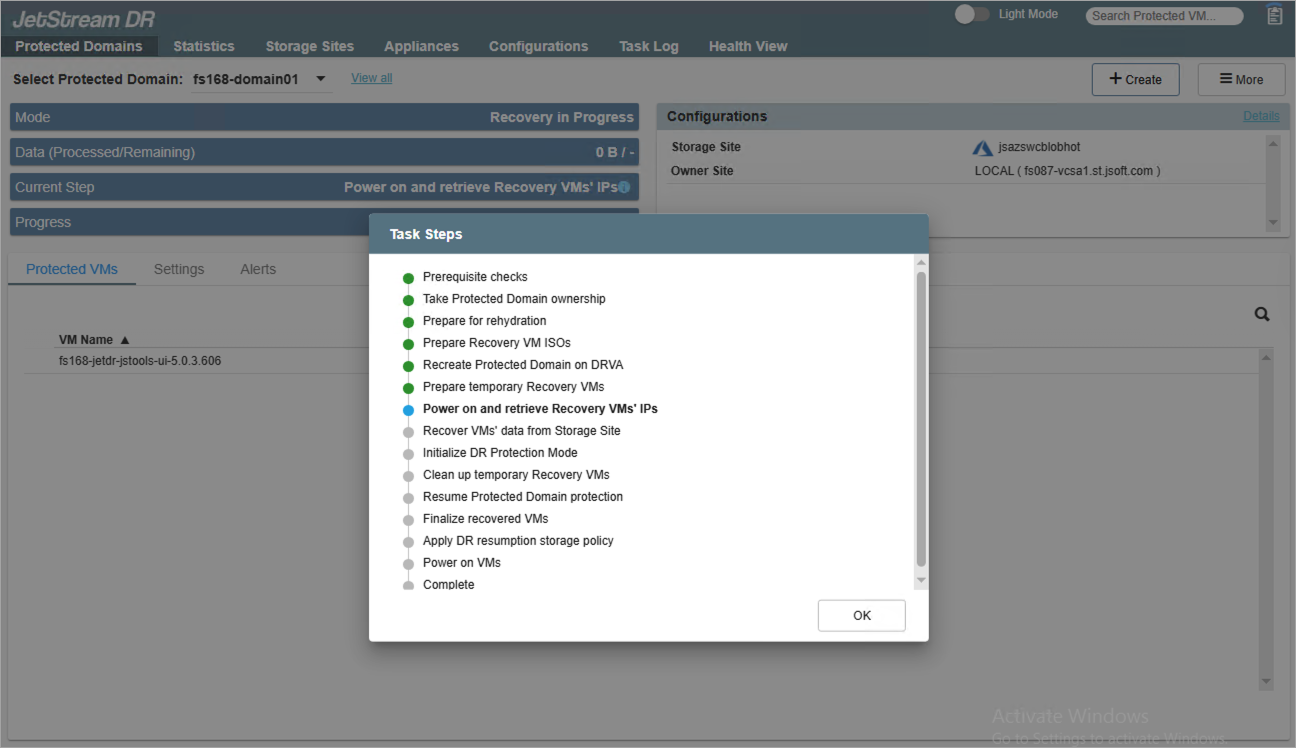
Figure 171: Details of current step.
- When the task is complete the restored VMs from the Domain will be fully operational and their status will be “recoverable” and they will continue to be protected.

Figure 172: The recovery process is complete.
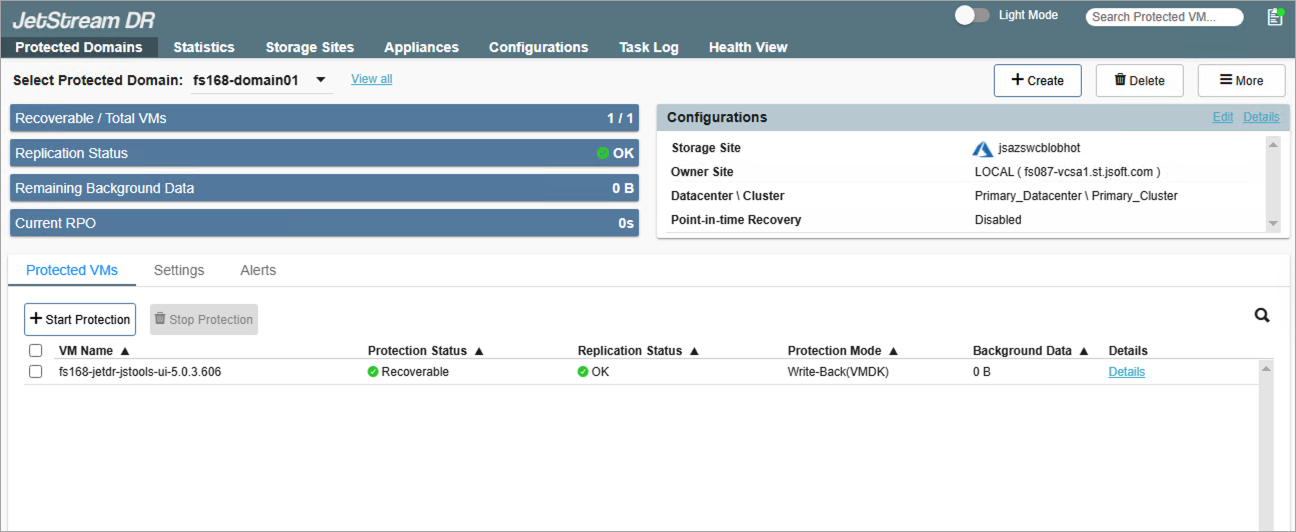
Figure 173: The restored Domain is functional and protected.